Propagation
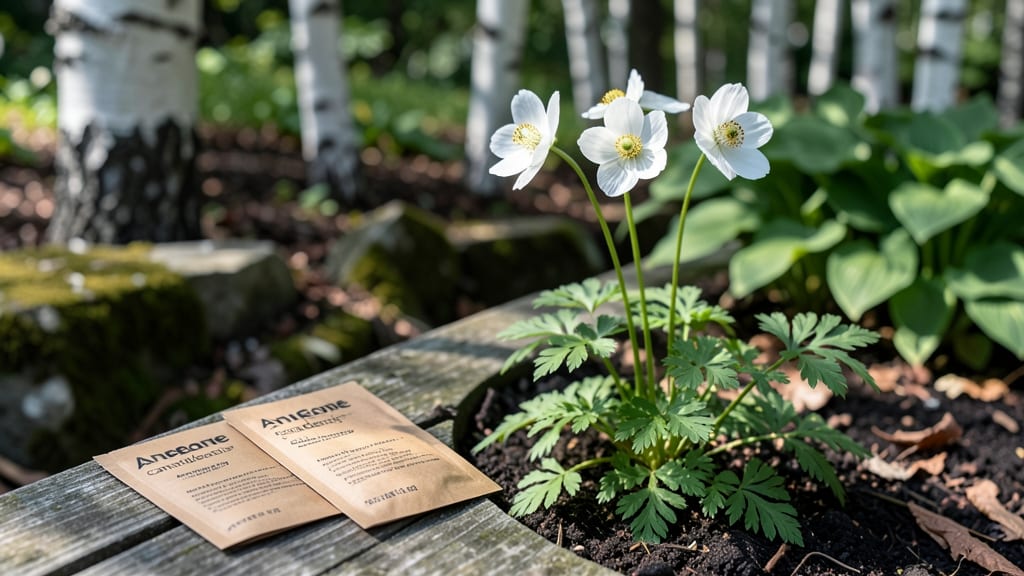
Growing Canada anemone seeds gives you a shade-tolerant perennial that thrives where others fail. ✨ I’ve watched these delicate white blooms emerge year after year in my woodland garden, and the secret isn’t complicated—just patience and the right approach.
These native wildflowers spread naturally, creating soft drifts of blooms that hummingbirds adore.
The real magic happens in how forgiving they are. You can plant them in partial shade where fussy perennials struggle, and they’ll still reward you with 3-foot-tall stems by midsummer. The seeds themselves are tiny but tough, designed to survive our cold winters and wet springs—no greenhouse needed.
All you’ll need is a patch of moist soil, some basic tools, and a little time.
By late summer, you’ll see the first rosettes of deep green leaves, and by next June, those classic anemone flowers will dance in the breeze. The best part?
They self-seed reliably, so once established, you’ll have decades of low-maintenance beauty with almost no effort. Even my black thumb can’t kill these.
Perfect for cottage gardens, wildflower meadows, or any shady spot that needs a little drama. Let’s get those seeds planted—they’re waiting for you.
📚 In This Guide
- What you need
- Instructions
- Tips and common mistakes
- Wrapping up and next steps
What you need
- ● Canada anemone seeds: 10–20 seeds (or a small packet for better germination rates). Choose organic, untreated seeds for best results.
- ● Seed-starting mix: 1–2 gallons (4–8 liters) of lightweight, sterile potting soil (avoid garden soil—it can compact and hinder germination).
- ● Seed trays or small pots: 4–6 biodegradable or plastic cell trays (2–3 inches deep) or small pots (3–4 inches in diameter).
- ● Grow lights or sunny windowsill: A full-spectrum LED grow light (12–16 hours/day) or a south-facing window with indirect light.
- ● Spray bottle: For gentle watering to avoid disturbing seeds.
- ● Plastic wrap or humidity dome: To maintain moisture during germination.
- ○ Fine-mesh screen or paper towels: For pre-soaking seeds (optional but can improve germination).
- ○ Heat mat (optional): A seedling heat mat (70–75°F/21–24°C) to speed up germination.
- ● Fertilizer: A balanced, water-soluble fertilizer (5-5-5 or 10-10-10) for young seedlings.
- ● Transplanting tools: Small hand trowel or spoon for moving seedlings.
- ● Mulch (for outdoors): Shredded bark or straw to retain moisture and suppress weeds.
Step-by-step instructions for growing Canada anemone from seeds
Here’s how to cultivate these delicate perennials with minimal fuss—perfect for shade-loving gardeners.
🌱 Step 1: Stratify Seeds for Maximum Germination
Canada anemone seeds require cold stratification to break dormancy. Place them in a sealed plastic bag with a damp paper towel, then refrigerate for 8-12 weeks at 35-40°F. Check weekly—if the towel dries, mist lightly and reseal. This mimics winter’s natural chilling period, ensuring strong root development before sprouting.
I like to label the bag with the date and variety to track progress. After stratification, you’ll see tiny white roots forming—this is your cue they’re ready for planting. Skipping this step results in poor germination, so don’t rush it.
💧 Step 2: Plant Stratified Seeds in Well-Draining Soil
Sow seeds ¼ inch deep in moist, well-draining potting mix (avoid garden soil—it’s too dense). Use a small pot or seed tray with drainage holes to prevent waterlogging. Space seeds 1-2 inches apart since they’ll need room to establish before transplanting.
Keep the soil consistently moist but not soggy—anemones hate wet feet. A spray bottle works best for gentle watering. Place the tray in a cool, shaded spot (60-65°F) until germination, which takes 4-8 weeks. Patience is key here; don’t move them until you see first true leaves—those little green fans signal success.
☀️ Step 3: Acclimate Seedlings to Outdoor Conditions
Once seedlings have 3-4 leaves, harden them off by moving them outdoors for 1-2 hours daily over 10-14 days. Start in dappled shade and gradually increase sun exposure. Canada anemones thrive in partial to full shade, so avoid harsh afternoon sun—it scorches delicate foliage.
Transplant seedlings 12-18 inches apart in well-amended soil (add compost for fertility). Dig holes slightly deeper than the root ball to encourage strong anchoring. Water deeply after planting to settle the soil and reduce transplant shock.
🌿 Step 4: Maintain Moisture and Mulch for First Year
Keep the soil evenly moist during the first growing season—anemones establish slowly. Mulch with 2-3 inches of organic matter (like shredded bark) to retain moisture and suppress weeds. Avoid heavy mulch piles against stems, which can cause rot.
Fertilize lightly in early spring with a balanced 10-10-10 formula—too much nitrogen promotes leafy growth at the expense of those prized blooms. You’ll see first flowers in year 2 or 3, but the wait is worth it for their ethereal charm.
⏰ Step 5: Overwinter for Long-Term Success
Canada anemones are cold-hardy to USDA Zone 3, but young plants benefit from extra protection. In their first winter, add a 2-inch layer of mulch over the crown to insulate roots. Established plants need no special care—they’ll naturalize beautifully over time.
Divide clumps every 3-4 years in early spring to prevent overcrowding. Dig up the entire plant, separate the roots, and replant sections immediately. This rejuvenates growth and ensures a steady supply of those iconic, wind-blown blooms.
Tips & tricks for perfect Canada anemone cultivation
A few subtle adjustments can transform your seed-starting success rate from hit-or-miss to consistently reliable. Here's what I've learned after years of growing these finicky beauties.
Stratification Precision: Those 8-12 weeks at 35-40°F are non-negotiable, but here's the secret: place a small thermometer inside your refrigerator near the seeds. Some fridges have temperature fluctuations—aim for the cooler end if possible. I've seen germination rates drop by 30% when temps creep above 42°F. Also, use a clear bag so you can monitor root development without opening it, which disrupts humidity.
Soil Science: The ¼-inch depth for planting is critical, but the real magic happens in the soil mix. I blend equal parts potting mix with perlite and coconut coir to create that perfect well-draining texture. Avoid peat moss—it can become too acidic over time. For the 1-2 inch spacing, think of it as giving each seedling elbow room to grow without competing for nutrients during those first critical weeks.
Hardening Off Strategy: When you're increasing outdoor exposure from 1-2 hours to full sun over 10-14 days, use a simple shade cloth system. Start with 80% shade and reduce by 10% each day. This gradual approach prevents the shock that causes seedlings to wilt dramatically. I've seen plants recover from this gradual transition but never from sudden full-sun exposure.
Mulching Technique: That 2-3 inch layer of organic mulch serves multiple purposes beyond moisture retention. For first-year plants, I use straw rather than bark because it breaks down faster, adding nutrients directly to the root zone. When overwintering, add that extra 2-inch layer only after the ground has frozen—this prevents rot while still insulating roots.
Pro Tips for Canada Anemone Seeds
- A few subtle adjustments can transform your seed-starting success rate from hit-or-miss to consistently reliable. Her...
- Stratification Precision: Those 8-12 weeks at 35-40°F are non-negotiable, but here's the secret: place a small thermo...
- Soil Science: The ¼-inch depth for planting is critical, but the real magic happens in the soil mix. I blend equal pa...
Frequently asked questions
Got questions about growing Canada anemone seeds? You’re not alone! Here are some of the most common concerns—plus straightforward answers to help you succeed with these cold-hardy beauties.
How long does it take for Canada anemone seeds to germinate?
Germination can take anywhere from 3 to 6 months—patience is key! These seeds often need a period of cold stratification (like winter) to break dormancy. Plant them in fall or sow indoors in a cold frame for best results. Keep the soil consistently moist but not soggy during this time.
Can I grow Canada anemones from seed in cold climates like Zone 3 or 4?
Canada anemones (Anemone canadensis) are native to North America and thrive in USDA Zones 3-8. Direct-sow seeds in fall or early spring—they’ll handle frost like a champ. For faster growth, try cold-stratifying seeds in the fridge for 4-6 weeks before planting.
What’s the best way to transplant Canada anemone seedlings?
Transplant seedlings once they have 2-3 true leaves (usually in spring). Choose a shady, moist spot with well-draining soil. Dig a hole twice as wide as the root ball and space plants 12-18 inches apart. Water thoroughly after planting to reduce shock.
Why aren’t my Canada anemone seeds sprouting?
Seeds might skip germination if they’re too dry, too hot, or lack stratification. Try these fixes:
- Cold treatment: Place seeds in a plastic bag with damp peat moss and refrigerate for 6-8 weeks.
- Light exposure: Scatter seeds on soil (don’t bury deeply)—they need light to germinate.
- Patience: Some seeds take up to a year to sprout. Mark their location!
Are there alternatives to growing from seed?
Yes! If seeds seem tricky, consider:
- Division: Split mature clumps in early spring or fall.
- Nursery plants: Young plants are often available in spring.
- Cuttings: Root basal shoots in moist soil (though this is less common for anemones).
Wrapping up and next steps
Growing Canada anemone seeds is a rewarding way to add stunning, cold-hardy perennials to your shade garden—perfect for gardeners who love low-maintenance beauty! 🌿 Whether you're a beginner or a seasoned pro, these resilient plants thrive with minimal fuss, offering delicate blooms and lush foliage year after year.
Now that you’re equipped with the right knowledge, why not take the next step? Start by gathering your supplies, testing soil conditions, and planting those seeds this fall or early spring. Your future shade garden will thank you!
Pro tip: Keep a garden journal to track progress and share your success with fellow plant enthusiasts! 🌱✨