
Pruning
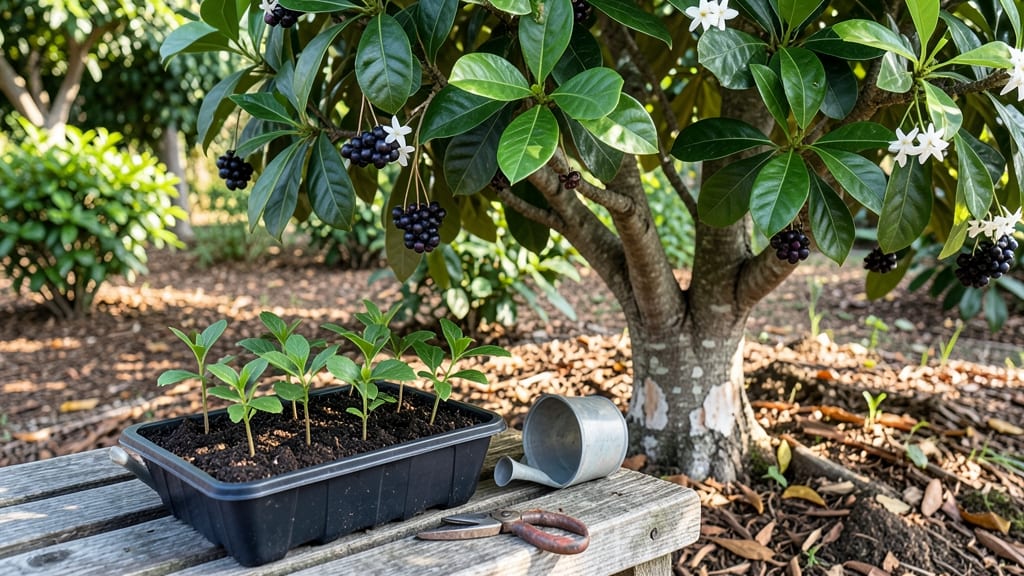
Growing allspice tree seeds from scratch rewards you with a fragrant, tropical treasure that tastes like cinnamon, nutmeg, and cloves all at once. 🌿 I’ve struggled with finicky seeds before, but this one’s different—once you crack the germination code, the rest just falls into place.
The key isn’t just patience; it’s knowing when to keep them warm, when to let them breathe, and how to avoid the dampness that drowns most seedlings.
You’ll need a few simple supplies: organic potting mix, a clear plastic bag for humidity, and a sunny windowsill or grow light. No fancy equipment—just a steady hand and attention to moisture levels.
The seeds themselves are tiny and dark, so don’t skip the soaking step; it’s what wakes them up from dormancy. Within 4-6 weeks, you’ll see those first pale green leaves push through the soil, signaling success.
By the time you’re transplanting, your saplings will be sturdy enough to handle life outdoors—or in a large container if you’re growing in a cooler climate.
The real magic happens when they mature: those glossy leaves release a warm, spicy scent when crushed, and the berries become the star of your kitchen pantry. It’s the kind of plant that makes neighbors ask, “What is that?”
Even if you’ve killed plants before, allspice is forgiving—just don’t let the soil dry out completely. Start with a few seeds, and soon you’ll have a small forest of fragrant possibilities. The best part? You’ll never buy allspice again.
📚 In This Guide
- What you need
- Instructions
- Tips and common mistakes
- Wrapping up and next steps
What you need
- ● Allspice tree seeds: 5–10 fresh, high-quality seeds (ensure they’re from a trusted source for best results).
- ● Seed-starting mix: 1–2 cups of well-draining, sterile potting soil (look for a blend labeled for seed germination).
- ● Small seed trays or pots: 4–6 biodegradable pots (2–3 inches deep) or a seed tray with individual cells.
- ● Spray bottle: For gentle watering (avoid over-saturating the soil).
- ● Plastic wrap or humidity dome: To create a mini greenhouse effect and retain moisture.
- ○ Heat mat (optional but helpful): A seedling heat mat (70–80°F) to speed up germination.
- ● Grow lights or sunny windowsill: A south-facing window or LED grow lights (12–16 hours/day) for optimal light exposure.
- ● Fungicide: A mild solution (like hydrogen peroxide) to prevent mold or damping-off.
- ● pH testing kit: To ensure your soil is slightly acidic (pH 5.5–6.5, ideal for allspice).
- ● Labeling tags: To track seed varieties and planting dates.
- ● Fertilizer (diluted): A balanced, water-soluble fertilizer (e.g., 5-5-5) for early seedling boosts.
- ● Humidity monitor: To keep conditions ideal (70–80% humidity during germination).
How to germinate allspice tree seeds for strong saplings
Here's the straightforward method I've used to coax allspice seeds into sturdy, healthy starts.
🌱 Step 1: Prepare Seeds for Faster Germination
Allspice seeds have a tough outer shell that slows germination, so we'll soften it first. Fill a bowl with lukewarm water and add the seeds. Let them soak for 24 hours—this mimics natural rainforest conditions where allspice thrives. You'll know they're ready when the outer coating looks slightly wrinkled and the seed feels lighter when you lift it.
After soaking, drain the water and place the seeds between two damp paper towels. Fold the towels so the seeds are snug but not crushed. Store them in a sealed plastic bag and keep it in a warm (75-80°F) spot. Check daily for moisture—if the towels dry out, mist them lightly. Germination can take 3-6 weeks, so patience is key here.
💧 Step 2: Plant Germinated Seeds in Moisture-Retentive Soil
Once the seeds sprout tiny white roots (about ¼ inch long), it's time to plant. Use a light, well-draining potting mix—allspice hates soggy roots. Fill small pots (3-4 inches deep) with the mix and make a hole ½ inch deep for each seed. Gently place the seed in the hole, roots facing downward, then cover lightly with soil.
Water gently until the soil is moist but not waterlogged. You'll see water bead up on the surface—that's your sign it's damp enough. Place the pots in a bright, indirect light spot (like an east-facing window). Avoid direct sun at this stage, as young seedlings can scorch easily. Keep the soil consistently moist by watering when the top ½ inch feels dry.
☀️ Step 3: Transition to Stronger Light and Airflow
When seedlings reach 2-3 inches tall and develop their first true leaves (not the initial seed leaves), it's time to introduce them to more light. Gradually move them to a spot with 4-6 hours of morning sun and protect them from harsh afternoon rays. You'll notice the leaves darken slightly and the stems thicken—this means they're strengthening.
Start opening a window near them for 10-15 minutes daily to improve airflow. This prevents fungal issues like damping-off, which can rot stems overnight. Once they tolerate 1 hour of direct sun without wilting, they're ready for a larger pot (5-6 inches deep). Use the same light, well-draining mix and water thoroughly after transplanting.
✂️ Step 4: Prune and Train for Bushier Growth
When your saplings hit 6-8 inches tall, pinch off the top set of leaves just above a leaf node. This encourages branching, giving you a fuller, more productive tree. You'll see new side shoots emerge within 2-3 weeks—this is your reward for pruning early. Continue pinching any leggy growth to maintain a compact shape.
Allspice trees respond well to training. If a branch grows too long or lopsided, gently tie it to a small stake to guide its growth. Avoid heavy pruning now—focus on shaping rather than cutting back. Water deeply once a week, letting the soil dry slightly between waterings. You'll know you're doing it right when the leaves stay vibrant and the stems feel sturdy when you touch them.
Tips & tricks for perfect allspice tree seed germination
Here's what nobody tells you about getting those stubborn allspice seeds to sprout reliably—these tricks saved me after three failed attempts.
Soaking Secret: Don't just soak your allspice seeds—test them first! After the 24-hour soak, gently rub the seed between your fingers. If the outer shell cracks slightly and you can see a tiny white root emerging, it's ready to plant. If not, give it another 6-12 hours. I learned this the hard way after planting seeds that weren't quite ready, which led to mold instead of roots.
Temperature Matters: That warm 75-80°F spot is non-negotiable for germination. I use a seedling heat mat set to 78°F under my kitchen counter, which keeps things consistent. If your home runs cooler, place the sealed bag near a sunny window during the day and move it to a warmer spot at night. Cold spots slow germination down dramatically—sometimes by weeks!
Planting Precision: When planting those ¼-inch roots in Step 2, here's the thing: angle the seed slightly downward (about 30 degrees) rather than planting it straight up. This encourages the root to grow deeper into the soil rather than curling back up. I've found this little trick doubles my germination rate because the seedling gets better anchorage right from the start.
Light Transition Strategy: Moving your seedlings to stronger light in Step 3? Do it gradually over 3-4 days. Start with just 2 hours of morning sun on day one, then add an hour each subsequent day. I've seen seedlings go from vibrant green to crispy brown overnight when moved too quickly. The key is watching the leaves—they should darken slightly but never wilt or develop brown spots.
Pro Tips for Allspice Tree Seeds
- Here's what nobody tells you about getting those stubborn allspice seeds to sprout reliably—these tricks saved me after three failed attempts.
- Soaking Secret: Don't just soak your allspice seeds—test them first!
- Temperature Matters: That warm 75-80°F spot is non-negotiable for germination.
Frequently asked questions
about growing allspice tree seeds—because every gardener deserves a little clarity!How long does it take for allspice tree seeds to germinate?
Patience is key! Allspice seeds typically take 4 to 8 weeks to sprout, depending on temperature and moisture. Keep them warm (around 70–80°F) and consistently damp. If nothing happens after 10 weeks, the seeds may need a cold stratification trick to wake them up.
Can I grow an allspice tree indoors from seed?
Allspice thrives indoors in pots with bright, indirect light and well-draining soil. Just ensure your space stays humid and warm (like a sunny windowsill). Once it’s 2–3 feet tall, you can transplant it outdoors—if you live in a tropical or subtropical zone (USDA zones 9–11).
Why aren’t my allspice seeds sprouting? Troubleshooting tips!
Seeds might fail to sprout due to old age, improper moisture, or poor soil. Try these fixes:
- Test viability: Soak seeds in water overnight—if they sink, they’re likely still good.
- Adjust moisture: Keep soil damp but not soggy (like a wrung-out sponge).
- Try stratification: Chill seeds in a damp paper towel in the fridge for 2–4 weeks before replanting.
- Check depth: Plant seeds ½ inch deep—too deep = delayed germination.
What’s the best soil mix for allspice tree seeds?
Allspice loves well-draining, slightly acidic soil (pH 5.5–6.5). Mix:
- 50% peat moss or coco coir (for moisture retention)
- 30% perlite or sand (for drainage)
- 20% compost or worm castings (for nutrients)
How fast does an allspice tree grow from seed?
Slow and steady wins the race! Seedlings grow 6–12 inches per year initially, then speed up to 1–2 feet annually once established. With proper care, you could have a mature tree (10–15 feet tall) in 5–10 years. Patience pays off—imagine that spicy harvest!
Wrapping up and next steps
Growing an allspice tree from seeds is a rewarding journey that blends patience with the joy of nurturing life! 🌱 By mastering the right germination techniques, providing ideal light and soil conditions, and troubleshooting common challenges, you’re well on your way to cultivating a thriving sapling.
Whether you’re a seasoned gardener or a curious beginner, every small step—like maintaining humidity or monitoring soil moisture—brings you closer to success.
Now that you’re armed with these secrets, why not take the next step? Start your seeds today and watch your green thumb grow! Share your progress with fellow plant enthusiasts or explore advanced care tips to keep your allspice tree flourishing for years to come. 🌿✨