Propagation
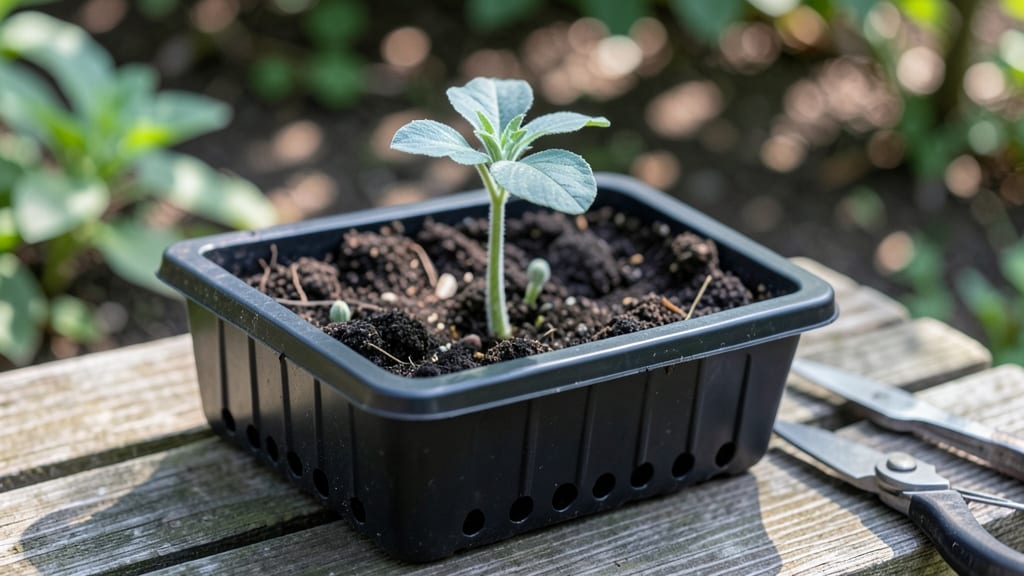
Poppy seeds sprout faster than you’d expect—in just 3-5 days—with the right moisture and warmth trick. 🌱 I’ve grown poppies from seed every spring, and the secret isn’t fancy equipment but a damp paper towel and a sunny windowsill.
These tiny seeds pack a punch: bold, papery blooms that last weeks in the garden.
The setup couldn’t be simpler: soak seeds overnight, sandwich them between damp paper towels, and tuck them in a sealed container. Keep it warm (around 70°F) and check daily for those first green cracks.
Once sprouted, transplant into soil when they’re about 1 inch tall—they’re tough little things that hate being moved later.
By week 3, you’ll have lush seedlings ready for the garden or kitchen. The sprouts themselves add a peppery kick to salads, while the mature plants bring shockingly lush blooms to borders. Just remember: poppy seeds contain trace alkaloids, so avoid consuming them raw in large quantities.
Works for both culinary and ornamental poppies—just adjust spacing. Here’s how to keep them thriving from seed to bloom without the usual germination guesswork.
📚 In This Guide
- What you need
- Instructions
- Tips and common mistakes
- Wrapping up and next steps
What you need
- ● Poppy seeds: 1–2 tablespoons (about 15–30 grams) – Choose organic, non-GMO seeds for best results.
- ● Growing medium: Option 1: Sprouting jar (16–32 oz) with a mesh lid or sprouting lid
- ● Option 2: Wide-mouth mason jar (8–16 oz) + cheesecloth or fine mesh screen
- ● Option 3: Sprouting tray (for larger batches, ~10x15 inches)
- ● Water: Filtered or distilled (avoid chlorinated water)
- ● Fine-mesh strainer (for rinsing sprouts)
- ● Colander or salad spinner (for gentle drying)
- ● Grow light or sunny windowsill (4–6 hours of indirect light daily)
- ● Humidity dome (to maintain moisture in early stages)
- ● Notebook & pen (to track germination progress)
- ○ Food dehydrator (optional, for drying sprouts into seed bombs 🌼)
- ● Clean workspace (sanitize jars/tools with 1 tsp vinegar per cup of water)
- ● Patience! Poppy sprouts germinate in 3–7 days (depending on variety).
- ● Access to lukewarm water (not hot) for soaking.
Step-by-step instructions for growing poppy seed sprouts
Here’s how to get those fast, vibrant sprouts—no waiting weeks for blooms.
🌱 Step 1: Soak and Prepare the Seeds
Poppy seeds germinate fastest when pre-soaked. Place the ¼ cup poppy seeds in a small bowl and cover with warm water (not boiling—just warm to the touch). Let them soak for 4-6 hours until they swell slightly. This softens the outer shell so roots emerge quicker.
Drain the seeds in a fine-mesh strainer, then transfer them to a clean, damp paper towel. Fold the towel to lightly wrap the seeds—this keeps them hydrated without drowning them. Place the towel in a shallow dish and cover with another towel to maintain moisture. You’ll see tiny roots peek through within 12-24 hours.
💧 Step 2: Plant in Moist Growing Medium
Fill the 4-inch pots with the 2 gallons of seed-starting mix, leaving ½ inch of space at the top. Press the soil down lightly so it’s firm but not compacted. Poppy sprouts need good airflow to prevent mold, so avoid heavy, dense mixes.
Gently press the soaked seeds into the soil, spacing them 1 inch apart—they’ll grow quickly, so don’t crowd them. Cover them with a thin layer of soil (¼ inch deep) and mist the surface with water until damp but not soggy. A spray bottle works best to avoid disturbing the seeds.
☀️ Step 3: Provide Warmth and Light
Poppy sprouts need warmth to germinate fast. Place the pots in a spot with 70-75°F soil temperature—use a seedling heat mat if your home runs cooler. Keep the soil consistently moist but never waterlogged; the top layer should dry slightly between waterings.
Once the first sprouts emerge (usually 3-5 days), move them to a bright location with 6-8 hours of indirect light daily. A south-facing window or grow light works best. Watch for leggy growth—if sprouts stretch too tall, they’re reaching for light. Adjust the light source within 6 inches to keep them compact.
✂️ Step 4: Thin and Support Growth
When sprouts reach 2 inches tall (about 1-2 weeks), thin them to 1 plant per pot to give roots room. Snip the weaker sprouts at the base with clean scissors—don’t pull, or you’ll disturb the remaining plants. This step ensures bold, healthy blooms instead of crowded, weak stems.
Poppy sprouts are delicate, so handle them carefully. Once they develop 2-3 true leaves, fertilize lightly with a diluted liquid fertilizer (half-strength) to encourage strong root growth. Keep the soil moist but not soggy—overwatering causes root rot, which kills sprouts quickly.
🌿 Step 5: Transplant or Enjoy Sprouts
If growing for edible sprouts, harvest them when the first true leaves appear—this takes about 7-10 days after germination. Rinse them gently under cool water and pat dry. For flowering poppies, transplant the sprouts to their final location once they’re 4-6 inches tall and have 4-5 leaves.
Poppy sprouts thrive in full sun and well-draining soil. Space them 12 inches apart in the garden to give them room to mature. With these fast tricks, you’ll see bold blooms in just 6-8 weeks—no waiting months for color!
Tips & tricks for perfect poppy seed sprouts
Fast germination is all about timing and conditions—here’s how to get those sprouts popping in record time.
Soak Smart: The 4-6 hour soak is your speed boost—poppy seeds need this time to soften their tough outer shells. Use water that’s warm to the touch (around 100°F) but not boiling. If your seeds aren’t swollen after 6 hours, give them another hour. Pro tip: Add a pinch of sea salt to the soak water (about ¼ teaspoon) to prevent fungal growth while keeping them hydrated.
Temperature Matters: That 70-75°F soil temperature isn’t just a suggestion—it’s the sweet spot for fast germination. If your home runs cooler, pop your pots on a seedling heat mat set to 75°F right after planting. I learned this the hard way after watching sprouts take 3 days instead of 2! For extra warmth, place pots on top of your fridge (not inside) where it’s naturally warmer. The goal is to mimic springtime conditions when poppies naturally sprout in the wild.
Lighting Secrets: Those 6-8 hours of indirect light are crucial after sprouts emerge. If you’re using a grow light, keep it 6 inches away to prevent leggy growth. I’ve seen sprouts stretch to 4 inches tall in just 3 days when they’re reaching for light! For natural light, a south-facing window is ideal, but east or west windows work too if you rotate pots daily. Watch for pale, elongated sprouts—they’re telling you they need more light.
Thinning Technique: When you thin to 1 plant per pot at 2 inches tall, use clean scissors to snip at the base rather than pulling. This prevents disturbing the roots of your remaining plants. I’ve found that thinning early (around 10 days instead of 2 weeks) gives the kept plants more space to develop strong stems. After thinning, give your pots a light watering to help the remaining sprouts recover from any stress.
Pro Tips for Sprouts Poppy Seeds
- Fast germination is all about timing and conditions—here’s how to get those sprouts popping in record time.
- Soak Smart: The 4-6 hour soak is your speed boost—poppy seeds need this time to soften their tough outer shells. Use ...
- Temperature Matters: That 70-75°F soil temperature isn’t just a suggestion—it’s the sweet spot for fast germination. ...
Frequently asked questions
Got questions about growing sprouts poppy seeds? You’re not alone! Here are answers to the most common queries—from germination tips to troubleshooting—so you can grow bold, healthy blooms with confidence.
How long does it take for sprouts poppy seeds to germinate?
Poppy seeds are fast germinators! With the right conditions (warmth, moisture, and indirect light), you’ll see tiny sprouts peeking through the soil in 3–7 days. Keep the soil consistently damp but not soggy—patience pays off for those iconic Papaver blooms.
Can I grow sprouts poppy seeds indoors?
Poppies thrive indoors if you mimic their natural habitat. Use a sunny windowsill (south-facing is ideal) or a grow light for 6–8 hours daily. A temperature of 60–70°F (15–21°C) and well-draining soil will keep them happy. Just avoid drafts—they hate cold feet!
Why aren’t my poppy seeds germinating?
No sprouts? Don’t panic! Check these common culprits:
- Cold soil: Poppies need warmth—try a heat mat if your home runs chilly.
- Too much water: Overwatering drowns seeds. Let the top inch dry out between waterings.
- Old seeds: Store-bought seeds lose viability after 1–2 years. Test a few to confirm freshness.
- Light issues: Some poppies need light to germinate. If yours are slow, try a shallow planting (¼ inch deep max).
Do I need to thin poppy seedlings?
Yes! Overcrowded seedlings compete for nutrients and light, leading to leggy, weak plants. Once the first true leaves appear, thin seedlings to 12–18 inches apart (check your variety’s spacing needs). Snip with scissors at soil level—no pulling to avoid disturbing roots.
What can I plant with poppy seeds for better growth?
Poppies love companions! Pair them with:
- Basil or thyme: Repels pests naturally.
- Marigolds: Deters aphids and adds color.
- Lettuce or radishes: Shallow-rooted plants won’t compete for space.
Are poppy seeds safe to grow?
Yes! Sprouts poppy seeds (Papaver somniferum or Papaver rhoeas) are non-narcotic varieties bred for ornamental use. Always source seeds from reputable suppliers to avoid confusion with illegal strains. When in doubt, check local regulations—safety first!
Wrapping up and next steps
Growing sprouts poppy seeds is a rewarding journey that brings vibrant blooms to your garden with minimal effort! Whether you’re a seasoned gardener or a curious beginner, these fast-germinating seeds offer a quick and beautiful way to add color to your space.
With the right prep, patience, and a little love, you’ll soon be enjoying their striking petals—so don’t wait, get sprouting! 🌱✨
Ready to take the next step? Start with a small batch of seeds, experiment with your setup, and track your progress. Before you know it, you’ll be sharing your gorgeous blooms with fellow plant enthusiasts—or even expanding your garden with confidence! 🌸