Tools
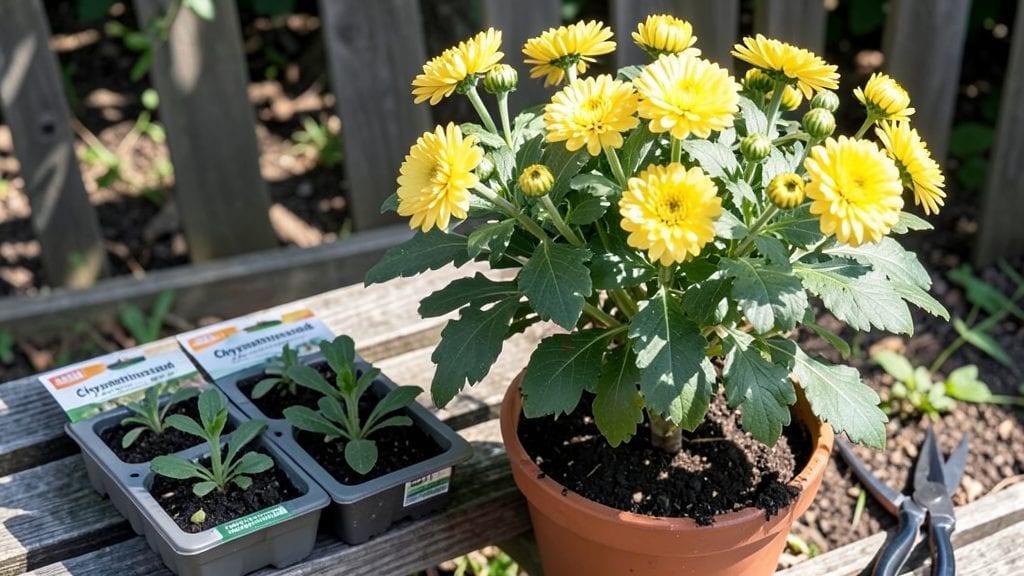
Growing chrysanthemum seeds from scratch lets you create a garden that blooms reliably from summer through frost—no fancy cuttings or expensive plants needed. 🌿 The key isn’t complicated: it’s all about timing, soil warmth, and those four strategic trims that keep flowers coming.
I’ve grown these from seed for years, and my garden stays in bloom when neighbors’ plants fade.
You’ll need a sunny spot with well-draining soil, a flat tray or small pots, and patience for the first few months. The real secret? Starting seeds indoors in early spring, then hardening them off before transplanting after the last frost.
Most beginners overwater or crowd seedlings—both kill progress fast. With the right setup, you’ll see those first green shoots in just 10-14 days.
What you end up with is a bushy plant covered in vibrant blooms that last for weeks, not days. The flowers come in every color imaginable, and the foliage stays lush even when others are wilting.
Once established, these plants thrive with minimal care—just 4 simple trims to encourage new growth and keep the blooms coming.
Works perfectly for garden beds, containers, or even window boxes. The same principles apply whether you’re in a warm climate or a cooler zone—just adjust your planting timeline. Let’s get those seeds started right!
📚 In This Guide
- What you need
- Instructions
- Tips and common mistakes
- Wrapping up and next steps
What you need
- ● Chrysanthemum seeds: 1–2 packets (choose varieties like ‘Bonanza,’ ‘Daisy,’ or ‘Cushion’ for year-round blooms).
- ● Seed-starting mix: 5–10 lbs of sterile, well-draining potting soil (avoid garden soil—it’s too dense!).
- ● Seed trays or small pots: 2–4 (3–4 inches deep) with drainage holes.
- ● Grow lights or sunny windowsill: 6–8 hours of indirect light daily (or a south-facing window).
- ● Watering can or spray bottle: With a fine mist nozzle for gentle hydration.
- ● Fertilizer: Balanced liquid fertilizer (10-10-10 ratio) or slow-release granules.
- ● Trowel: Small hand trowel for transplanting seedlings.
- ● Pruning shears: Sharp, clean pair for trimming (sterilize with rubbing alcohol!).
- ● Gloves: Gardening gloves to protect your hands from soil and thorns.
- ○ Thermometer (optional): To monitor soil temps (ideal: 60–70°F for germination).
- ○ Mulch (optional): Straw or shredded leaves to retain moisture in outdoor beds.
- ● Patience: Seeds take 7–14 days to sprout—keep them warm and moist!
- ● Space: Chrysanthemums thrive in full sun (6+ hours daily) or partial shade.
- ● Knowledge of pruning: Master 3–4 cuts per season to encourage bushy growth and non-stop blooms!
How to grow garden chrysanthemums from seed
Here's the straightforward approach I use to get vibrant chrysanthemums blooming all year.
🌱 Step 1: Start Seeds Indoors in Early Spring
Fill 2-inch deep seed trays with moistened seed-starting mix. Sprinkle seeds evenly—chrysanthemums are tiny, so I use a toothpick to space them ½ inch apart. Press them just below the soil surface since they need light to germinate properly. Cover the tray with plastic wrap to retain warmth and moisture.
Place the tray in a warm spot with 70-75°F soil temperature. Germination takes 10-14 days, so be patient. Keep the soil consistently damp but never soggy—you'll know it's right when the surface stays slightly moist to the touch. Once sprouts appear, remove the plastic wrap immediately to prevent fungal growth.
☀️ Step 2: Provide Bright Light for Strong Seedlings
Move seedlings to a sunny window or under grow lights as soon as they emerge. Chrysanthemums need 12-14 hours of light daily to prevent leggy growth. If you notice stems stretching toward the light with large gaps between leaves, your plants need more intensity—adjust the lights to 2-3 inches above the seedlings.
Rotate the tray a quarter turn every few days so plants grow straight. You'll see strong, compact seedlings with deep green leaves in about 4-6 weeks. At this stage, fertilize lightly with a diluted balanced fertilizer to encourage sturdy growth without burning tender foliage.
🪴 Step 3: Transplant to Individual Pots
When seedlings reach 3-4 inches tall with 4-5 true leaves, transplant them into 4-inch pots filled with fresh potting mix. Handle the stems gently to avoid damaging roots—chrysanthemums are sensitive to rough treatment. Water thoroughly after transplanting to help settle the soil around the roots.
Place the pots in a location with full sun (6+ hours daily) and maintain consistent moisture. You'll know they're thriving when new growth appears within 1-2 weeks. Pinch back the tips of each stem when they reach 6 inches tall to encourage bushier growth—this is how you get those lush, full chrysanthemums.
✂️ Step 4: Harden Off and Plant Outdoors
About 2 weeks before your last frost date, begin hardening off the plants by placing them outside in a sheltered spot for 1-2 hours the first day. Gradually increase their outdoor time over 7-10 days, protecting them from direct sun and wind. Watch for any signs of stress like wilting or yellowing leaves—this means they need more time to adjust.
Once hardened off, transplant your chrysanthemums into the garden where they'll receive full sun to partial shade. Space them 12-18 inches apart in well-draining soil. Water deeply after planting to help roots establish. You'll see new growth within 2-3 weeks, signaling they've settled in and are ready for their first trim to encourage blooming.
Tips & tricks for perfect garden chrysanthemum growth
These simple strategies will help you avoid common pitfalls and get those vibrant blooms all year long.
The Light Factor: In Step 2, when you're providing those crucial 12-14 hours of light, I've found that placing grow lights just 2-3 inches above seedlings creates the perfect balance. Too high and they'll stretch (leggy growth), too low and they'll burn. I use a simple kitchen timer to remind myself to rotate the tray every few days—this prevents uneven growth toward the light source.
Germination Secret: That 10-14 day germination window can feel like forever, but don't be tempted to peek under the plastic wrap! The sudden temperature change can shock those delicate sprouts. Instead, I place a small piece of tape on the outside of the tray to mark the day I planted—this helps me track progress without disturbing the seeds. The soil should feel like a wrung-out sponge when checking moisture.
Transplanting Wisdom: When you're ready for Step 3, handle those 3-4 inch seedlings by their leaves rather than the stems to avoid damage. I fill my 4-inch pots about ¾ full with fresh potting mix, then gently press the soil around the roots after transplanting. This creates better root-to-soil contact for faster establishment. Water thoroughly until you see moisture running from the drainage holes.
Harden Off Gradually: The 1-2 hour outdoor introduction in Step 4 might seem short, but it's crucial for acclimation. I start with a sheltered spot like under a patio cover, then gradually move to more direct sunlight. Watch for wilting—this is your plant's way of saying "I need more time!" If you notice yellowing leaves, it's a sign of stress from too much sun too soon. Take it slow, and your plants will thank you with robust growth.
Pro Tips for Garden Chrysanthemum Seeds
- These simple strategies will help you avoid common pitfalls and get those vibrant blooms all year long.
- The Light Factor: In Step 2, when you're providing those crucial 12-14 hours of light, I've found that placing grow lights just 2-3 inches above seedlings creates the perfect balance.
- Germination Secret: That 10-14 day germination window can feel like forever, but don't be tempted to peek under the plastic wrap!
Frequently asked questions
Got questions about growing garden chrysanthemum seeds? You’re not alone! Here are answers to the most common queries to help you cultivate stunning blooms with ease.
When is the best time to plant chrysanthemum seeds?
For most U.S. climates, sow seeds indoors 8–10 weeks before your last frost date (typically February–March). Transplant seedlings outdoors after the soil warms to 60°F (15°C) and nighttime temps stay above 50°F (10°C). In warmer zones (Zones 8–10), direct-sow seeds in early spring or late summer for fall blooms.
How long does it take for chrysanthemum seeds to germinate?
Germination usually takes 7–21 days at 65–75°F (18–24°C), depending on variety and moisture. Keep soil consistently damp (not soggy) and cover trays with plastic wrap until sprouts appear. Pro tip: Use a heat mat for faster results if your home runs cool!
Can I grow chrysanthemums from store-bought flowers?
Yes! Save seeds from open-pollinated (not hybrid) flowers by letting them dry on the plant, then storing them in a cool, dark place. However, hybrid varieties (like many commercial chrysanthemums) may not grow true to form. For reliable blooms, stick to named garden seed varieties.
What pests or diseases should I watch for?
Common issues include:
- Aphids/spider mites: Spray with water or use neem oil.
- Powdery mildew: Improve airflow and avoid overhead watering.
- Root rot: Ensure well-draining soil and don’t overwater.
Inspect plants regularly—early action prevents problems!
How do I encourage bigger, fuller blooms?
Prune young plants to 4–6 inches tall to promote bushiness. Pinch back tips again when stems reach 12 inches for denser foliage. For larger flowers, reduce flowering by removing some buds early—this forces energy into fewer, showier blooms. Feed with low-nitrogen fertilizer (like 5-10-10) when buds form.
Will chrysanthemums survive winter?
Hardy varieties (like ‘Ruby Mound’ or ‘Dwarf Bonanza’) tolerate Zone 5–9. In colder areas, mulch heavily or cut back to 2–3 inches above ground after frost. In warmer zones, they may bloom year-round—just deadhead spent flowers to prolong blooming.
Wrapping up and next steps
Growing garden chrysanthemum seeds is a rewarding way to enjoy vibrant blooms year-round with just a few simple trims! 🌸 Whether you’re a seasoned gardener or just starting, these hardy plants thrive with minimal effort—just provide the right soil, sunlight, and a little patience.
Now that you know the basics, why not grab those seeds and start your own flourishing garden today? Next, pick a sunny spot, plant your seeds, and watch your garden transform into a colorful oasis!