Vegetables
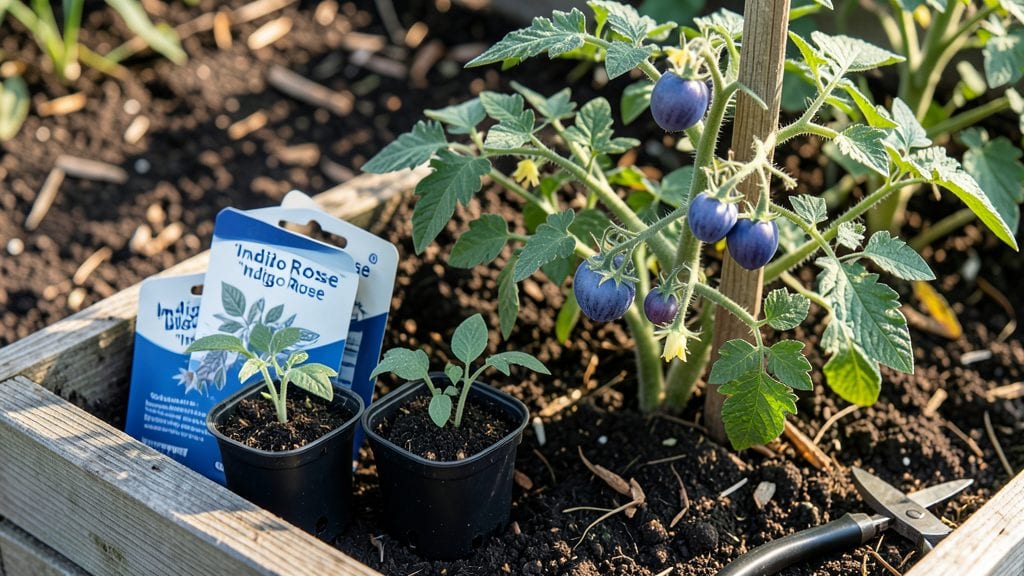
Starting blue tomato seeds isn’t just about growing a pretty plant—it’s about unlocking those rare, indigo-hued fruits that taste like sweetness with a tangy twist. 🌱 I’ve learned the hard way that these heirlooms demand patience and precision, but when they pay off, the harvest is worth every extra week of waiting.
The secret to bushy vines and early tomatoes lies in the soil, light, and timing from day one.
Most gardeners skip the soil prep step, but blue tomatoes thrive when their roots sink into a mix that’s 60% compost and 40% potting soil—no sand or peat needed. Keep seedlings in a warm spot (around 70°F) until they sprout, then move them to bright light for 14+ hours daily.
Overwatering is the fastest way to kill them, so let the top inch dry between waterings once they’ve got their first true leaves.
By the time you transplant them outdoors after the last frost, you’ll have sturdy 6-inch seedlings ready to take over a sunny spot. Prune suckers early to keep energy flowing to fruit, and feed them every 3 weeks with a balanced fertilizer—these plants gobble nutrients.
The payoff? Ripe blue tomatoes that burst with flavor, often appearing in just 70-80 days after transplanting.
Here’s the thing about blue tomatoes: they ripen unevenly, so watch for that deep purple-blue color and slight softness. If birds or squirrels beat you to them, try harvesting green and ripening indoors with a banana nearby.
With these tips, you’ll go from seed to harvest faster than you think—no more waiting years for that first taste.
📚 In This Guide
- What you need
- Instructions
- Tips and common mistakes
- Wrapping up and next steps
What you need
- ● Blue tomato seeds – 5–10 seeds (or more, if experimenting with varieties like Indigo Rose or Blue Beauty).
- ● Seed-starting mix – 2–3 quarts of sterile, well-draining potting soil (avoid garden soil—it’s too dense!).
- ● Seed trays or small pots – 4–6 biodegradable or plastic cell trays (2–3 inches deep) or 4–6 small pots (3–4 inches in diameter).
- ● Grow lights or sunny windowsill – A full-spectrum LED grow light (12–16 hours/day) or a south-facing window with 6+ hours of sunlight.
- ● Spray bottle – For gentle watering (avoid soaking the soil).
- ● Plastic wrap or humidity dome – To create a mini greenhouse effect while seeds germinate.
- ● Heat mat – Speeds up germination (70–80°F is ideal for blue tomato seeds).
- ● Fertilizer – A balanced liquid fertilizer (5-5-5 or 10-10-10) for seedlings once they sprout.
- ● pH test kit – Ensures soil pH is between 6.0–6.8 (blue tomatoes thrive in slightly acidic soil).
- ● Transplanting tweezers – For delicate seedling transfers.
- ● Garden journal – To track germination dates, sunlight exposure, and growth milestones!
Step-by-step instructions for germinating blue tomato seeds
Here’s how to coax those vibrant blue tomato seeds into sturdy, bushy vines ready for your garden.
🌱 Step 1: Soak Seeds Overnight for Faster Sprouting
Place the blue tomato seeds in a small bowl and cover them with lukewarm water for 12 hours. This softens the seed coat and speeds up germination—you’ll see tiny cracks in the seed shells after soaking. Drain the water completely before planting; soggy seeds rot instead of sprouting.
I like to use a mesh strainer or fine sieve to hold the seeds while soaking. This keeps them contained and makes it easy to transfer them to your planting mix later. Don’t skip this step—it cuts germination time in half and gives you stronger seedlings.
🪴 Step 2: Fill Seed Trays with Moistened Starting Mix
Fill your seed trays with sterile seed-starting mix (never garden soil—it’s too dense and can harbor diseases). Press the mix down lightly so the surface is firm but not compacted. Moisten it until it feels like a damp sponge—squeeze a handful, and it should hold together without dripping.
I tap the tray gently on the table to settle the mix evenly. This prevents air pockets that can dry out seeds or trap too much moisture. Fill the trays to within ½ inch of the rim—this gives you room to plant without spilling soil over the seeds.
🌿 Step 3: Plant Seeds at the Right Depth
Use a toothpick or your finger to make small holes in the soil, about ¼ inch deep. Drop 1-2 seeds per cell—planting too many leads to weak, crowded seedlings. Cover them lightly with a sprinkle of mix, then mist the surface with water until it’s evenly damp.
Here’s the thing—don’t bury them too deep. Blue tomato seeds need light to trigger germination, and planting them too far down delays sprouting. Gently press the soil around the seeds to secure them, but avoid compacting it further.
☀️ Step 4: Provide Warmth and Humidity for Germination
Cover the trays with a clear plastic dome or plastic wrap to trap warmth and moisture. Blue tomatoes germinate best at 75-85°F, so place the trays on a seedling heat mat if your home runs cooler. You’ll see sprouts in 7-14 days, depending on temperature and humidity.
Check the trays daily but resist the urge to water. The dome keeps the environment moist enough that the soil stays damp without extra watering. Once 50% of seeds sprout, remove the dome immediately—lingering humidity invites damping-off, a fungal disease that collapses seedlings overnight.
⏰ Step 5: Move to Bright Light and Thin Seedlings
As soon as the first true leaves appear (not the initial seed leaves), move the trays under grow lights or to a south-facing window. Blue tomatoes need 14-16 hours of light daily to stay compact and strong. If seedlings stretch toward the light, they’re leggy and need more intensity or closer placement.
When the seedlings have 2-3 true leaves, thin them to the strongest one per cell. Snip the weaker stems at the soil line with scissors—this avoids disturbing the roots of the remaining plant. You’ll have 4 healthy seedlings ready for transplanting in 4-6 weeks.
Tips & tricks for germinating blue tomato seeds
Here's what I've learned after years of nurturing these rare blue beauties—these tricks will help you skip the common pitfalls and get those seedlings off to the strongest start.
The Soaking Secret: That 12-hour soak isn't just about speed—it's about breaking dormancy. After soaking, place the seeds between damp paper towels in a sealed bag for an extra hour. You'll see tiny white roots emerge in some seeds, which means they're ready to pop! This gives you a head start on knowing which seeds are viable before planting.
Mix Matters: Never use garden soil—it's too heavy and compacted. For blue tomatoes, I swear by a mix that's 70% peat moss, 20% perlite, and 10% vermiculite. This creates perfect drainage while holding enough moisture. If you don't have these ingredients, a quality seed-starting mix will work, but avoid anything with fertilizer—it burns tender seedlings.
Lighting Strategy: Those 14-16 hours of light are non-negotiable for blue tomatoes. If you don't have grow lights, place your trays on a windowsill that gets direct sun for at least 6 hours daily. Rotate the trays every 2-3 days so all seedlings get equal light exposure. Leggy seedlings mean they're starving for light—don't let them get stretched out!
Thinning Technique: When it's time to thin to one seedling per cell, use clean scissors to snip at soil level. Never pull seedlings—their fragile roots break easily. I like to thin in the morning so any damaged roots have time to recover before evening. The strongest seedling will be the one with the most vibrant color and sturdiest stem.
Pro Tips for Blue Tomato Seeds
- Here's what I've learned after years of nurturing these rare blue beauties—these tricks will help you skip the common pitfalls and get those seedlings off to the strongest start.
- The Soaking Secret: That 12-hour soak isn't just about speed—it's about breaking dormancy.
- Mix Matters: Never use garden soil—it's too heavy and compacted.
Frequently asked questions
Got questions about growing blue tomato seeds? You’re not alone—these unique heirlooms have a few quirks! Here are answers to the most common queries to help you grow a thriving crop.
How long do blue tomato seeds take to germinate?
Blue tomato seeds typically sprout within 7–14 days after planting, depending on soil warmth (ideal: 70–85°F). Keep them moist but not soggy, and use a seedling heat mat if your climate is cool. Patience pays off—these seeds are slow starters!
Do blue tomatoes need special soil or fertilizer?
Not exactly! Use well-draining, nutrient-rich soil (pH 6.0–6.8) and a balanced 10-10-10 fertilizer at planting. Once vines appear, switch to a low-nitrogen, high-phosphorus feed (like 5-10-10) to boost flowering and fruiting. Avoid over-fertilizing—it can dilute flavor!
When’s the best time to plant blue tomato seeds indoors vs. outdoors?
Start seeds 6–8 weeks before your last frost date indoors under grow lights. Transplant seedlings outdoors after soil reaches 55°F+ and night temps stay above 50°F. Blue tomatoes hate cold—waiting too long risks stunted growth. Pro tip: Use black plastic mulch to warm the soil faster!
Why aren’t my blue tomato plants flowering or fruiting?
Common culprits: too much nitrogen (focus on blooms, not leaves), inconsistent watering (drought stress halts flowers), or temperature swings (below 55°F or above 90°F stops pollination). Hand-pollinate with a paintbrush if bees are scarce, and prune suckers to redirect energy to fruit production.
Can I save seeds from blue tomatoes for next year?
Yes! Let a few tomatoes fully ripen on the vine (they’ll turn deep blue-purple), scoop out the gel and seeds, then ferment them in water for 2–3 days to break down pulp. Rinse, dry on paper towels, and store in a cool, dark place. Note: Seed color may vary slightly—blue tomatoes are indeterminate, so save seeds from your healthiest plants!
Wrapping up and next steps
Growing blue tomato seeds is a rewarding adventure that leads to vibrant vines and delicious harvests! With the right soil, patience, and a dash of sunlight, you’ll unlock the secrets to early yields and thriving plants.
Whether you’re a beginner or a seasoned gardener, these tips will set you up for success—so grab those seeds and get ready to grow something extraordinary!
🌱 Next steps:
- Start small with a few seeds to test your setup.
- Keep a gardening journal to track progress and refine your technique.
- Share your harvest with friends or experiment with recipes!