
Pruning
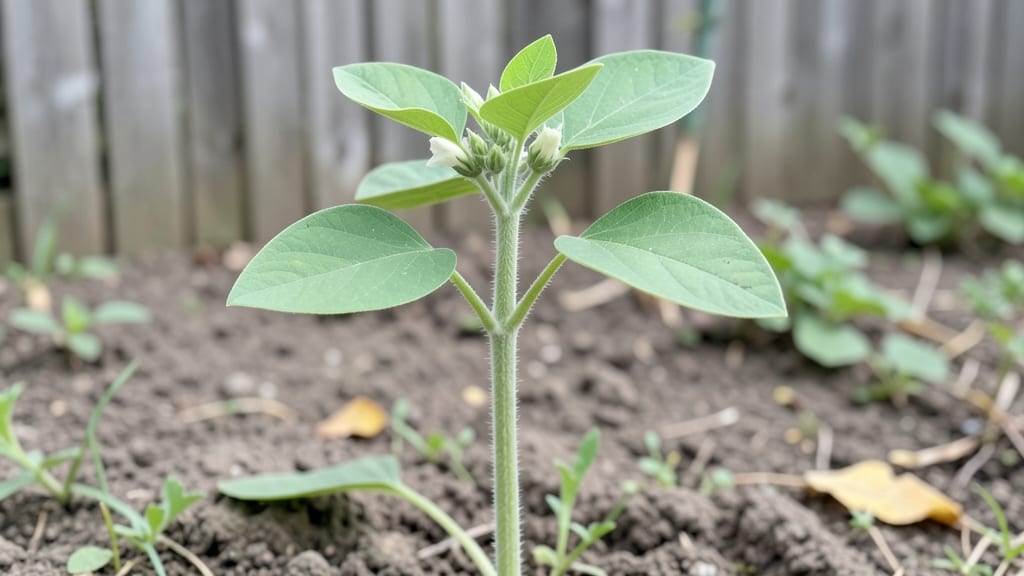
Pruning bush bean seedlings isn’t about trimming back—it’s about guiding their energy into stronger stems and more pods. I learned this the hard way after snipping too aggressively and watching my plants struggle to recover.
The right cuts at the right time can double your harvest, but timing and technique matter more than you’d think.
Start with healthy seedlings that have two to four true leaves—that’s when they’re ready for the first prune. Use clean scissors or pruners to snip just above a leaf node, never below it.
This encourages new growth where you want it, not at the base where it weakens the plant. The goal is to shape them early so they don’t get leggy or crowded as they mature.
What you’ll end up with is bushier plants that produce pods all season long, not just at the top. The secret is consistency: check your seedlings every few days after pruning, and remove any yellowing or damaged leaves immediately.
This keeps air flowing and prevents disease from setting in before your plants even hit full size.
This method works for all bush bean varieties, whether you’re growing in raised beds, containers, or straight in the ground. The key is starting early—once your seedlings hit that two-leaf stage, you’re already behind if you wait.
Let’s get those scissors ready and turn those skinny stems into pod-producing powerhouses.
📚 In This Guide
- What you need
- Instructions
- Tips and common mistakes
- Wrapping up and next steps
What you need
- ● Bush bean seeds: 50–100 seeds (choose a variety like 'Blue Lake,' 'Contender,' or 'Provider' for best results).
- ● Seed-starting trays or biodegradable pots: 2–4 inch deep cells (10–20 pots, depending on quantity).
- ● High-quality seed-starting mix: Lightweight, sterile potting mix (avoid garden soil).
- ● Watering can or spray bottle: With a fine mist nozzle for gentle hydration.
- ● Grow lights or sunny windowsill: 6–8 hours of light daily (LED grow lights work best).
- ● Fertilizer: Balanced, water-soluble fertilizer (5-5-5 or 10-10-10 ratio, diluted to half-strength).
- ● Pruning shears: Sharp, small bypass pruners (sterilized with rubbing alcohol).
- ● Gloves: Lightweight gardening gloves for protection.
- ● pH test kit: To check soil pH (ideal range: 6.0–7.0).
- ○ Spray bottle with neem oil (optional): For pest prevention (e.g., aphids).
- ● Heat mat (for faster germination in cool climates).
- ● Humidity dome or plastic wrap (to retain moisture during sprouting).
- ● Labeled plant markers (to track varieties).
- ● Organic mulch (straw or grass clippings for transplanting).
Instructions for pruning bush bean seedlings
Pruning your bush bean seedlings might seem counterintuitive, but it’s the key to stronger plants and bigger harvests.
Identify the Right Time to Prune
Wait until your bush bean seedlings have developed at least 3-4 sets of true leaves—those are the larger leaves that appear after the initial seed leaves. This usually happens 3-4 weeks after planting, depending on your climate. Pruning too early stresses young plants, while waiting too long reduces your yield potential.
Check the stem just above the first set of true leaves—this is where you’ll make your first cut. The stem should feel firm, not rubbery or weak. If it’s still thin and pale, give the plant a few more days to mature. Healthy seedlings have deep green leaves and thick stems about ¼-inch wide at the base.
Pinch Off the Top Growth
Using your fingers or clean pruning shears, gently pinch off the top 2-3 inches of the main stem just above a set of leaves. This encourages the plant to branch out, which leads to more pods. Avoid tearing the stem—make a clean cut at a 45-degree angle to prevent water from pooling and causing rot.
Here’s the thing—you’re not removing leaves, just the growing tip. The plant will redirect its energy to the side shoots, which will eventually produce more flowers and beans. If you’re unsure, look for the small buds forming at the leaf joints; these are your future harvest points.
Remove Damaged or Yellowing Leaves
Inspect your seedlings for yellow, brown, or wilted leaves—these are signs of stress, disease, or pests. Use sterilized pruning shears to snip them off at the base of the stem. Never pull leaves by hand, as this can damage the plant. Focus on leaves that are more than 50% discolored or have visible holes.
If you spot black spots or mold, isolate the plant immediately and dispose of the affected leaves in the trash—not the compost. Healthy leaves should be shiny, deep green, and free of spots. Pruning diseased leaves early prevents the problem from spreading to your entire bush bean patch.
Encourage Airflow and Light Penetration
After pruning, gently spread out the remaining branches to 3-4 inches apart from each other. This improves airflow, which reduces humidity around the plant and cuts down on fungal diseases like rust. If your seedlings are crowded, thin them out now—keep only the healthiest, strongest stems per plant.
Position your seedlings in a spot with full sun (6-8 hours daily). If they’re in containers, rotate them a quarter turn every few days to ensure even growth. You’ll notice the stems thicken and leaves darken over the next 7-10 days—that’s your sign the pruning is working.
Monitor and Repeat as Needed
Check your bush beans weekly for new growth. If side shoots reach 6-8 inches tall, pinch them back again to encourage even more branching. Focus on secondary stems—these are the ones that will produce the most pods. Avoid over-pruning; never remove more than one-third of the foliage at a time.
Real talk: If you see long, weak stems with small leaves, your plants need more light. Move them closer to a sunny window or under grow lights. Healthy pruned seedlings should look bushy, compact, and vibrant—not leggy or sparse. With consistent care, you’ll see a 20-30% increase in yield compared to unpruned plants.
Tips & tricks for pruning bush bean seedlings
A few key strategies will help you maximize your harvest while keeping your plants healthy and vigorous. These insights come from years of hands-on experience and learning from common mistakes.
Timing is Everything: The 3-4 week mark isn't just a guideline—it's when your seedlings have developed the energy reserves to handle pruning. I've seen beginners rush this step and end up with stunted growth. Wait until you see those thick stems about ¼-inch wide at the base, and you'll know the plant can handle the stress of pruning. This timing also coincides with when the plant starts developing those crucial side shoots that will produce your harvest.
The Technique That Changed Everything: When you pinch off that top 2-3 inches in Step 2, make sure you're cutting at a 45-degree angle just above a set of leaves. This might seem like a small detail, but it prevents water from pooling on the cut surface, which could lead to rot. I learned this the hard way after losing several plants to fungal infections—always make clean cuts! Also, focus on removing just the growing tip, not the leaves themselves. The plant needs those leaves to continue photosynthesis and fuel new growth.
Disease Prevention: Sterilizing your pruning shears between cuts is more important than you might think. I use a 10% bleach solution between plants to kill any potential pathogens. When you spot those black spots or mold in Step 3, don't hesitate to remove the affected leaves immediately. I've seen entire patches of bush beans ruined by rust because someone waited too long to act. Remember, you're not just pruning for yield—you're maintaining plant health, which directly impacts how many beans you'll harvest.
Monitoring Growth: The weekly check-ins mentioned in Step 5 are crucial for catching problems early. I keep a small notebook by my garden where I record when I prune each plant and how it responds. You'll start noticing patterns—like which plants need more light or which varieties respond best to pruning. That 7-10 day window after pruning is when you'll see the most dramatic changes in stem thickness and leaf color. If you don't see these signs of recovery, it might indicate underlying issues like poor soil quality or pest problems.
Pro Tips for Bush Bean Seedling
- A few key strategies will help you maximize your harvest while keeping your plants healthy and vigorous.
- Timing is Everything: The 3-4 week mark isn't just a guideline—it's when your seedlings have developed the energy reserves to handle pruning.
- The Technique That Changed Everything: When you pinch off that top 2-3 inches in Step 2, make sure you're cutting at a 45-degree angle just above a set of leaves.
Frequently asked questions
Got questions about growing bush bean seedlings? You're not alone! Here are some of the most common concerns—plus quick, actionable answers to keep your plants thriving.
How soon can I start pruning my bush bean seedlings?
Prune bush bean seedlings only after they’ve developed their first set of true leaves (usually 1–2 weeks after germination). Avoid pruning the cotyledons (seed leaves)—focus on removing lower leaves or leggy growth to encourage bushier, stronger plants. Pro tip: Use clean, sharp scissors to prevent disease!
How often should I prune bush bean seedlings?
Prune bush beans lightly and regularly—about every 2–3 weeks during the growing season. The goal is to remove only 10–20% of the plant’s foliage at a time to avoid stress. Prioritize dead, yellowing, or crowded leaves to improve airflow and sunlight penetration. Over-pruning = fewer beans!
What if my bush bean seedlings look leggy or weak?
Leggy seedlings need more light! Move them to a sunnier spot (6+ hours of direct sunlight daily) and avoid overcrowding. If they’re already planted, trim the top growth by 1/3 to encourage bushier growth. For extra support, use small stakes or a trellis to keep them upright. Bonus: A balanced fertilizer (like 10-10-10) can help revive weak seedlings.
Can I prune bush beans too much?
Yes! Pruning more than 30% of the plant’s foliage at once can stress bush beans, reducing yield and making them vulnerable to pests or disease. Stick to selective pruning—remove only damaged, diseased, or overly crowded leaves. Remember: Bush beans rely on their leaves for photosynthesis, so less is often more!
What’s a good alternative if pruning seems complicated?
If pruning feels tricky, focus on preventative care instead! Space seedlings 4–6 inches apart to reduce overcrowding, water consistently (1–1.5 inches per week), and mulch to retain moisture. For bush beans, thinning seedlings early (keeping the strongest 2–3 plants per hill) can mimic pruning benefits without cutting. Easy peasy!
Wrapping up and next steps
Cultivating healthy bush bean seedlings is all about balance—pruning at the right time and with the right technique ensures stronger plants, higher yields, and fewer pests. Remember, consistency is key: monitor growth closely, and don’t hesitate to trim those leggy stems or crowded leaves.
With patience and care, your garden will soon be bursting with vibrant, productive bush beans!
Ready to take the next step? Start small—try pruning just a few plants this season—and watch your confidence (and harvest!) grow. Happy gardening! 🌱💚