Lawn
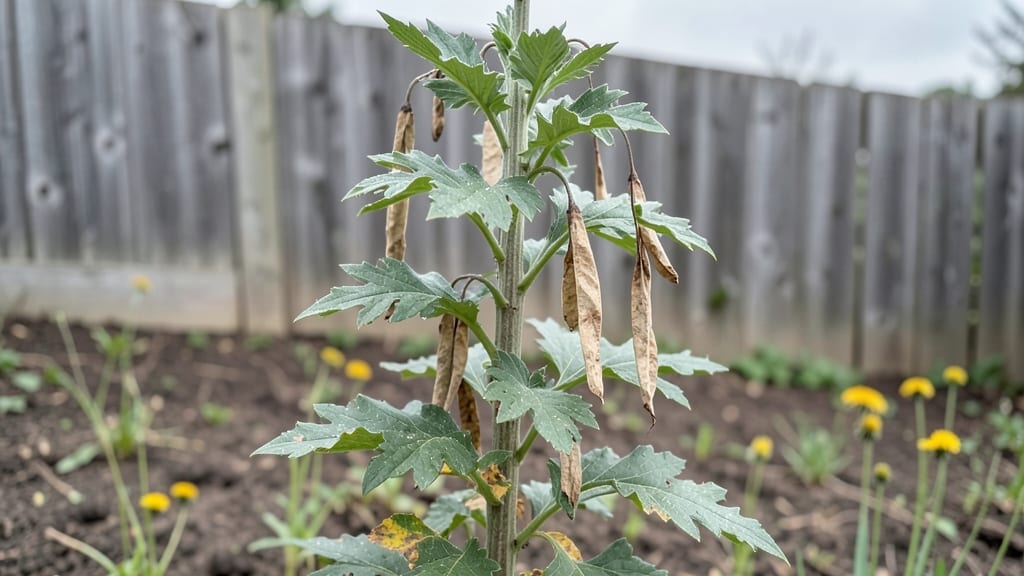
Saving flower seed pods from this year’s garden means next season’s blooms cost you nothing—just a little patience and timing. 🌻 I’ve collected seeds from poppies, sunflowers, and marigolds for years, and the trick is knowing exactly when to harvest before the birds or weather beat you to it.
The right pods turn brittle and brown, while the wrong ones shatter into useless dust.
You’ll need basic supplies: paper bags for drying, a sharp pair of pruners, and a dry, dark spot to store them. Most seed pods dry fully in 2-3 weeks, but some like poppies need to stay on the plant until they’re almost hollow-sounding when tapped.
Store them in envelopes labeled with the plant name and harvest year—trust me, you’ll forget otherwise.
Once dried, you’ll have seeds that sprout just as reliably as store-bought, often with better vigor. Imagine sunflowers towering over your fence or poppies blanketing your garden for free—all from last summer’s blooms.
The key is planting them at the right time, whether that’s direct sowing in spring or a quick soak for stubborn seeds.
This method works for perennials and annuals alike, though some plants like delphiniums need a cold stratification trick. Start small with 3-5 varieties, and you’ll save money while creating a garden that renews itself year after year.
📚 In This Guide
- What you need
- Instructions
- Tips and common mistakes
- Wrapping up and next steps
What you need
- ● Garden shears or pruning scissors – Choose a pair with sharp, clean blades (4-6 inch length works well). Pro tip: 💡 Sterilize with rubbing alcohol to prevent disease spread!
- ● Paper bags or seed envelopes – Opt for breathable, labeled bags (e.g., 4x6 inch kraft paper bags) or pre-printed seed envelopes (10-20 units).
- ● Drying rack or mesh screen – A flat, elevated surface (like a wooden rack or hardware cloth over a table) to air-dry pods.
- ● Labeling supplies – Waterproof markers, tags, or sticky labels + permanent ink for naming varieties.
- ○ Glove (optional but recommended) – Lightweight gardening gloves to protect hands from prickly pods (e.g., okra or milkweed).
- ● Desiccant packets – Silica gel packs for long-term storage (place 1-2 in airtight containers).
- ● Humidity monitor – A small digital hygrometer (30-50% humidity ideal for storage).
- ● Spray bottle with water – For lightly misting stubbornly sticky pods during drying.
- ● Vacuum sealer – Extends seed viability by removing moisture (great for bulk storage).
Step-by-Step instructions for harvesting and storing flower seed pods
Here's how to save seeds from your favorite blooms and keep them viable until planting time.
🌿 Step 1: Identify and Wait for Seed Pods to Mature
Let the flower heads stay on the plant until they've fully dried and turned a light brown color. This usually happens after the petals have fallen away naturally. For example, with zinnias, you'll see the center turn from green to a papery brown. Harvesting too early means immature seeds that won't germinate properly.
Check pods daily during their final drying phase. Gently squeeze a mature pod—if it crumbles easily, the seeds are ready. I like to harvest on a dry morning when the pods are crisp and brittle. This ensures the seeds inside are fully developed and won't mold during storage.
✂️ Step 2: Harvest and Dry the Seed Pods
Use clean, sharp scissors or pruners to cut the seed pods from the stem, leaving about 1 inch of stem attached. This helps identify the seed type later. Place the harvested pods in a single layer on a clean, dry paper towel or screen tray. Avoid stacking them to prevent moisture buildup and potential mold.
Find a warm, dry spot with good air circulation—like a sunny windowsill or a well-ventilated room. Let the pods dry for 1-2 weeks until they feel completely dry and brittle. You'll know they're ready when the pods shatter easily when touched. If any pods show signs of mold or dampness, spread them out again and give them more drying time.
🪴 Step 3: Extract Seeds from the Pods
Once the pods are fully dry, place them in a clean paper bag and seal it loosely. Shake gently to release the seeds inside. You can also use a small bowl or plate to catch the seeds as they fall out. I like to do this over a sheet of white paper so I can easily see the seeds and any debris.
Remove any remaining plant debris, chaff, or empty seed coats by hand or with a fine-mesh strainer. Store the clean seeds in small envelopes or airtight containers. Label each container with the flower type and the harvest date—this helps track seed viability over time. Seeds from self-pollinated flowers like zinnias or marigolds will be true to type, while hybrids may not produce the same blooms.
💧 Step 4: Store Seeds Properly for Long-Term Viability
Place the labeled envelopes or containers in a cool, dark place with consistent temperatures between 35-50°F. A refrigerator works well, but avoid the freezer—freezing can damage seeds. For even longer storage, you can add a small packet of silica gel to absorb moisture, but make sure the seeds stay dry before sealing.
Most flower seeds remain viable for 1-3 years, depending on the type. Test stored seeds by planting a few each year to check germination rates. If you notice a drop in germination after a year or two, it's time to harvest fresh seeds. Proper storage keeps seeds dry and prevents pests or mold from ruining your next season's blooms.
⏰ Step 5: Test Seed Viability Before Planting Next Season
Before you plant your stored seeds, do a quick viability test. Place 10 seeds between two damp paper towels in a sealed plastic bag. Keep them in a warm spot (70-75°F) and check daily for sprouts. If at least 50% of the seeds sprout within 7-10 days, your seeds are still good to plant.
If germination is low, try storing the remaining seeds for another year or harvest fresh seeds from this season's plants. This simple test saves you from planting dozens of seeds that might not grow. Once you confirm viability, you're ready to start your flowers indoors or directly in the garden for next year's vibrant blooms.
Tips & tricks for perfect flower seed pod harvesting
These simple strategies will help you save seeds that stay fresh and viable for planting next season.
Timing Secret: In Step 1, patience pays off—wait until pods are completely dry and crumbly before harvesting. I've learned the hard way that harvesting too early leads to seeds that won't germinate. For flowers like zinnias, the pods should turn a light brown color and feel like they'll shatter at the slightest touch. This usually happens in late summer or early fall, depending on your climate.
Drying Strategy: During Step 2's drying process, spread pods in a single layer on a screen tray for maximum airflow. I use a mesh produce bag or an old window screen to create airflow while keeping out pests. Avoid stacking pods—this traps moisture and can lead to mold. If you notice any pods developing mold after 1-2 weeks, spread them out again in a warmer, drier spot.
Storage Wisdom: For Step 4's long-term storage, I recommend using small, airtight containers with silica gel packets to absorb any moisture. Place these containers in the refrigerator (between 35-50°F) rather than the freezer—freezing can actually damage seed viability. Label each container with both the flower type and harvest date to track aging. Most flower seeds remain viable for 1-3 years, but some like zinnias may last longer if stored properly.
Viability Test Tip: Before planting your stored seeds in Step 5, always do the damp paper towel test with 10 seeds. Keep them in a warm spot (70-75°F) and check daily. If fewer than 50% sprout within 7-10 days, your seeds may have lost viability. This simple test saves you from wasting time planting seeds that won't grow.
Pro Tips for Flower Seed Pods
- These simple strategies will help you save seeds that stay fresh and viable for planting next season.
- Timing Secret: In Step 1, patience pays off—wait until pods are completely dry and crumbly before harvesting.
- Drying Strategy: During Step 2's drying process, spread pods in a single layer on a screen tray for maximum airflow.
Frequently asked questions
Got questions about harvesting and storing flower seed pods? You’re not alone! Here are some of the most common queries—and their answers—to help you master the process like a pro.
When is the best time to harvest flower seed pods?
Harvest seed pods when they’re fully mature but before they split open—usually in late summer or early fall. Look for pods that are dry, brown, or slightly papery to the touch. Overripe pods release seeds naturally, so act fast!
How do I know if my seed pods are ready for storage?
Ready-to-store pods should be completely dry (no moisture inside) and hard to the touch. Test by gently squeezing: if seeds rattle or the pod cracks easily, it’s perfect. Store them in a cool, dry place (like a paper bag or envelope) to prevent mold.
Can I save seeds from hybrid flowers?
Probably not—and that’s okay! Hybrid flowers (like many commercial blooms) often produce seeds that won’t grow true to the parent plant. For reliable results, opt for heirloom or open-pollinated varieties labeled as "seed-saving friendly."
How long can I store flower seeds before they lose viability?
Most flower seeds stay viable for 1–5 years if stored properly (cool, dark, and dry). Test germination by planting a few seeds each year—if they sprout, the batch is still good! For long-term storage, use airtight containers with silica gel.
What should I do if my seed pods mold or get damp?
If pods develop mold, discard them immediately—mold can kill seeds or spread to other storage. To prevent this, ensure pods are fully dry before storing, and avoid plastic containers (they trap moisture). A breathable paper bag or envelope works best!
Wrapping up and next steps
From cleaning and drying to labeling and storing, mastering the art of saving flower seed pods ensures your garden will burst with life next season! 🌱 Whether you’re a seasoned gardener or just starting, these simple steps make the process effortless and rewarding.
Now that you’re equipped with the know-how, why not take the next step?
🌟 Ready to Grow?
Start small—pick a few favorite flowers, harvest their pods, and experiment with storage methods. Before you know it, you’ll be sharing your blooms with neighbors or even selling extras at a local market! Happy gardening! 🌸