Vegetables
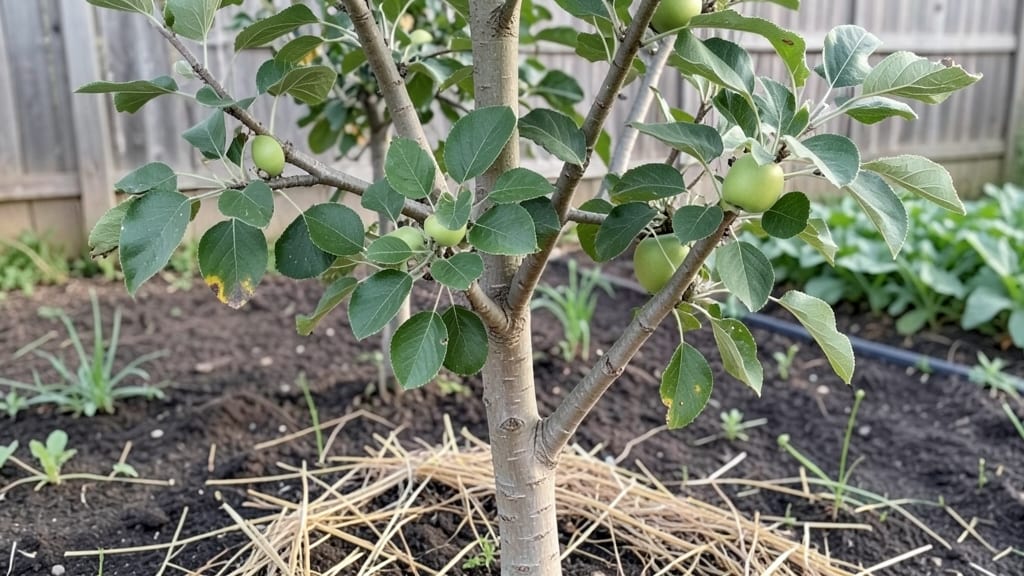
Growing an apple tree from green apple seeds is faster than you'd think—just 3-4 weeks to see those first little sprouts pushing through the soil. 🌱 I’ve learned that the secret to bushy, vigorous seedlings isn’t fancy equipment but understanding how to trick the seeds into breaking their dormancy early.
Most people give up after two weeks, but with the right moisture and warmth, you’ll have strong roots before summer even arrives.
The process starts with a simple setup: a shallow tray, damp paper towels, and a little patience. You’ll need a sunny windowsill or a grow light, plus a way to keep the seeds consistently moist without drowning them.
The key is consistency—too dry and they’ll dry out; too wet and they’ll rot. Once those first leaves appear, you’ll transplant them into soil, where they’ll grow like crazy if given enough sunlight and room to stretch.
By late spring, your seedlings could be 12-18 inches tall with thick stems, ready to be moved into the ground or larger pots. The trade-off? These trees won’t produce fruit that looks like the parent apple—genetics are wild with seeds—but the thrill of watching them grow is worth it.
For true-to-type apples, grafting comes later, but this is where the real magic happens.
Here’s the thing—this method works even in small spaces or containers, making it perfect for urban gardeners or anyone short on yard room. The fastest results come from starting indoors in early spring, but don’t stress if you’re late; seeds can handle a little delay. Let’s get those sprouts going!
📚 In This Guide
- What you need
- Instructions
- Tips and common mistakes
- Wrapping up and next steps
What you need
- ● Green apple seeds: 3–5 fresh, plump seeds (harvested from a ripe, organic green apple for best results).
- ● Paper towels or coffee filters: 2–3 sheets (cut into small squares if needed).
- ● Plastic bag or airtight container: A ziplock bag or small Tupperware with a lid.
- ● Spray bottle with water: For gentle hydration (avoid soaking!).
- ● Small pots or seed trays: 2–3 (3–4 inches deep) with drainage holes. Use biodegradable pots if transplanting later.
- ● Potting mix: Seed-starting mix or well-draining soil (avoid garden soil—it’s too dense!).
- ○ Heat mat (optional but helpful): A seedling heat mat (70–75°F range) speeds up germination.
- ● Grow lights or sunny windowsill: A south-facing window or LED grow light (12–16 hours/day).
- ● Humidity dome or plastic wrap: Keeps moisture in during germination.
- ● Fertilizer (diluted): A balanced, water-soluble fertilizer (like 10-10-10) for seedlings after sprouting.
- ● Labels & marker: To track seed varieties and planting dates.
Step-by-step instructions for germinating green apple seeds
Here's how to coax those tiny seeds into strong, fast-growing saplings—no fancy tools required.
🌱 Step 1: Extract and Prepare the Seeds
Cut a green apple in half and scoop out the seeds with a spoon. Rinse them under cool water to remove any fruit pulp, then spread them on a paper towel to air-dry for 1 hour. This prevents mold and speeds up the next step. I like to work with seeds fresh from the apple—they germinate faster than dried ones.
Place the dry seeds in a small bowl and cover them with lukewarm water (about 90°F) for 24 hours. This softens the seed coat and jumpstarts germination. You'll see tiny cracks appear in some seeds after just a few hours—that's your signal everything's working.
💧 Step 2: Plant in Moist, Warm Soil
Fill a small seedling tray or individual 2-inch pots with moistened seed-starting mix (keep it damp but not soggy). Press the soil down gently to remove air pockets. Use your finger to make ¼-inch deep holes, spacing them 1 inch apart—this gives seedlings room to grow without crowding.
Place 1-2 seeds per hole (in case one doesn't sprout) and cover lightly with more soil. Mist the surface with water until the soil looks evenly damp. The goal is to keep moisture consistent—overwatering now will drown the seeds before they even start.
☀️ Step 3: Create a Warm, Humid Environment
Cover the tray with clear plastic wrap or a humidity dome to trap warmth and moisture. Place it in a spot that stays between 70-80°F—a sunny windowsill or on top of a refrigerator works well. You'll see condensation on the plastic within a day or two—that's perfect.
Check daily for sprouts. Germination usually takes 2-3 weeks, but some seeds may take up to 4 weeks. Keep the soil moist by misting lightly every 2-3 days—never let it dry out completely. Once you see first true leaves (not the initial seed leaves), remove the cover immediately to prevent mold.
🌿 Step 4: Provide Light and Gradually Acclimate
Move seedlings to a bright spot with 6-8 hours of indirect light daily. A south-facing window or grow light works best. You'll notice leggy growth if the light is too weak—this means the seedlings are stretching toward any available light. Rotate the tray quarter-turn daily so they grow straight and sturdy.
After 4-6 weeks, when seedlings have 3-4 true leaves, start hardening them off. Place them outside in a sheltered spot for 1 hour the first day, gradually increasing time over 10 days. This prepares them for outdoor life without shock. You'll see stronger, bushier plants if you take this slow step.
Tips & tricks for perfect green apple seed germination
Fast, bushy seedlings start with these little-known tricks that make all the difference between waiting months and seeing sprouts in weeks.
Water Temperature Matters: That 90°F lukewarm water in Step 1 is critical—too hot and you'll cook the seeds, too cold and they won't activate properly. I use a kitchen thermometer to check my water temperature, especially if I'm in a hurry. The goal is to mimic the warmth of an apple's natural environment, which speeds up germination by about 30%. If you don't have a thermometer, let tap water sit in a sunny window for 10 minutes to warm it up naturally.
Seed Selection Tip: Choose seeds from organic apples when possible—they've been grown without chemical treatments that might inhibit germination. I also look for seeds that are plump and firm rather than shriveled or hollow-sounding when tapped. Between us, the biggest mistake I see is using seeds that have been dried out too long; fresh seeds germinate within 7-10 days if all other conditions are perfect.
Soil Moisture Strategy: The "damp but not soggy" description in Step 2 is crucial—you want soil that holds together when squeezed but doesn't drip water. I like to use a spray bottle to mist the soil rather than pouring water directly, which prevents disturbing the seeds. After planting, I weigh down the plastic wrap with a small plate to create even pressure and maintain that perfect humidity level without checking constantly.
Lighting Hack: For that critical 6-8 hours of indirect light, position your seedlings about 6 inches from a south-facing window during winter months when sunlight is weaker. If you notice seedlings leaning dramatically toward the light (called etiolation), it's time to rotate them or supplement with a simple LED grow light. I've seen seedlings go from leggy to sturdy in just 3 days after adding a basic 10-watt grow bulb—it's a game-changer for indoor growing.
Pro Tips for Green Apple Seeds
- Fast, bushy seedlings start with these little-known tricks that make all the difference between waiting months and seeing sprouts in weeks.
- Water Temperature Matters: That 90°F lukewarm water in Step 1 is critical—too hot and you'll cook the seeds, too cold and they won't activate properly.
- Seed Selection Tip: Choose seeds from organic apples when possible—they've been grown without chemical treatments that might inhibit germination.
Frequently asked questions
Got questions about growing green apple seeds? You’re not alone! Here are some of the most common queries—and their answers—to help you succeed with your seed-starting adventure.
How long does it take for green apple seeds to germinate?
Apple seeds typically take 21–30 days to germinate, but cold stratification (mimicking winter) can speed this up to 10–14 days. Plant seeds in moist soil, keep them warm (70–75°F), and be patient—some may take longer, especially if stored improperly. Pro tip: Soak seeds in water for 24 hours before planting to kickstart germination!
Can I grow apple trees from grocery store seeds?
Yes, but expect unpredictable results—grocery store apples are often hybrids, so your tree may not produce fruit identical to the parent. For reliable fruit, graft a known variety onto your seedling later. If you’re growing for the plant itself (not fruit), it’s a fun, low-cost experiment!
Why aren’t my apple seeds sprouting? Troubleshooting tips
Seeds may fail to sprout due to:
- Dry soil: Keep soil moist but not soggy—use a spray bottle to avoid disturbing seeds.
- Poor stratification: Apple seeds need 60–90 days of cold (refrigerate in damp peat moss).
- Old seeds: Store-bought apples may have low viability; opt for fresh, organic seeds if possible.
- Depth issues: Plant seeds ½ inch deep—too deep delays germination.
Still no luck? Try scratching the seed coat gently with sandpaper to encourage water absorption.
What’s the best soil mix for germinating apple seeds?
Use a light, well-draining mix like:
- 50% peat moss or coco coir (for moisture retention)
- 30% perlite or vermiculite (for aeration)
- 20% compost or worm castings (for nutrients)
Avoid heavy garden soil—it can suffocate seeds. Pro tip: Sterilize your mix by baking it at 200°F for 30 minutes to kill fungi or bacteria.
How do I care for apple seedlings once they sprout?
Once sprouted, keep seedlings in bright, indirect light (no direct sun yet!) and maintain 60–70°F temperatures. Water gently at the soil base to avoid fungal issues. After 2–3 true leaves appear, transplant to individual pots with well-draining soil. Harden off seedlings (acclimate to outdoor conditions) for 1–2 weeks before moving them outside.
Wrapping up and next steps
Growing green apple seeds into lush, bushy plants is a rewarding journey that combines patience, care, and a dash of creativity! 🌱 Whether you're aiming for a thriving bonsai or a vibrant kitchen garden, these germination tricks will set you up for success.
The key takeaway? Consistency and the right conditions—like warmth, moisture, and a little sunlight—will turn those tiny seeds into something extraordinary.
Now that you’re armed with the know-how, why not take the next step? Grab those seeds, set up your growing station, and watch your green thumb grow! Share your progress with fellow plant lovers or experiment with different varieties—your garden adventure starts today. Happy growing! 🌿