
Picking
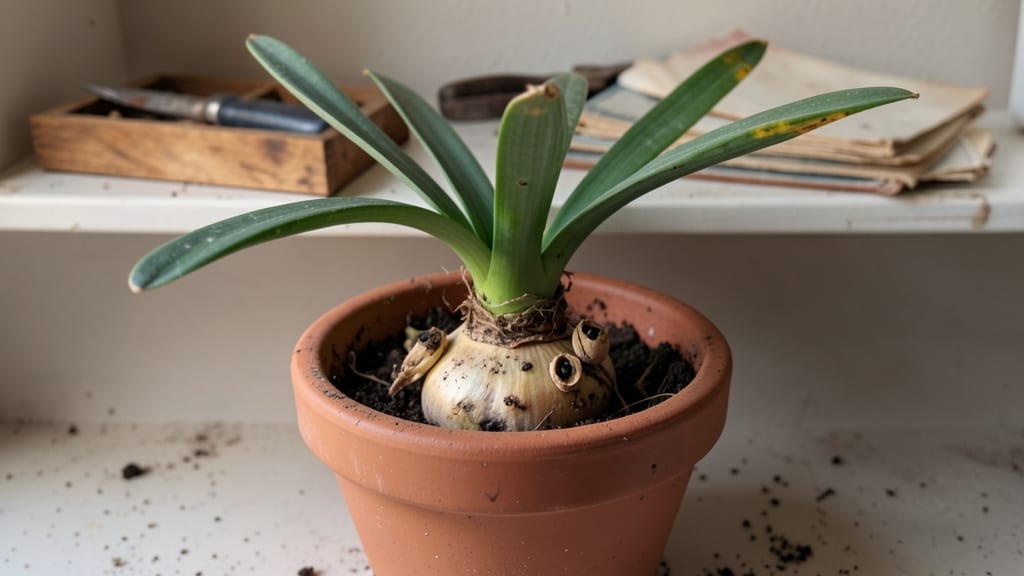
Harvesting amaryllis seeds after those dramatic blooms is where the real magic happens—if you know the timing. 🌱 The pods turn from green to papery brown in about 8-12 weeks after flowering, and that's your cue to collect them before they crack open.
I learned the hard way that waiting too long means scattered seeds everywhere and wasted potential.
The trick is picking plump, firm pods that feel heavy for their size—those are the ones packed with viable seeds. Hybrid amaryllis varieties often produce sterile seeds, so if your plant isn't blooming true-to-type, you might be better off starting with a known seed source.
I've had the most success with heirloom varieties like 'Paper White' or 'Apollo,' which reliably produce fertile seeds.
Once you've collected the seeds, give them a quick rinse and let them dry on paper towels for 3-5 days before storing in a sealed bag in the fridge. Plant them in sphagnum moss or a light seed mix just barely covered, and keep them in bright, indirect light.
Germination can take 4-8 weeks, but patience pays off with sturdy seedlings that'll reward you with blooms in 3-5 years.
Common pitfalls include overwatering (which rots seeds) and impatience (seeds need time to mature). If your pods split too soon, try covering them with a breathable mesh bag to protect the seeds until you can collect them.
The key is consistency—just like with the parent plant, amaryllis seeds thrive on routine care.
📚 In This Guide
- What you need
- Instructions
- Tips and common mistakes
- Wrapping up and next steps
What you need
- ● Mature amaryllis bulb – Choose a healthy, bloomed bulb (at least 2 years old) with viable seed pods.
- ● Scissors or pruners – Sharp, clean pair for harvesting seed pods (sterilize with rubbing alcohol).
- ● Paper bags or breathable mesh bags – 2-3 medium-sized bags to collect seeds and allow airflow.
- ● Ripe seed pods – Wait until pods turn brown and dry (usually 4-6 weeks after flowering).
- ● Small containers with drainage holes – 4-6 small pots (3-4 inches deep) for sowing seeds.
- ● Well-draining potting mix – A blend of peat moss, perlite, and sand (or a cactus/succulent mix).
- ● Spray bottle – For gentle watering to avoid disturbing seeds.
- ● Plastic wrap or clear lid – To create a humidity dome for germination.
- ● Grow lights or sunny windowsill – Seeds need bright, indirect light (12-16 hours/day).
- ● Fungicide (e.g., neem oil or hydrogen peroxide) – Prevents mold in damp conditions.
- ○ Heat mat (optional) – Speeds up germination if your space is cool (70-75°F ideal).
- ● Labeling tags – To track seed varieties and planting dates.
- ● Patient mindset! – Amaryllis seeds take time—some may take 6+ months to sprout.
Step-by-Step instructions for harvesting and germinating amaryllis seeds
Here’s how I turn amaryllis seed pods into healthy new plants—no fancy tools, just patience and precision.
🌱 Step 1: Identify and Harvest Ripe Seed Pods
Wait until the seed pod turns a dry, papery brown color—this means the seeds are fully mature. Gently twist the pod from the stem; it should pop off easily when ready. If it resists, leave it another week. Harvest in the morning when humidity is low to prevent mold.
Once removed, place the pods in a paper bag with a few holes punched in it. Store in a dry, shaded spot for 7-10 days—this mimics natural drying conditions. You’ll know they’re ready when the pod splits open on its own, releasing seeds that look like tiny, flat beans.
💧 Step 2: Extract and Stratify the Seeds
Empty the seeds into a bowl and separate any shriveled or discolored ones—they won’t germinate. Fill a small container with moistened perlite or vermiculite (not soil) and nestle the seeds ½ inch deep. Mist lightly to keep the medium damp but not soggy.
Cover the container loosely with plastic wrap and place it in the fridge for 8-12 weeks. This cold stratification mimics winter, breaking dormancy. Check monthly to ensure the medium stays barely moist—overwatering here kills seeds before they sprout.
☀️ Step 3: Germinate Under Grow Lights
After stratification, transfer the container to a warm spot (65-75°F) under a grow light (or a south-facing window). Seeds typically sprout in 4-8 weeks, though some take longer. You’ll see tiny green shoots pushing through the perlite—this is your signal to keep conditions stable.
Once seedlings have 2-3 true leaves (not the first tiny cotyledons), transplant them into 2-inch pots filled with a mix of 50% potting soil and 50% perlite. Water gently at the base to avoid disturbing delicate roots. Avoid direct sunlight for the first week to prevent shock.
🌿 Step 4: Transition to Soil and Light
After 4-6 weeks in the small pots, move seedlings to 4-inch pots with standard potting mix. Place them in bright, indirect light for another 2 months—this gradual adjustment strengthens stems. You’ll notice leaves darkening and thickening as they adapt.
By 6 months, seedlings should be 6 inches tall with multiple leaves. Now they’re ready for full sun (morning light is best) and regular watering. Keep soil slightly moist but never waterlogged—amaryllis seedlings hate soggy roots.
⏰ Step 5: Overwinter and Encourage Bulb Formation
As temperatures drop below 50°F, move pots indoors near a window. Reduce watering to once every 3-4 weeks, letting the soil dry completely between waterings. This mimics dormancy and forces the plant to focus energy on bulb development—the key to future blooms.
After 3-4 months, you’ll see a small, firm bulb forming. At this stage, resume normal watering and fertilize lightly with a balanced 10-10-10 solution every 4-6 weeks. With patience, these seedlings will flower in 3-5 years—worth every step!
Tips & tricks for perfect amaryllis seed germination
Here's what I learned after watching my first batch of amaryllis seeds struggle to sprout—these tricks make all the difference.
Pod Maturity Check: In Step 1, don't rush harvesting! The pod should be completely dry and papery brown—if it still has any green, leave it another week. I learned this the hard way after planting seeds from an underripe pod that never germinated. The key is waiting for that natural split on its own.
Stratification Secrets: For Step 2, I recommend using a small plastic container with drainage holes for your perlite or vermiculite. This keeps the medium perfectly moist without risking overwatering. Place a small piece of plastic wrap over the top (not sealed) to maintain humidity while still allowing airflow—this mimics natural conditions better than a fully sealed bag.
Lighting Tips: When moving to grow lights in Step 3, keep them just a few inches above the seedlings. I use a simple LED grow bulb on a timer for 12 hours daily. The 65-75°F range is crucial—if your room runs cooler, consider a small heating mat underneath the container to maintain consistent warmth.
Transplanting Timing: In Step 4, watch for those 2-3 true leaves—they'll be darker green than the initial seed leaves. This is your cue to transplant to 2-inch pots. I've found that using a mix of 50% potting soil and 50% perlite gives the best drainage while still holding enough moisture for delicate roots.
Pro Tips for Harvest Amaryllis Seeds
- Here's what I learned after watching my first batch of amaryllis seeds struggle to sprout—these tricks make all the difference.
- Pod Maturity Check: In Step 1, don't rush harvesting!
- Stratification Secrets: For Step 2, I recommend using a small plastic container with drainage holes for your perlite or vermiculite.
Frequently asked questions
Got questions about harvesting and germinating amaryllis seeds? You’re not alone!
Here are some of the most common queries—and their straightforward answers—to help you navigate the process with confidence.
How do I know when amaryllis seeds are ready to harvest?
Harvest seeds when the seed pods turn brown and dry (usually 6–8 weeks after pollination). Gently twist or cut them open to reveal flat, dark seeds inside. Wait until pods are fully mature—green pods mean seeds aren’t ready! Overripe pods may crack open on their own, so check them weekly.
How long does it take for amaryllis seeds to germinate?
Germination can take 4–12 weeks (or longer!) depending on conditions. Keep seeds in a warm (70–75°F), humid environment with indirect light. Patience is key—some seeds sprout slowly, while others may never germinate. Don’t give up after 3 months! Refresh moisture if the medium dries out.
Do amaryllis seeds need light to germinate?
Yes! While seeds don’t need light to sprout, they germinate faster with indirect light (e.g., near a window but not in direct sun). After germination, provide bright, filtered light to prevent leggy seedlings. A grow light can help if natural light is insufficient.
What should I do if my amaryllis seeds rot instead of sprouting?
Rot is usually caused by too much moisture or poor drainage. If seeds turn mushy or develop mold:
- Stop watering immediately.
- Remove affected seeds and repot healthy ones in fresh, sterile potting mix.
- Use a well-draining medium (like perlite or sand mixed with soil).
- Let the mix dry slightly between waterings.
Can I grow amaryllis from seeds instead of buying bulbs?
Growing from seeds is rewarding but slower—seedlings take 5–7 years to bloom compared to 2–3 years for bulb offsets. Seeds also produce smaller, less predictable flowers. If you’re patient, it’s a fun project! For faster results, combine seeds with bulb propagation (like separating offsets).
Wrapping up and next steps
Harvesting amaryllis seeds is a rewarding journey that blends patience with the joy of nurturing new life! 🌱 With the right tools, timing, and care, you’ve got everything you need to turn those tiny seeds into stunning blooms. Remember: consistency is key—whether it’s pollinating flowers, collecting seeds, or giving them the perfect growing conditions.
Now that you’re armed with these germination tricks, it’s time to roll up your sleeves and get growing! Start by planting those seeds in well-draining soil and watch your green thumb shine. Happy gardening! 🌸