Picking
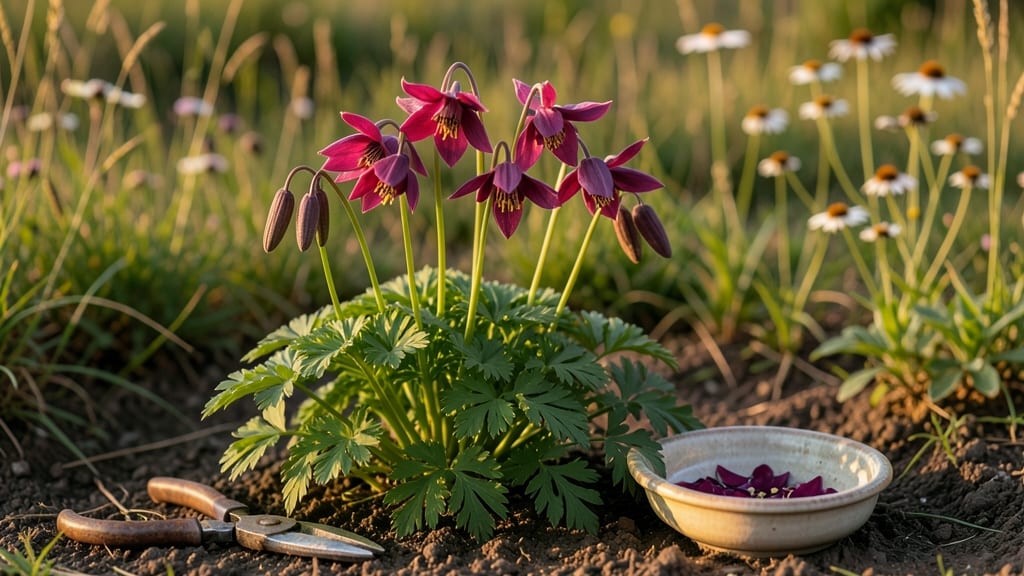
Harvesting columbine seeds is easier than you think—once you know the right moment. 🌿 Those whimsical, nodding blooms give way to papery seed pods that turn from green to brown, and that’s your cue to act.
I’ve learned that waiting too long means the pods split open and scatter seeds everywhere, while harvesting too early leaves you with immature, nonviable seeds.
The process starts with patience—wait until the pods are fully brown but still intact, usually 4-6 weeks after flowering. Grab a pair of scissors or pruners and snip the pods cleanly, leaving the stems attached.
Place them in a dry, well-ventilated spot for 2-3 weeks to finish drying; this ensures the seeds inside are ready for storage. I store mine in a labeled paper envelope in a cool, dark place, where they’ll stay viable for 2-3 years.
When planting time comes, you’ll be rewarded with self-sown columbine popping up everywhere—delicate spires of purple, pink, or white that return year after year. The key is to avoid crushing the seeds during drying; a gentle touch keeps them intact.
If you’re impatient, you can even plant fresh pods directly in the garden, but they’ll need that extra drying time to germinate reliably.
Columbine seeds are famously finicky about germination, so don’t be discouraged if not every one sprouts. A little shade, consistent moisture, and a light dusting of soil over the seeds works wonders.
Before you know it, your garden will be dotted with these charming perennials, proving that a little attention now saves you work—and heartache—later.
📚 In This Guide
- What you need
- Instructions
- Tips and common mistakes
- Wrapping up and next steps
What you need
- ● Mature Columbine plants: Ensure they’ve finished blooming and developed seed pods (usually late summer to fall).
- ● Sharp pruning shears or scissors: A pair with clean, sharp blades (sterilized with rubbing alcohol if reusing).
- ● Paper bags or brown paper envelopes: 3–5 bags per plant (or a large cardboard box lined with newspaper).
- ● Labeling tags or masking tape + marker: To note plant varieties and harvest dates.
- ● Drying surface: A clean, dry, well-ventilated area (like a mesh screen, baking sheet, or open cardboard box).
- ○ Small sieve or fine mesh screen: For separating seeds from chaff (optional but helpful).
- ● Air-tight storage containers: Small jars, resealable plastic bags with silica gel packets, or seed envelopes.
- ● Fine-tip tweezers or toothpicks: For delicate seed handling (especially if pods are sticky or stubborn).
- ● Gloves: To protect hands from prickly seed pods or sap.
- ● Spray bottle with water: For lightly misting dried pods if they’re too brittle.
- ● Desiccant packets: Extra for storage to absorb moisture and prevent mold.
- ● Notebook: To log seed viability, germination rates, or planting notes.
- ● Seedling trays or pots: If you plan to start seeds indoors next season.
Step-by-Step instructions for harvesting columbine seeds
Here’s how to save columbine seeds for next season’s vibrant blooms—simple steps that preserve viability and prevent waste.
🌱 Step 1: Identify and Select Mature Seed Pods
Wait until columbine seed pods turn brown and papery, usually 6-8 weeks after flowering. Avoid green or plump pods—they won’t be ready. Gently twist the pods to check for dryness; if they crumble easily, they’re harvest-ready. I like to collect pods on a dry, sunny morning when dew has evaporated, as moisture can speed up spoilage.
Use clean, sharp scissors to snip the pods from the stem, leaving a ½-inch stem attached. This helps prevent mold during drying. Place the pods in a paper bag (not plastic) to allow airflow. If pods are still green, leave them on the plant for another 1-2 weeks—patience here ensures better germination rates.
💧 Step 2: Dry the Seed Pods Completely
Spread the harvested pods in a single layer on a clean, dry surface like a mesh screen or paper towel. Store them in a warm, dry place (around 70°F) away from direct sunlight for 2-3 weeks. You’ll know they’re fully dry when the pods open slightly on their own or when pressed gently.
Check daily for mold or soft spots—discard any pods that feel damp or smell musty. If humidity is high, speed up drying with a small fan on low setting. Once dry, the seeds inside will rattle when shaken. This step is critical: moisture is the enemy of long-term seed storage.
✂️ Step 3: Extract and Clean the Seeds
Open each dry pod carefully by squeezing or cutting along the seam with scissors. Shake the pods over a white sheet of paper to catch the seeds—columbine seeds are small, flat, and wings often attach to the edges. Remove any debris or empty seed casings by hand or with a soft brush.
For extra cleanliness, place the seeds in a fine-mesh strainer and rinse gently under lukewarm water to remove dust or plant residue. Let them air-dry completely on the paper for 24 hours before storing. This prevents clumping and ensures seeds stay viable longer.
🪴 Step 4: Store Seeds Properly for Germination
Transfer the dried seeds to an airtight container like a small glass jar or resealable plastic bag. Add a silica gel packet or a damp paper towel (just slightly moist) to maintain 30-40% humidity—this mimics natural conditions and keeps seeds dormant but alive. Label the container with the date and variety (if applicable).
Store in a cool, dark place like a refrigerator or basement, where temperatures stay 35-45°F. Columbine seeds can remain viable for 2-3 years under these conditions. Check the container every 6 months for moisture or pests—discard any seeds that smell off or look discolored.
⏰ Step 5: Plant Stored Seeds for Next Season
Sow columbine seeds outdoors in early spring or fall, about ¼ inch deep in well-draining soil. Lightly cover with soil and water gently to settle. Columbine seeds germinate best in cool weather (50-60°F)—they may take 2-4 weeks to sprout. Thin seedlings to 6-12 inches apart once they’re 2 inches tall to give them room to grow.
For faster results, stratify seeds by placing them in a plastic bag with moist peat moss, then refrigerating for 4-6 weeks before planting. This mimics winter conditions and breaks dormancy. Once planted, mulch lightly to retain moisture and protect young seedlings from temperature swings.
Tips & tricks for perfectly harvested columbine seeds
Here's what I've learned from years of saving columbine seeds—small details that make all the difference between seeds that sprout and ones that don't.
Timing is Everything in Step 1: Don't rush harvesting! Those 6-8 weeks after flowering are crucial for seed maturity. I've learned the hard way that green pods won't produce viable seeds—wait until they're completely brown and papery. A quick twist test works best: if the pod crumbles easily, it's ready. Harvesting on dry mornings prevents moisture issues during storage, which is especially important if you're in a humid climate.
Drying Strategy for Step 2: The 2-3 week drying period at 70°F is non-negotiable for columbine seeds. I use a mesh screen over my kitchen counter near a small fan (on low) to create airflow without direct heat. Check daily for moisture—any dampness means more drying time. The seed pods should rattle when shaken, and you'll notice they often open slightly on their own as they dry. This natural opening helps release the seeds gently.
Cleanliness Matters in Step 3: That 24-hour final air-dry after rinsing is where many people cut corners. I've seen seeds clump together and lose viability when rushed. Use a fine-mesh strainer for rinsing and pat seeds completely dry with paper towels before that final drying period. The cleanest seeds store best and germinate more reliably.
Storage Secrets for Step 4: That 35-45°F temperature range in your refrigerator or basement is perfect for maintaining dormancy while keeping seeds alive. I like to add a damp paper towel (not soaking wet) to maintain 30-40% humidity—this mimics natural conditions. Labeling containers with the date helps track viability, as columbine seeds typically stay good for 2-3 years when stored properly. Check every 6 months for any signs of mold or pests that might compromise your seeds.
Pro Tips for Harvest Columbine Seeds
- Here's what I've learned from years of saving columbine seeds—small details that make all the difference between seed...
- Timing is Everything in Step 1: Don't rush harvesting! Those 6-8 weeks after flowering are crucial for seed maturity....
- Drying Strategy for Step 2: The 2-3 week drying period at 70°F is non-negotiable for columbine seeds. I use a mesh sc...
Frequently asked questions
Got questions about harvesting and saving columbine seeds? You’re not alone! Here are some of the most common concerns—and their answers—to help you succeed in storing and replanting your seeds for next year’s vibrant blooms.
When is the best time to harvest columbine seeds?
Harvest columbine seeds when the seed pods turn brown and dry but before they split open—usually late summer to early fall. If you wait too long, the seeds will scatter naturally, and you’ll miss your chance to collect them. Watch for pods that feel crispy to the touch!
How do I know if the seeds are fully mature and ready to harvest?
Mature columbine seeds are ready when the pods turn a papery brown and rattle when shaken gently. If you open a pod and see plump, dark seeds inside (not shriveled or pale), they’re perfect for saving. Avoid harvesting if the seeds are still green or moist!
Can I plant columbine seeds right after harvesting, or do they need to dry first?
Always let seeds dry completely for 1–2 weeks in a cool, dry place before storing or planting. Fresh seeds may rot if planted too soon. For best results, store them in a paper envelope (not plastic) until spring—columbines often need cold stratification to germinate.
What’s the best way to store columbine seeds long-term?
Store seeds in a cool (35–40°F), dry location like a refrigerator or seed vault. Place them in a labeled paper envelope or glass jar with a silica gel packet to absorb moisture. Seeds stay viable for 2–3 years if kept dry—just don’t use plastic bags (they trap humidity).
Why aren’t my columbine seeds germinating after planting?
Columbines often need cold stratification (a period of cold, moist conditions) to break dormancy. Try planting seeds outdoors in fall or stratifying them in the fridge for 4–6 weeks before sowing. If soil is too warm or dry, germination may fail—keep seeds lightly moist and in partial shade until sprouts appear.
Are there alternatives if I can’t harvest seeds from my plants?
If your columbines don’t produce seeds (or pods don’t mature), try buying seeds online or from local nurseries. Many garden centers sell columbine seeds in pre-packaged mixes. You can also divide mature plants in early spring or take root cuttings for propagation!
Wrapping up and next steps
Harvesting columbine seeds is a rewarding way to ensure next year’s vibrant blooms—just follow the right steps to dry, store, and replant them with confidence! 🌱 Whether you’re a gardening novice or a seasoned pro, this process connects you to the cycle of nature while saving you money.
Now that you’re equipped with the know-how, why not share your newfound skills? Try swapping seeds with fellow gardeners or gifting them to friends—spreading beauty (and knowledge!) one seed pod at a time.
🌟 Your Next Step:
Ready to dive deeper? Experiment with different storage methods or explore companion planting to boost your columbine’s growth. Happy gardening!