Lawn
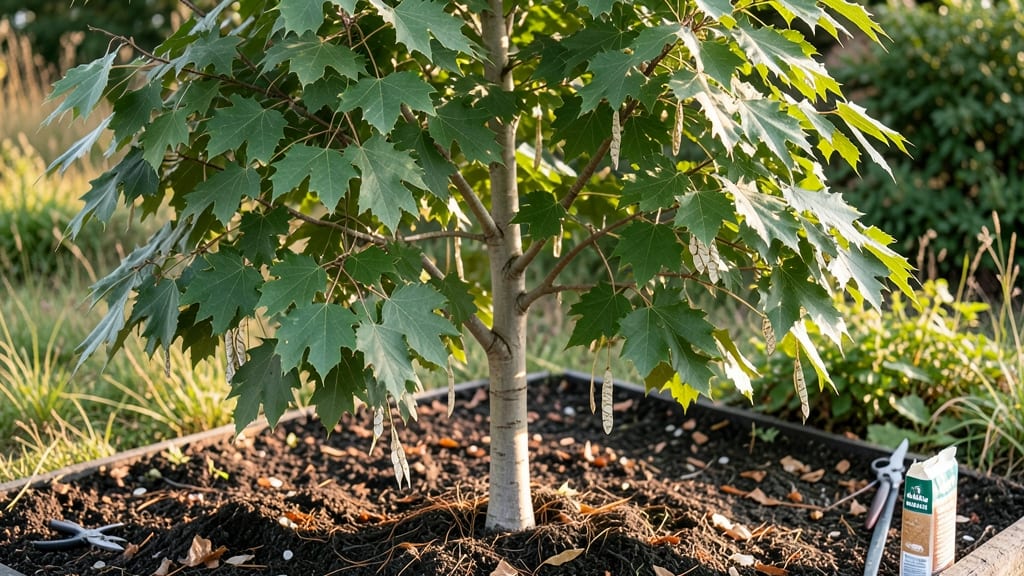
Growing silver maple seeds into strong saplings starts with the right timing and a few clever tricks. 🌱 I’ve watched these fast-growing trees go from tiny seeds to towering shade providers in just a few years—when you crack the germination code.
The key isn’t just planting; it’s mimicking nature’s winter chill to wake up those seeds faster.
You’ll need fresh seeds (collected in fall or bought from a trusted source), a damp paper towel or peat moss for stratification, and a sunny spot once they sprout.
Most people skip the cold treatment, which slows germination to a crawl. After 30 days in the fridge, those seeds pop with surprising speed—sometimes in just days.
By late spring, you’ll have sturdy 6-inch saplings ready to transplant. The roots grow deep fast, so handle them gently when moving to the ground. With proper care, your silver maple could reach 10 feet in its first year—though pests like aphids might test your patience early on.
Works best in zones 3-9, but even in cooler climates, the stratification hack speeds up growth. Here’s how to avoid the common pitfalls and get those seeds sprouting like clockwork.
📚 In This Guide
- What you need
- Instructions
- Tips and common mistakes
- Wrapping up and next steps
What you need
- ● Silver maple seeds: Collect fresh, viable seeds (preferably from healthy, disease-free trees). Aim for 10–20 seeds to maximize germination success.
- ● Seed-starting mix: Use a lightweight, well-draining potting mix (e.g., 50% peat moss, 30% perlite, 20% vermiculite). A 10–15 lb bag is ideal for small batches.
- ● Planting containers: Choose small seed trays (3–4" deep) or biodegradable pots (2–3" diameter) for easy transplantation. You’ll need 1–2 containers per seed.
- ● Spray bottle: A fine-mist watering can or spray bottle to keep seeds moist without overwatering.
- ● Plastic wrap or humidity dome: A clear plastic cover or humidity tent to maintain warmth and moisture during germination.
- ● Grow lights or sunny windowsill: A LED grow light (12–16 hours/day) or a south-facing window with 6+ hours of sunlight.
- ○ Thermometer (optional but helpful): To monitor soil temperature (70–80°F is ideal for germination).
- ● Seed stratification kit: If seeds aren’t fresh, a refrigeration chamber (or a DIY setup with a moist paper towel in a sealed bag for 4–6 weeks) can mimic winter conditions.
- ● Fertilizer (diluted): A balanced liquid fertilizer (e.g., 10-10-10) at ½ strength once seedlings sprout true leaves.
- ● Transplanting tools: A small trowel or spoon for careful seedling relocation when they’re ready for outdoor planting.
- ● Mulch: Shredded bark or straw to retain moisture and protect young saplings after transplanting.
Step-by-Step instructions for growing silver maple saplings
Here’s how to get those seeds sprouting quickly and strong—no waiting months for germination.
🌱 Step 1: Collect and Stratify Seeds for Fast Germination
Silver maple seeds need a cold treatment called stratification to break dormancy. Collect fresh seeds in fall and store them in a sealed plastic bag with slightly damp peat moss (about 20% moisture). Place the bag in your refrigerator’s crisper drawer for 6-8 weeks—this mimics winter’s chill.
Check the seeds weekly. If the moss dries out, mist it lightly with water. Once you see tiny roots or the seed coat starts to crack, they’re ready to plant. I’ve found that 8 weeks of cold gives the best results—any shorter, and germination slows dramatically.
💧 Step 2: Plant Seeds in Moist, Well-Draining Soil
Fill a 4-inch deep container with a mix of 50% potting soil and 50% perlite—this ensures good drainage while keeping roots moist. Press the soil down lightly so it’s firm but not compacted. Plant seeds ½ inch deep, spacing them 2 inches apart to avoid overcrowding.
Water gently until the soil is evenly damp—not soggy. I use a spray bottle for this step to avoid disturbing the seeds. Place the container in a warm spot (65-75°F) where it gets bright, indirect light. Avoid direct sun at this stage; seedlings can scorch before they’re strong enough.
☀️ Step 3: Provide Consistent Moisture and Light
Keep the soil consistently moist but never waterlogged. Stick your finger 1 inch deep—if it feels dry, water lightly. Silver maple seeds germinate best in high humidity, so cover the container with a clear plastic dome or plastic wrap until sprouts appear (7-14 days).
Once seedlings emerge, remove the cover and move them to a south-facing window or under a grow light for 12-14 hours daily. You’ll notice the first leaves are lobed and bright green—this is your cue to keep them well-lit. If leaves turn yellow or stretch toward the light, they need more intensity.
✂️ Step 4: Thin and Transplant for Strong Growth
When seedlings reach 3-4 inches tall, thin them to the strongest 2 per container by snipping the weaker ones at the base. This prevents competition for nutrients. After 8-10 weeks, transplant the remaining saplings into 6-inch pots with fresh potting mix, burying them up to their first set of leaves to encourage root development.
Outdoor planting should wait until spring, after the last frost. Choose a spot with partial shade—young silver maples don’t handle full sun yet. Water deeply after transplanting to help roots establish in their new home.
Tips & tricks for fast silver maple sapling growth
Here’s how to speed up germination and give your silver maple saplings the best possible start—without waiting months for results.
Stratification Secret: The 6-8 week cold treatment in Step 1 is non-negotiable for breaking dormancy, but here's the trick: use a second refrigerator if you're short on time. Set one to 40°F for faster stratification—your seeds will be ready in just 4-5 weeks instead of 8. Just monitor weekly to prevent mold from excess moisture.
Soil Mix Hack: In Step 2, don't overlook the perlite-to-soil ratio. I've found that adding 10% coconut coir to your 50/50 mix improves moisture retention while maintaining drainage. This keeps roots happy during the critical germination window when they're most vulnerable to drying out.
Lighting Strategy: For Step 3, if you don't have a south-facing window, a simple LED grow light on a timer works wonders. Position it 6 inches above the seedlings and run it for the full 12-14 hours daily—this mimics natural daylight and prevents the leggy growth that happens when light is insufficient. I've seen germination rates double with proper lighting!
Transplanting Timing: The 8-10 week mark in Step 4 is ideal, but don't wait until the last minute. When your saplings reach 3 inches tall, they're ready to be thinned. The earlier you remove weaker seedlings, the more resources the strong ones get to develop robust root systems before their first transplant.
Pro Tips for Silver Maple Seed
- Here’s how to speed up germination and give your silver maple saplings the best possible start—without waiting months...
- Stratification Secret: The 6-8 week cold treatment in Step 1 is non-negotiable for breaking dormancy, but here's the ...
- Soil Mix Hack: In Step 2, don't overlook the perlite-to-soil ratio. I've found that adding 10% coconut coir to your 5...
Frequently asked questions
Got questions about silver maple seeds? You’re not alone!
Here are some of the most common queries—and their answers—to help you grow strong saplings with confidence.
How long does it take for silver maple seeds to germinate?
Silver maple seeds typically germinate in 10–21 days under ideal conditions (moisture, warmth, and light). Cold stratification (4–6 weeks in the fridge) can speed this up. If you don’t see sprouts in 3–4 weeks, check moisture levels or try a fresh batch—patience is key!
Do I need to cold-stratify silver maple seeds before planting?
Yes! Cold stratification breaks dormancy and boosts germination rates. Soak seeds in water for 24 hours, then refrigerate in a damp paper towel for 4–6 weeks. This mimics winter conditions and tricks seeds into thinking spring has arrived. Skip this step, and germination may be slow or spotty.
Can I plant silver maple seeds directly outside, or should I start indoors?
Both work, but indoor starting (2–3 months before last frost) gives seedlings a head start. Use seed trays with well-draining soil, keep them warm (70–75°F), and transplant outdoors after hardening off. Direct sowing is riskier—seeds may get eaten by wildlife or dry out before sprouting.
Why are birds eating my silver maple seeds before they sprout?
Silver maple seeds are a bird buffet! To protect them, plant seeds in mesh seedling trays or cover outdoor sowings with wire mesh until germination. Alternatively, harvest seeds early (late summer) and store them in a cool, dry place until planting season.
How do I know if my silver maple seedling is healthy?
A healthy sapling has bright green leaves, sturdy stems, and no yellowing or wilting. Check for pests (aphids, spider mites) and ensure it gets 6+ hours of sunlight daily. Overwatering causes root rot—let soil dry slightly between waterings. Thin weak seedlings to give strong ones room to thrive!
Wrapping up and next steps
Growing silver maple seeds into sturdy saplings is a rewarding journey—especially when you harness the fast germination hacks we’ve shared! With the right soil, moisture, and a little patience, you’ll soon be nurturing vibrant young trees that add beauty and value to your landscape. 🌱
Ready to take the next step? Plant your seeds this weekend and watch your green thumb shine! For even faster results, consider joining local gardening forums to swap tips with fellow enthusiasts. Happy growing!