Diseases
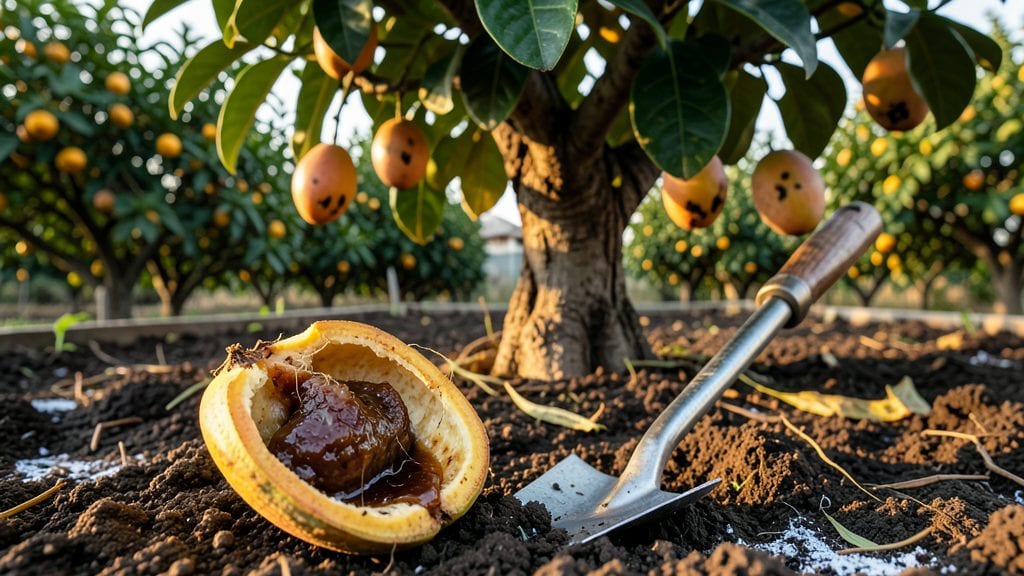
Mango seed rot turns healthy seedlings into mushy messes before they even sprout. 🌱 I’ve watched entire batches of mango seeds collapse into slimy brown pulp—until I learned the early warning signs and how to stop it.
The problem starts with waterlogged seeds or contaminated soil, but the fix is simpler than you think.
You’ll spot it when seeds develop dark, sunken spots or emit a foul, fermenting smell instead of the fresh, earthy scent of healthy growth. The culprits? Too much moisture, fungal spores hiding in old seedling trays, or soil that doesn’t drain.
My first attempt at saving seeds involved baking them to dry—but that’s not the full solution.
With the right mix of air circulation, sterilized soil, and a quick fungicide spray, you can reverse the rot before it spreads to your entire crop.
I’ve saved seedlings this way twice now, and the key is acting fast. The payoff? Strong, disease-free mango trees that actually make it to harvest.
Works for both home gardeners and small orchards, and the methods scale from a single seedling tray to larger nursery setups. Let’s get those seeds thriving again—before the rot takes over.
Root Causes Behind Seed Decay
When your mango seeds turn mushy, discolored, or fail to sprout, the problem often stems from a mix of biological, environmental, and even human factors. Understanding these causes is the first step to preventing—and reversing—seed rot before it ruins your crop.
Below, we break down the key triggers behind this frustrating issue, with science-backed explanations and actionable insights.
Mango seeds thrive in moisture balance, not soggy soil. When seeds sit in waterlogged environments, fungal pathogens like Phytophthora and Pythium multiply rapidly, leading to rot. These microbes thrive in anaerobic (low-oxygen) conditions, breaking down seed tissues and blocking nutrient uptake.
- Why it happens:
- Excessive irrigation or heavy rainfall keeps seeds perpetually damp.
- Compacted or clay-heavy soil prevents water drainage, trapping moisture around seeds.
- Containers without drainage holes create a greenhouse effect, accelerating decay.
- Actionable fix:
- Use well-draining soil mixes (e.g., 60% coco coir, 30% perlite, 10% vermiculite).
- Elevate seed trays or pots to prevent water pooling.
- Water seeds only when the top 1–2 inches of soil feel dry.
Pathogenic microbes are the #1 culprits behind seed rot. Fungi like Fusarium and bacteria such as Erwinia release enzymes that digest seed proteins and starches, turning them to mush. These invaders often hitchhike on contaminated soil, tools, or even infected parent plants.
- Why it happens:
- Reusing soil from previous infected crops without sterilization.
- Planting seeds from diseased mango fruits (e.g., with blackened pits or oozing lesions).
- High humidity (above 80%) and warm temperatures (75–95°F) create ideal microbial breeding grounds.
- Actionable fix:
- Sterilize soil with a 1:10 bleach-water solution (let sit 30 mins, then rinse) or bake at 180°F for 30 minutes.
- Disinfect tools with 70% isopropyl alcohol between uses.
- Choose seeds from healthy, firm mangoes with no visible mold or soft spots.
Mango seeds are living organisms with short shelf lives. Storing them in the wrong conditions accelerates deterioration, making them vulnerable to rot once planted. Enzymatic activity inside the seed speeds up as it dries out or overheats, weakening its defenses against pathogens.
- Why it happens:
- Leaving seeds exposed to direct sunlight, which raises internal temperatures and denatures proteins.
- Storing seeds in plastic bags (traps moisture and ethylene gas, speeding decay).
- Planting seeds too late—mango seeds lose viability after 3–5 days of drying.
- Actionable fix:
- Store seeds in a paper towel-lined container in the fridge (34–40°F) for up to 2 weeks.
- Plant seeds within 48 hours of extraction for best germination rates.
- Avoid pre-drying seeds—plant them fresh with the pulp intact to retain moisture.
Soil pH and nutrient levels play a critical role in seed health. Mango seeds prefer slightly acidic to neutral soil (pH 6.0–7.0). If the pH drifts too high or low, it disrupts microbial balance, allowing harmful pathogens to dominate. Additionally, imbalances in nitrogen, phosphorus, or potassium weaken seed resilience.
- Why it happens:
- Over-fertilizing with synthetic nitrogen (burns seed tissues and attracts pests).
- Using alkaline soil amendments (e.g., lime) without testing pH first.
- Salinity buildup from poor-quality water or over-irrigation.
- Actionable fix:
- Test soil pH with a kit (adjust with sulfur for high pH or lime for low pH).
- Use balanced organic fertilizers (e.g., 5-5-5 NPK ratio) sparingly.
- Flush soil with rainwater to reduce salinity before planting.
Pro Tip: 💡 If you’re reusing containers, soak them in a 10% vinegar solution for 10 minutes to kill lingering pathogens before repurposing.
Fixing Rot Before It Ruins Your Harvest
Mango seed rot may sound like a hopeless battle, but with the right approach, you can stop it in its tracks and even prevent future outbreaks. The key is acting fast and addressing the root cause—whether it’s fungal pressure, poor water management, or weak tree health.
Below, we break down practical solutions tailored to the most common triggers, so you can save your trees and your crop.
Problem: Excess moisture creates the perfect breeding ground for fungi like Phytophthora and Fusarium, which thrive in soggy soil and infected seeds.
How to Fix It: ✅ 🔥 Adjust Your Watering Schedule
- Water deeply but infrequently—aim for 1–1.5 inches per week (adjust for rain).
- Avoid flooding the root zone; use drip irrigation or soaker hoses to deliver water directly to roots.
- Morning watering is best—allows foliage to dry before evening humidity spikes.
✅ 🏗️ Improve Soil Drainage
- Test your soil’s drainage: Dig a 12-inch hole, fill it with water, and time how long it takes to drain. Ideal time: under 4 hours.
- Amend heavy clay soil with sand, perlite, or compost (20–30% mix).
- Raise beds slightly if your yard has poor drainage—even a 2–3 inch mound helps.
✅ 🌡️ Mulch Strategically (But Don’t Overdo It)
- Use 2–3 inches of organic mulch (straw, wood chips) to retain moisture without suffocating roots.
- Keep mulch 6+ inches away from the trunk to prevent rot at the base.
💡 Pro Tip: If your tree is already infected, reduce watering immediately and let the soil dry out between sessions. Fungi need moisture to spread—starve them out!
Problem: Visible rot, blackened seeds, or oozing lesions mean Phytophthora, Fusarium, or Colletotrichum are at work. These fungi love warm, wet conditions and can jump from seed to fruit.
How to Fix It: 🧪 🔪 Prune Infected Areas Aggressively
- Remove and destroy (do not compost) any fruit with rot, blackened seeds, or mushy tissue.
- Cut back branches with lesions 6–12 inches below the infection. Sterilize pruners with 70% alcohol or bleach solution (1 part bleach to 9 parts water).
- Burn or bag infected debris—do not leave it near the tree.
💊 🍳 Apply Fungicides (Organic or Chemical)
- Preventative spray: Use copper fungicide (organic) or chlorothalonil (synthetic) every 2–4 weeks during rainy seasons.
- For active infections: Mix baking soda spray (1 tbsp baking soda + 1 tsp dish soap + 1 gallon water) and apply weekly for 4–6 weeks.
- Soil drench: For root rot, apply phosphite-based fungicides (like Amistar or Aliette) as directed.
🌿 👨🍳 Boost Tree Immunity
- Fertilize with potassium (like kelp meal or wood ash) to strengthen cell walls.
- Avoid nitrogen-heavy fertilizers—they encourage soft, fungal-susceptible growth.
- Beneficial microbes help! Add mycorrhizal fungi or Trichoderma to the soil to outcompete pathogens.
💡 Pro Tip: Copper sprays work best in dry conditions—apply in the late afternoon so the tree has time to dry before nighttime humidity sets in.
Problem: Young, stressed, or nutrient-deficient trees are easier targets for rot-causing pathogens. Extreme heat or drought weakens defenses, making seeds vulnerable.
How to Fix It: 🌞 🌡️ Provide Shade & Mulch
- Use shade cloth (30–50%) during peak summer heat to reduce stress.
- Mulch heavily (3–4 inches) to regulate soil temperature and retain moisture.
🍽️ 🥗 Feed Smart for Resilience
- Balanced fertilizer (10-10-10 or 6-6-6) in early spring promotes strong growth.
- Avoid over-fertilizing—too much nitrogen = soft, rot-prone tissue.
- Micronutrients matter! Add zinc, manganese, and boron (common deficiencies in mango trees).
🚿 💦 Deep Watering During Drought
- Water slowly and deeply (1–2 hours per session) to encourage deep root growth.
- Drip irrigation is ideal—it delivers water directly to roots without wetting leaves (which can spread fungus).
💡 Pro Tip: Stressed trees recover faster with foliar sprays—try seaweed extract or fish emulsion for a quick nutrient boost.
Once you’ve treated the problem, stop it from coming back with these long-term strategies:
🔄 🌱 Rotate Planting Spots
- Avoid planting mango trees in the same location year after year—soil-borne fungi build up. Wait 3–4 years before replanting in the same spot.
🧹 🧽 Clean Up Debris Religiously
- Remove fallen fruit, leaves, and mulch from under the tree weekly during harvest season.
- Sterilize tools after pruning to prevent spreading spores.
🌧️ 🌦️ Plan for Rainy Seasons
- If your area gets heavy rains, install drainage tiles or swales to divert water away from the root zone.
- Prune for airflow—thin out dense branches to reduce humidity trapped in the canopy.
📅 ⏰ Time Sprays Right
- Start fungicide applications 2 weeks before monsoon season and repeat every 3–4 weeks.
- Avoid spraying when rain is forecast—it washes off treatments too quickly.
💡 Pro Tip: Healthy trees are your best defense—regularly check for pests (like fruit flies or scale), as they weaken trees and make them more susceptible to rot.
Final Thought: Mango seed rot doesn’t have to be a death sentence—early action and smart prevention can turn the tide. Act fast, adjust your care routine, and give your trees the support they need to bounce back stronger. 🚀🌳
Frequently asked questions
What does mango seed rot look like on a seedling?
Infected seedlings develop dark brown or black sunken spots that spread rapidly. The seed coat may soften into a mushy texture, and you’ll notice a foul, fermenting smell instead of the fresh earthy scent. In advanced cases, the entire seed turns slimy and collapses.
Can I save a seed that’s already rotting?
Only if you act immediately. Remove the seed from moist soil, trim away mushy areas with sterilized scissors, and treat the remaining healthy portion with a 10-minute hydrogen peroxide soak (3%). Plant it in fresh, sterilized soil and monitor closely for new signs of rot. Success depends on how much of the seed remains viable.
Why does my mango seed rot even after using sterile soil?
Contamination often comes from tools, water, or even your hands. Always sterilize pruners with 70% alcohol, use filtered or boiled water for planting, and wear gloves. Even airborne spores can land on fresh seeds—consider a light plastic cover over seedlings for the first 7 days to create a sterile microclimate.
How often should I check seedlings for early rot signs?
Inspect your seedlings every 2–3 days during warm, humid weather. Look for tiny dark specks or slight softening—these are early warning signs. In dry conditions, weekly checks suffice. Early detection gives you the best chance to isolate and treat affected seeds before the rot spreads.
Are there any natural fungicides that work for seed rot?
Yes! A neem oil spray (2% solution) or garlic extract (1 crushed clove per gallon of water) can prevent fungal growth. For active infections, try a baking soda spray (1 tbsp baking soda + 1 tsp dish soap per gallon of water). Apply every 5–7 days until the problem clears. Always test on a small area first.