How To
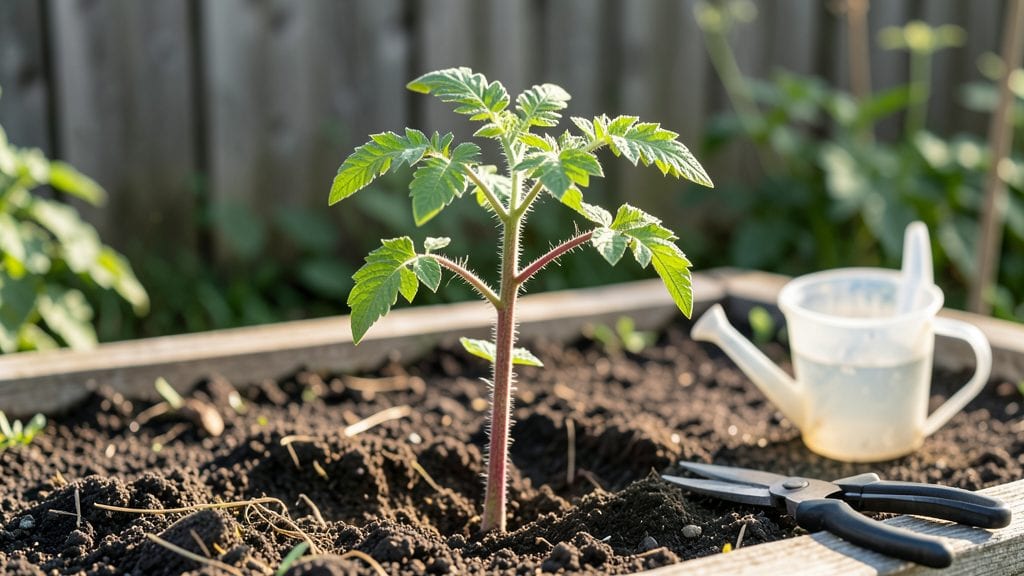
Tomato seedling leaves curling down is a common cry for help from stressed plants—but it’s usually fixable with the right moves. I’ve seen this happen to my seedlings when humidity drops too fast or when they’re fighting off tiny pests hiding in the soil.
The good news? Most cases turn around within 24-48 hours once you address the root cause.
First, check the soil moisture and air flow. Overwatering can suffocate roots while underwatering makes leaves crispy at the edges. A quick finger test—if the top inch feels bone-dry or soggy—tells you whether to water lightly or hold off.
Then inspect the undersides of leaves for spider mites or aphids, which love to hitch rides on seedlings and trigger curling as they suck out sap.
Once you’ve ruled out pests and water issues, focus on creating a stable microclimate. Pop seedlings under a humidity dome or cover them loosely with plastic wrap for a few days to mimic their greenhouse-like needs.
If your seedlings are already in the ground, a light layer of mulch keeps moisture steady and reduces stress. Within a week, those curled leaves should unfurl into strong, vibrant growth.
This fix works for seedlings in pots, trays, or even newly transplanted starts. The key is acting fast—most seedlings bounce back if you catch the problem early. Confession: I’ve let mine spiral before, but now I check them daily during their first two weeks of life.
Here’s how to spot the difference between reversible stress and a more serious issue like fungal disease.
Root Causes Behind Curling Leaves
Understanding why your tomato seedling leaves are curling downward is the first step to saving your plants. Here’s a breakdown of the most common culprits, explained in simple terms with actionable insights:
Tomato seedlings thrive in consistent temperatures between 60–75°F (15–24°C). When exposed to extreme heat or cold, their leaves curl as a survival mechanism to reduce water loss or protect delicate tissues.
- Heat Stress (Above 85°F/29°C): - High temperatures cause transpiration to spike, forcing leaves to curl inward to minimize water evaporation. - Look for: Wilting, crispy edges, or a glossy sheen on leaves. - Fix: Move seedlings to partial shade (e.g., under a sheer curtain or dappled sunlight).
Use reflective mulch or a lightweight shade cloth (30–50%) during peak afternoon sun.
- Cold Stress (Below 50°F/10°C): - Chilly nights or drafts slow down enzyme activity, stunting growth and causing curling. - Look for: Stunted growth, purplish stems, or leaves curling tightly downward. - Fix: Use row covers or mini greenhouses (like plastic domes) to trap heat.
Avoid placing seedlings near AC vents, windows, or doors that open to cold drafts.
Water is the lifeblood of seedlings, but imbalances trigger curling as a distress signal. Here’s how to decode the clues:
- Underwatering (Dry Soil):
- Leaves curl downward and inward to conserve moisture, often paired with dry, brittle edges.
- Fix:
- Water deeply until soil is moist 1–2 inches down (use a finger test).
- Mist leaves lightly in the morning to boost humidity (but avoid evening misting to prevent fungal risks).
- Use self-watering pots or drip irrigation for consistency.
- Overwatering (Soggy Roots):
- Excess water drowns roots, cutting off oxygen and causing yellowing between leaf veins + curling.
- Fix:
- Let the top inch of soil dry out between waterings.
- Ensure pots have drainage holes and use well-draining soil (mix potting soil with perlite or vermiculite).
- Avoid saucers under pots—empty excess water after 10 minutes.
Tiny pests can sap nutrients or inject toxins, forcing leaves to curl as a defense. Check for these common culprits:
- Aphids & Spider Mites:
- Aphids cluster on undersides, excreting sticky honeydew (leads to sooty mold).
- Spider mites spin webs and cause silver speckling on leaves.
- Look for: Curling + sticky residue or tiny moving dots.
- Fix:
- Blast off pests with a strong spray of water.
- Use neem oil (1 tsp per quart of water) or insecticidal soap (apply at dusk).
- Introduce beneficial insects like ladybugs or lacewings.
- Whiteflies:
- These white, moth-like pests flutter when disturbed and suck sap, causing yellowing and curling.
- Fix:
- Trap them with yellow sticky cards.
- Wipe leaves with soapy water or use kaolin clay as a barrier.
Tomato seedlings need balanced nutrients, but deficiencies or excesses can cause curling. Here’s how to spot the issue:
- Nitrogen Deficiency (Pale, Yellow Leaves):
- Leaves curl upward (not downward) but may also show weak stems and slow growth.
- Fix: Add a balanced fertilizer (10-10-10) or compost tea to the soil.
- Potassium Deficiency (Brown Leaf Edges):
- Curling often pairs with brown, crispy edges (a classic sign of potassium starvation).
- Fix: Feed with banana peel tea (rich in potassium) or a low-nitrogen fertilizer (like 5-10-10).
- Over-Fertilization (Salt Burn):
- Excess salts from fertilizer burn roots, causing curling + white crust on soil.
- Fix: Flush soil with water until it runs clear from the drainage hole. Reduce fertilizer strength by half.
Even gentle relocation can trigger curling as seedlings adjust to new conditions.
Watch for: - Wilting + curling within 24–48 hours of transplanting. - Fix: - Hardening off seedlings first: Gradually expose them to outdoor conditions over 5–7 days (start with 1 hour/day, increasing time). - Water deeply before and after transplanting. - Avoid moving seedlings during peak sun (transplant in early morning or late afternoon).
Fixing Curled Tomato Seedlings Fast
Now that you’ve identified the root cause of your tomato seedlings’ curled leaves, it’s time to take action! Here’s a step-by-step guide to reversing the damage and preventing future issues. Whether it’s environmental stress, pests, or nutrient imbalances, these solutions are practical and easy to implement.
If your seedlings are struggling due to inconsistent moisture, fixing their watering schedule is key.
🔥 Step 1: Check Soil Moisture Use your finger to test the top 1–2 inches of soil. If it feels dry, it’s time to water. If it’s soggy, hold off until it dries slightly.
🍳 Step 2: Water Deeply but Less Often Instead of light, frequent watering, give your seedlings a slow, deep drink once or twice a week. This encourages strong root growth and prevents wilting.
👨🍳 Step 3: Improve Drainage Ensure pots have drainage holes and use a well-draining potting mix. If your seedlings are in trays, avoid sitting them in standing water.
💡 Pro Tip: Water in the morning so excess moisture can evaporate during the day, reducing the risk of fungal diseases.
Extreme temperatures can cause leaves to curl as a protective response.
🔥 Step 1: Move Seedlings to a Consistent Spot Keep them in a location with temperatures between 65–75°F (18–24°C) during the day and no lower than 50°F (10°C) at night.
🍳 Step 2: Shield from Direct Sun or Cold Drafts If your seedlings are in a sunny window, provide partial shade with a sheer curtain. If near a drafty door or AC vent, relocate them to a more stable area.
👨🍳 Step 3: Use a Heat Mat (If Needed) For cooler climates, place seedlings on a seedling heat mat (set to 65–70°F/18–21°C) to keep roots warm without overheating the leaves.
✨ Prevention Tip: Acclimate seedlings gradually to outdoor conditions by hardening them off—start with 1–2 hours of sunlight per day and increase slowly.
Spider mites, aphids, and whiteflies can cause curling by sucking sap from leaves.
🔥 Step 1: Identify the Pest Hold a white sheet of paper beneath the seedlings and gently shake them. Tiny moving dots? Likely spider mites. Sticky residue? Aphids.
🍳 Step 2: Remove Pests Manually For small infestations, spray leaves with a strong stream of water to dislodge pests. Use a soft brush to wipe off aphids or mites.
👨🍳 Step 3: Apply Natural or Chemical Treatments
- Neem oil spray (1 tsp neem oil + 1 tsp mild soap + 1 quart water) – Spray every 5–7 days.
- Insecticidal soap – Follow label instructions for safe use.
- Introduce beneficial insects like ladybugs or lacewings to eat pests naturally.
💡 Pro Tip: Isolate infected seedlings to prevent spreading. Check the undersides of leaves—they’re a favorite hiding spot for pests!
Yellowing or curling leaves may signal a lack of essential nutrients.
🔥 Step 1: Test Your Soil Use a simple soil test kit to check pH and nutrient levels. Tomato seedlings thrive in slightly acidic soil (pH 6.0–6.8).
🍳 Step 2: Apply a Balanced Fertilizer
- For young seedlings: Use a low-nitrogen, high-phosphorus fertilizer (like 5-10-10) to encourage root growth.
- For established seedlings: Switch to a balanced fertilizer (10-10-10) once true leaves appear.
- Organic option: Diluted fish emulsion or compost tea provides gentle nutrition.
👨🍳 Step 3: Avoid Over-Fertilizing More isn’t always better! Start with half the recommended dose and monitor for improvement. Over-fertilizing can burn roots.
🎯 Prevention Tip: Mix compost or worm castings into the soil before planting to provide slow-release nutrients.
If seedlings were crowded or recently transplanted, curling leaves may indicate stress.
🔥 Step 1: Thin Out Seedlings Ensure each seedling has at least 2–3 inches of space between them. Snip excess seedlings at soil level with clean scissors.
🍳 Step 2: Support Weak Stems If leaves are curling due to floppy stems, stake or cage seedlings early. Use toothpicks or small stakes to prop them up gently.
👨🍳 Step 3: Let Them Recover After transplanting, avoid disturbing the roots. Keep soil moist and provide bright, indirect light for a few days to help them adjust.
🌡️ Pro Tip: If transplanting outdoors, do it on a cloudy day to reduce stress from direct sunlight.
Final Thought: Most curled leaves can bounce back in 3–7 days with the right care. Monitor your seedlings closely, and don’t hesitate to adjust your approach if symptoms persist. Happy growing! 🍅🌱
Frequently asked questions
Why do tomato seedlings curl leaves downward instead of upward?
Downward curling usually signals environmental stress like underwatering, heat stress, or pest damage. Unlike upward curling (often from overwatering or nitrogen deficiency), downward curling is your plant’s way of protecting itself by reducing surface area exposed to extreme conditions. Check soil moisture first—if it’s dry, water deeply until soil is moist 1–2 inches down.
Can I save tomato seedlings if their leaves are curling badly?
Yes! Most seedlings recover within 3–7 days if you address the root cause. Start by moving them to a stable temperature (65–75°F) and checking for pests like spider mites (look for tiny webs). For water issues, adjust to deep but infrequent watering—avoid soggy soil. If leaves are crispy, trim the damaged parts to redirect energy to new growth.
Is curling always a bad sign, or could it be normal?
Mild curling can be normal during transplant shock or when seedlings adjust to new light conditions. However, persistent curling—especially with yellowing, wilting, or sticky residue—indicates stress. Healthy seedlings should have firm, slightly glossy leaves with no curling after 24 hours of stable conditions. Monitor closely for 2–3 days to distinguish normal adjustment from trouble.
How do I tell if my seedlings are curling from pests vs. water issues?
Pests (like aphids or spider mites) cause sticky residue or tiny moving dots on leaf undersides, while water issues show dry edges (underwatering) or yellowing between veins (overwatering). Shake seedlings over white paper—if you see tiny insects, it’s pests. For water, press soil: if it’s bone-dry, water; if soggy, let it dry slightly.
Will curled leaves grow back straight?
Yes! Once the stressor is removed, new growth will emerge straight. Focus on preventing further damage: use humidity domes for indoor seedlings, mulch outdoors, and avoid sudden temperature swings. The youngest leaves (near the stem) are most resilient—trim only the most damaged outer leaves to encourage recovery. With proper care, your seedlings will bounce back within 1–2 weeks.