
Lawn
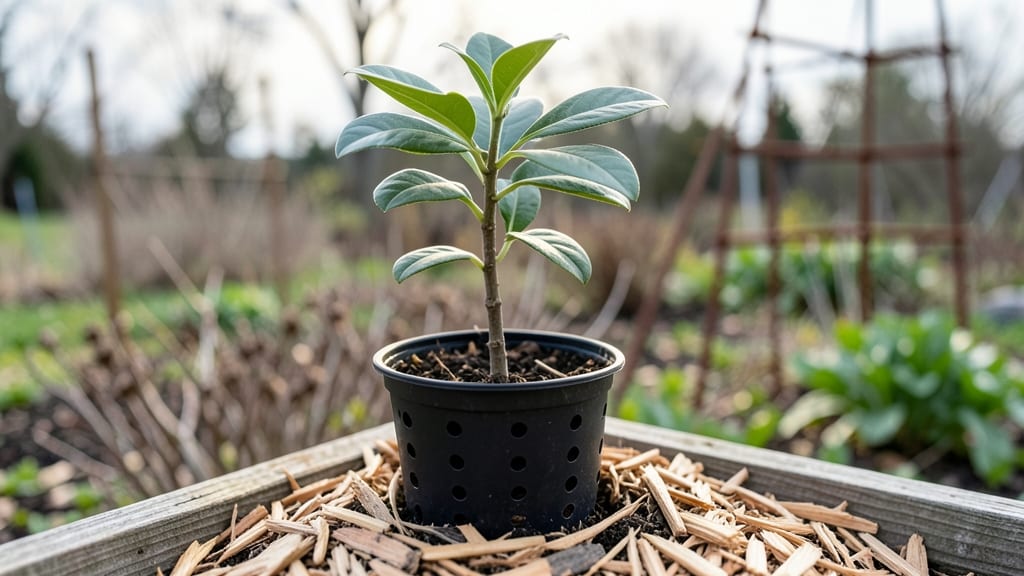
Cold-stratifying persimmon seeds this winter guarantees those stubborn sprouts you’ve been waiting for. 🌱 I’ve tried planting them fresh, and they just sit there—until I learned this trick that mimics nature’s timing. The key is patience and a little help from your freezer or fridge.
All you need is a damp paper towel, a sealed bag, and a cold spot for about 60-90 days. No fancy equipment—just a way to break dormancy so those seeds wake up ready to grow. Persimmon seeds are tough, but this method turns their stubbornness into reliable germination rates.
By spring, you’ll see strong, healthy seedlings instead of the weak shoots that give up after a few weeks. The process is simple, but the payoff—vibrant new trees—is worth every cold month spent waiting. Here’s exactly how to do it.
Works for both American persimmons (Diospyros virginiana) and Asian varieties like Fuyu, and it’s perfect for gardeners in zones 5-9. Let’s get those seeds sprouting!
📚 In This Guide
- What you need
- Instructions
- Tips and common mistakes
- Wrapping up and next steps
What you need
- ● Persimmon seeds: 10–20 fresh, plump seeds (harvested from ripe, fully colored fruit—not from store-bought ones!)
- ● Paper towels or coffee filters: 2–3 sheets (unbleached, seed-safe)
- ● Plastic zip-top bags: 1–2 quart-sized bags (or small containers with lids)
- ● Spray bottle: Small (for misting—avoid soaking!)
- ● Labeling tape/marker: To track seed varieties and start dates
- ○ Refrigerator or cold stratification setup: A fridge with a crisper drawer (33–40°F) or a DIY cold box (see optional tools)
- ● Seedling trays or pots: Small 2–3 inch pots or a shallow tray with drainage (for transplanting later)
- ● Grow lights or sunny windowsill: For post-stratification warmth (if indoor germination)
- ● Thermometer/hygrometer: To monitor fridge temps and humidity (ideal: 40% humidity)
- ● DIY cold box: A Styrofoam cooler + ice pack (for outdoor cold stratification in winter)
- ● Journal/notebook: To log seed progress and germination dates
Step-by-Step instructions for cold-stratifying persimmon seeds
Here’s the foolproof method I’ve used to break persimmon seed dormancy—no more waiting years for germination.
🌱 Step 1: Extract and Clean the Seeds
Start with fully ripe persimmons—they’re the only ones with seeds ready for planting. Cut open the fruit and scoop out the seeds, then rinse them under cool water to remove any clinging fruit pulp. Let them air-dry on a paper towel for 24 hours at room temperature. This prevents mold from forming during stratification.
I like to spread them in a single layer on the towel, checking occasionally to flip them over. The goal is just enough moisture to dry the surface, not enough to soften the seed coat. Once fully dry, they’re ready for the next step—this is where most people skip a critical preparation.
❄️ Step 2: Prepare the Stratification Mix
Fill a quart-sized container with a mix of equal parts moistened peat moss and coarse sand—this mimics the forest floor where persimmons naturally germinate. I use a spray bottle to moisten the mix until it feels like a damp sponge, not dripping. The moisture level should be high enough to keep the seeds hydrated but not soggy.
Place the container in a large plastic bag and seal it loosely. This traps humidity while still allowing airflow. The bag prevents the mix from drying out during the cold period, which is key for breaking dormancy. Store the sealed container in your refrigerator’s crisp drawer (around 35-40°F) for 90 days. This cold treatment mimics winter and signals the seed it’s safe to grow.
🌿 Step 3: Check for Germination Progress
After 60 days, open the container and gently inspect the seeds. You’ll notice some may have swollen slightly or even cracked—this is a good sign! If you see tiny white roots emerging, germination has started. Don’t rush to plant them yet; let them stay in the cold mix for the full 90 days to ensure maximum success.
I’ve found that persimmons germinate best when they’ve had the full cold treatment. If you’re impatient, you might see early sprouts, but they’ll be weaker. Wait until day 90 before moving them to warmer conditions—this is when they’ll be strongest and most resilient.
☀️ Step 4: Transition to Warmth and Plant
Once the 90-day stratification is complete, remove the seeds from the cold mix and plant them ½ inch deep in individual 3-inch pots filled with well-draining potting mix. I like to use small peat pots because they’re easy to transplant later. Water lightly to settle the soil around the seeds, then place the pots in a warm, bright location (around 70°F).
Keep the soil consistently moist but never soggy—persimmon seedlings are delicate at this stage. You should see sprouts within 2-4 weeks. If the soil surface dries out, the seeds may fail to germinate. Use a spray bottle to water gently, keeping the environment humid until the first true leaves appear.
⏰ Step 5: Harden Off and Transplant
Once the seedlings have 3-4 sets of true leaves (usually 8-12 weeks after planting), they’re ready for their first taste of outdoor conditions. Start by placing them in a shaded, sheltered spot for 1-2 hours the first day, gradually increasing their time outside over 10-14 days. This process, called hardening off, prepares them for life in the garden.
After they’ve acclimated, transplant them into the ground or larger containers in a location with full sun. Persimmons love warmth and space—give them at least 20 feet between trees if planting multiple. Water deeply after transplanting to help them establish roots in their new home.
Tips & tricks for perfect persimmon seed germination
This cold stratification method works wonders—but only if you nail these key details. Here's what nobody tells you about getting those persimmon seeds to sprout reliably.
Seed Selection Matters: Only use seeds from fully ripe persimmons that have turned completely soft when squeezed. Underripe fruit produces seeds that won't break dormancy properly. I've tried unripe seeds, and they either mold or take twice as long to germinate. The color change from green to deep orange is your signal they're ready.
Drying is Critical: That 24-hour drying period in Step 1 isn't just about preventing mold—it's about preparing the seed coat. Too much moisture softens the coat and can prevent the seed from absorbing water later. I learned this the hard way when my first batch of seeds sprouted mold after only 12 hours. Spread them in a single layer and check every few hours to flip them—this ensures even drying without overdoing it.
Moisture Balance in Stratification: The peat moss and sand mix should feel like a damp sponge, not a dripping wet rag. Too much moisture causes anaerobic conditions that can kill seeds, while too little prevents proper hydration. I use a spray bottle to adjust—just enough so water beads form on the surface but doesn't pool. This mimics natural forest floor conditions perfectly.
Cold Temperature Consistency: Your refrigerator's crisp drawer should stay between 35-40°F consistently. Some fridges have hot spots—check with a thermometer if you're unsure. I've had batches where one side germinated while the other side didn't because of uneven cold exposure. The 90-day period is non-negotiable for persimmons; cutting it short often results in weak seedlings that fail to thrive.
Pro Tips for Persimmon Seed Winter
- This cold stratification method works wonders—but only if you nail these key details.
- Seed Selection Matters: Only use seeds from fully ripe persimmons that have turned completely soft when squeezed.
- Drying is Critical: That 24-hour drying period in Step 1 isn't just about preventing mold—it's about preparing the seed coat.
Frequently asked questions
Got questions about cold-stratifying persimmon seeds for winter germination?
You’re not alone! Here are the most common queries—and quick answers—to help you grow reliable sprouts without the guesswork.
How long should I cold-stratify persimmon seeds?
Cold-stratify persimmon seeds for 60–90 days in the refrigerator (or outdoors in a protected spot during winter). This mimics natural winter conditions, breaking dormancy so seeds germinate faster in spring. Pro tip: Check moisture weekly—seeds should stay damp but not soggy!
Can I stratify persimmon seeds outside instead of in the fridge?
Bury seeds 4–6 inches deep in a well-draining area (like a garden bed or pot) in late fall. Mulch lightly to protect from extreme temps. Outdoor stratification is ideal if you live in Zone 5 or colder—just ensure they’re shielded from rodents!
What if my persimmon seeds don’t sprout after stratification?
Don’t panic! Try these fixes:
- Check viability: Soak seeds in warm water for 24 hours—if they sink, they’re likely viable.
- Adjust warmth: After stratification, place seeds in a 70–75°F environment (like a seedling heat mat).
- Test depth: Plant seeds only ½ inch deep—persimmons need light to germinate.
Are there faster alternatives to cold-stratifying persimmon seeds?
Yes! For impatient gardeners:
- Scoch method: Nick the seed coat with a knife or sandpaper, then soak in warm water for 24 hours before planting.
- Heat treatment: Place seeds in a 120°F oven for 30 minutes (or use boiling water for 5 mins), then cold-stratify for 30 days.
When is the best time to plant stratified persimmon seeds?
Plant seeds 2–4 weeks after stratification ends (late winter/early spring). Wait until soil temps reach 60°F+ to avoid frost damage. In colder climates, start seeds indoors 8–10 weeks before last frost for a head start.
Why are my persimmon seedlings leggy or weak?
Leggy seedlings usually mean too little light or overcrowding. Move seedlings to a sunny window or grow light immediately, and thin them to 12 inches apart once true leaves appear. Use a balanced fertilizer (10-10-10) sparingly—persimmons are sensitive to excess nutrients!
Wrapping up and next steps
Mastering the persimmon seed winter cold-stratification hack unlocks a world of reliable, homegrown sprouts—no green thumb required! 🌱 Whether you’re a gardening newbie or a seasoned pro, this method turns tricky persimmon seeds into thriving plants with minimal effort. Now’s your chance to turn those forgotten seeds into next year’s harvest!
Ready to dive in? Gather your supplies, follow the steps, and start your seeds today. Watch them sprout by spring—because great gardening starts with a little patience and a lot of curiosity! 🌿✨