Lawn
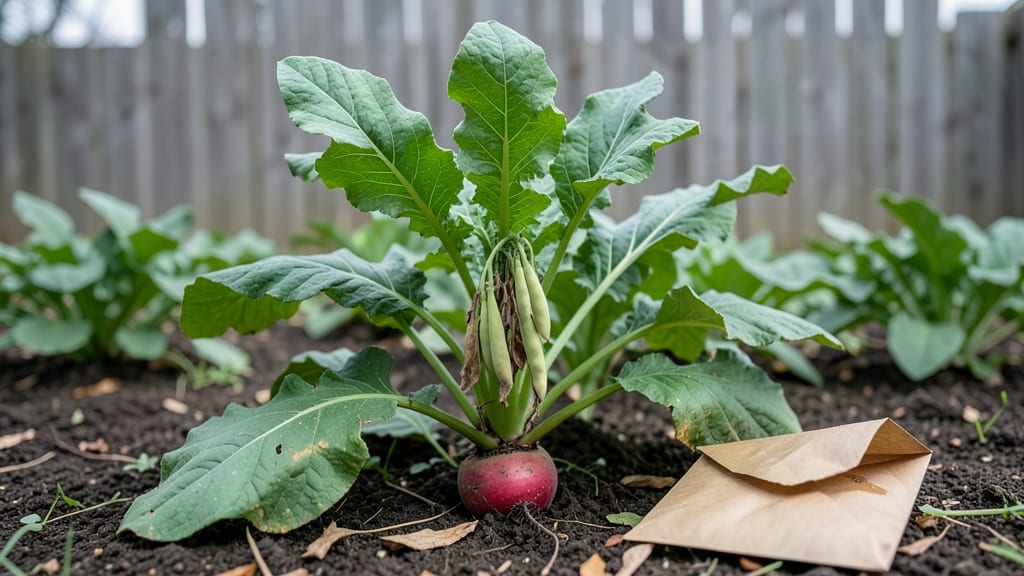
Saving radish seeds from your harvest turns last year’s scraps into next season’s bounty—if you do it right. 🌱 I’ve saved seeds for years, and radishes are the easiest crop to master once you know the timing and tricks to keep them viable.
The key isn’t just pulling seeds from pods; it’s catching them at the perfect moment and storing them properly so they’ll sprout strong when you replant.
You’ll need just a few simple tools: a sharp knife or scissors, paper towels or a mesh bag for drying, and a cool, dark place for storage. The real work happens in the garden—letting radishes bolt, then harvesting the pods before they crack open.
Most people skip this step, but those few extra days make all the difference in seed quality. Once you’ve got the pods, drying them correctly ensures they’ll last for years.
By following these steps, you’ll end up with plump, dark seeds that stay fresh for planting seasons to come. The satisfaction of growing radishes from seeds you saved yourself—with flavors and varieties you love—is unmatched.
Plus, you’ll cut costs and reduce waste by keeping the cycle going in your own backyard.
This method works for all radish types, from spicy daikons to mild cherry bells, and adapts to both small containers and full garden beds. Once you’ve got the hang of it, seed saving becomes a rewarding part of your growing routine. Let’s get those seeds ready for next year!
📚 In This Guide
- What you need
- Instructions
- Tips and common mistakes
- Wrapping up and next steps
What you need
- ● Mature radish plants: Choose open-pollinated varieties (avoid hybrids like ‘Cherry Belle’).
- ● Select 3-5 healthy, disease-free plants with plump, fully developed pods.
- ● Pruning shears or sharp scissors: 1 pair (sterilized with rubbing alcohol).
- ● Paper bags or breathable mesh bags: 2-3 (for seed drying).
- ● Labeling tags & permanent marker: 1 pack (to track varieties/years).
- ● Seed envelope or airtight container: 1-2 (for long-term storage).
- ○ Desiccant packets (optional but recommended): 1-2 (for moisture control).
- ● Seed catalog or notebook: To log harvest details (e.g., variety, date, location).
- ● Humidity pack or silica gel: For extra moisture protection in storage.
- ● Fine-mesh strainer: If cleaning seeds post-drying (e.g., removing chaff).
- ● Garden journal: To note weather conditions or plant quirks affecting seed quality.
Step-by-Step guide to saving radish seeds for next year
Here's how I preserve radish seeds—simple, reliable, and ready for replanting.
🌱 Step 1: Select the Best Plants for Seed Saving
Choose the healthiest, most vigorous radishes from your garden—look for plants with strong stems, no signs of disease, and the best flavor. I always pick the ones that matured just a little slower than the rest, as they tend to be more established. Avoid any radishes that show signs of pests, rot, or poor growth, as these can pass on weak traits or diseases to next year's seeds.
Let the radishes mature fully on the plant instead of harvesting them early. You'll know they're ready when the pods on the plant turn dry and papery, usually about 2-3 weeks after the radishes would normally be ready to harvest. This extra time allows the seeds to fully develop inside the pods.
🌿 Step 2: Harvest and Dry the Seed Pods
Carefully cut the seed pods from the plant, leaving about 1 inch of stem attached. This helps prevent the pods from breaking open while drying. Spread them out in a single layer on a clean, dry surface—like a mesh screen or a piece of cardboard—in a warm, dry place. I like to use a well-ventilated area with indirect sunlight to avoid overheating.
Let the pods dry completely for about 1-2 weeks. You'll know they're ready when the pods turn completely brown and crispy, and the seeds inside rattle when you shake them. If you see any signs of mold or moisture, move the pods to a drier location immediately. This drying process is crucial—wet seeds won't store well and may spoil.
✂️ Step 3: Extract and Clean the Seeds
Once the pods are fully dry, gently crush them by hand or with a small hammer to release the seeds. I find a clean paper towel works great for catching the seeds as they fall out. Avoid using metal tools, as they can damage the seeds or introduce moisture. Remove any debris, like pod fragments or plant matter, by sifting the seeds through a fine mesh strainer or by gently blowing on them.
Spread the cleaned seeds on a fresh paper towel or mesh screen and let them dry for another 24-48 hours to ensure all moisture is gone. This extra step prevents mold during storage. You'll see the seeds become slightly darker and harder as they dry completely. Store them in a cool, dry place until you're ready to plant them next season.
🪴 Step 4: Store Seeds Properly for Long-Term Viability
Transfer the fully dried seeds into a small, airtight container—like a glass jar or a resealable plastic bag with a desiccant packet. Label the container with the radish variety and the year saved. I like to include a note about any special traits, like disease resistance or flavor, so I remember why I saved them in the first place.
Store the container in a cool, dark place, like a pantry or refrigerator, where the temperature stays between 35-50°F. Radish seeds can remain viable for 3-5 years under these conditions, though they may lose some vigor over time. Check the seeds annually to ensure they're still dry and free from moisture or pests. Proper storage keeps them ready for next year's planting.
Tips & tricks for perfect radish seed preservation
Preserving radish seeds successfully comes down to patience and attention to detail—here's what I've learned to ensure maximum viability.
Selection Matters: In Step 1, when choosing your healthiest radishes, focus on plants that show no signs of stress or disease. I've found that radishes with slightly larger pods tend to produce more seeds. If you're unsure which plants to select, look for ones with the most uniform color and shape—they're often the most vigorous. The extra 2-3 weeks of maturation on the plant is crucial; don't rush this step even if your radishes look perfect for eating.
Drying Strategy: The 1-2 week drying period in Step 2 is where most people go wrong. I recommend placing your seed pods in a location with good airflow but no direct sunlight—like a mesh screen over a cardboard box. If you notice any pods developing mold during this time, remove them immediately and move the remaining pods to a drier spot. Complete drying is essential—if seeds aren't fully dry, they'll develop mold during storage and become unusable.
Storage Wisdom: When storing your seeds in Step 4, I can't emphasize enough how important the 35-50°F temperature range is. Your refrigerator's crisper drawer is perfect for this! I've had seeds last up to 5 years when stored properly, though they may lose some germination vigor after 3 years. Always include a small packet of silica gel or a desiccant in your storage container—this helps absorb any residual moisture that could cause spoilage.
Make-Ahead Move: You can actually prep your seed pods up to 24-48 hours before the final drying step if needed. Just store them in a paper bag in a cool, dry place between steps. This is helpful if you're expecting rain or need to pause the process. The key is maintaining that dry environment throughout—even a few hours of dampness can set you back days in the drying process.
Pro Tips for Radish Seed Saving
- Preserving radish seeds successfully comes down to patience and attention to detail—here's what I've learned to ensure maximum viability.
- Selection Matters: In Step 1, when choosing your healthiest radishes, focus on plants that show no signs of stress or disease.
- Drying Strategy: The 1-2 week drying period in Step 2 is where most people go wrong.
Frequently asked questions
Got questions about radish seed saving?
You’re not alone! Whether you’re a first-time gardener or a seasoned green thumb, these answers cover the most common concerns—plus a few pro tips to ensure your seeds stay fresh and ready for next season.
How do I know when radish seeds are ready to harvest?
Radish seeds are ready to harvest when the pods turn brown and dry out—usually 60–90 days after planting. If you wait too long, the pods may shatter, scattering seeds everywhere. A gentle tug should release the seeds easily. Pro tip: Harvest on a dry day to avoid mold!
Can I save radish seeds from store-bought radishes?
Nope! Store-bought radishes are often hybrid varieties, meaning their seeds won’t grow true to type. For seed saving, plant heirloom or open-pollinated radishes (like ‘French Breakfast’ or ‘Cherry Belle’). Always check seed packets for a “O.P.” label!
How long can I store radish seeds before they lose viability?
Radish seeds stay viable for 2–4 years if stored properly in a cool, dry place (like a sealed container in the fridge). Test germination by planting a few seeds—if <70% sprout, it’s time to replenish your stash. Pro tip: Label seeds with the harvest date!
Will cross-pollination ruin my radish seeds?
Radishes are self-pollinating, so cross-pollination is rare—but if you grow multiple varieties nearby, isolate them by 10–20 feet to prevent accidental mixing. For extra safety, hand-pollinate with a paintbrush if you’re saving seeds from rare types.
What do I do if my radish seeds don’t germinate?
Try these fixes:
- Check seed freshness—old seeds may need scarification (lightly sanding the seed coat).
- Soak seeds overnight in warm water to soften the shell.
- Ensure soil temps are 50–70°F—radishes need warmth to sprout!
- Test a few seeds in damp paper towels to rule out mold or rot.
Wrapping up and next steps
Saving radish seeds is a rewarding way to preserve heirloom varieties and connect with the roots of your garden—literally! 🌱 With patience and a few simple steps, you’ve learned how to extend seed viability, avoid common pitfalls, and even troubleshoot issues like bolting or poor germination.
Now that you’re equipped with the knowledge, there’s no better time to put it into action.
Start small—grow a few radishes this season, let them bolt, and practice seed saving. Before you know it, you’ll be sharing your homegrown seeds with fellow gardeners or even experimenting with new varieties. Happy growing!