
Aphids
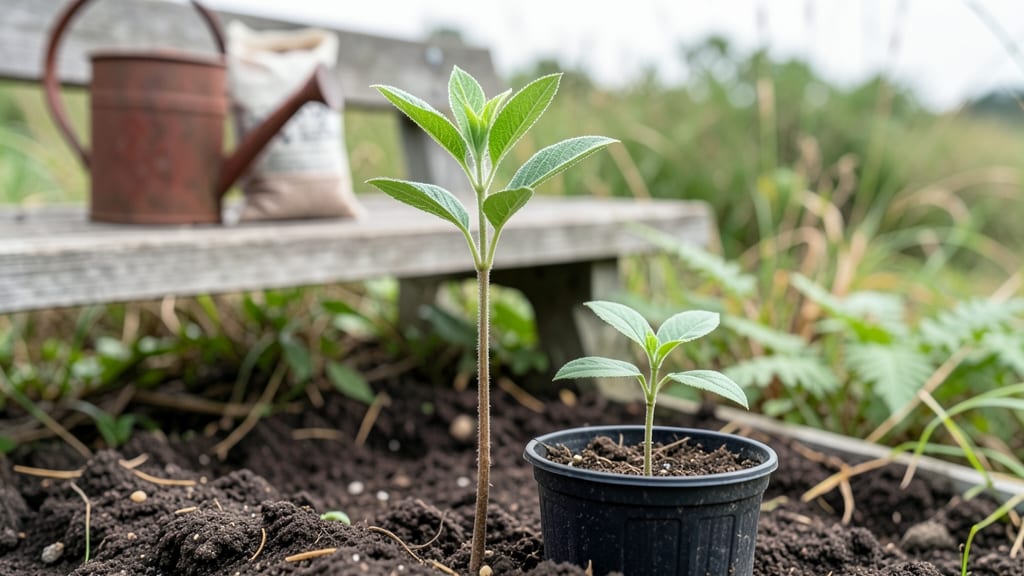
Growing roselle hibiscus seedlings into thriving plants starts with the right approach—one that keeps pests at bay while you nurture bold, deep-green leaves and vibrant blooms. ✨ I’ve learned that roselle thrives when you mimic its tropical roots, even in warmer climates, and the key is in the soil, water, and timing.
The secret to pest-resistant growth begins with well-draining soil rich in organic matter—think 60% compost mixed with 40% potting soil. Place seedlings in full sun (6+ hours daily) and water only when the top inch feels dry, avoiding soggy roots that attract aphids.
Spacing matters too: give each plant 2-3 feet of room to stretch out without competing.
By the time your seedlings hit 6 inches tall, you’ll notice sturdy stems and glossy leaves that naturally deter pests. Prune leggy growth early to encourage bushier plants, and harvest leaves as needed—just avoid taking more than a third at once.
The payoff? A plant that rewards patience with crisp, tangy leaves perfect for tea or cooking.
This method works best in zones 9-11, but container growing extends it to cooler climates. Keep an eye out for spider mites (they love dry conditions) and treat with neem oil if needed. With these steps, your roselle will grow lush, productive, and resilient—no chemical sprays required.
📚 In This Guide
- What you need
- Instructions
- Tips and common mistakes
- Wrapping up and next steps
What you need
- ● Roselle hibiscus seeds: 10–20 seeds (organic, non-GMO preferred for best results).
- ● Seed-starting mix: 2–3 cups of sterile, well-draining potting soil (avoid garden soil—it may contain pests!).
- ● Seed trays or small pots: 4–6 biodegradable or plastic cell trays (2–3 inches deep).
- ● Grow lights or sunny windowsill: A full-spectrum LED grow light (12–16 hours/day) or a south-facing window with bright, indirect light.
- ● Spray bottle: For gentle watering (avoid over-saturating seeds!).
- ● Plastic wrap or humidity dome: To retain moisture while seeds germinate.
- ○ Fertilizer (optional but helpful): A balanced, water-soluble fertilizer (5-10-5 ratio) for seedlings.
- ● Tweezers or small spoon: For carefully placing seeds in trays.
- ● Pencil or toothpick: To create small holes (¼ inch deep) for seeds.
- ● Pest control (preventative): Neem oil (1 tsp per quart of water) – spray lightly on seedlings to deter aphids.
- ● Insecticidal soap (ready-to-use) – for early pest outbreaks.
- ● Hardening-off supplies (later stage): Shade cloth (30–50%) – to acclimate seedlings to outdoor conditions.
- ● Sturdy pots or garden bed – for transplanting (6–8 inches deep).
Step-by-Step instructions for growing roselle hibiscus seedlings indoors
Here's my foolproof method for raising strong, pest-resistant roselle seedlings that'll thrive from seed to harvest.
🌱 Step 1: Prepare Containers and Seed Starting Mix
Fill four 3-inch diameter biodegradable pots with seed-starting mix (never garden soil—it's too dense). Moisten the mix until it's damp like a wrung-out sponge. I tap the pots gently to settle the soil without compacting it, creating a perfect seedbed for those tiny roselle seeds.
Roselle seeds germinate best in warm soil, so place the pots in a shallow tray filled with 1 inch of water. The bottom heat from the water will help kickstart germination. Keep the tray in a spot with 70-80°F temperatures—your kitchen counter near the stove works great if it stays warm.
🌱 Step 2: Sow Seeds and Maintain Moisture
Plant 2 seeds per pot at a depth of just ¼ inch. Press them lightly into the soil—don't bury them too deep, or they'll struggle to surface. Cover the pots with clear plastic wrap to trap warmth and humidity, which speeds up germination.
Check daily but resist watering until you see condensation on the plastic. Once 50% of seeds sprout (usually in 7-14 days), remove the plastic immediately to prevent fungal issues. You'll know it's time when tiny green sprouts poke through the soil—don't wait until they're fully emerged.
☀️ Step 3: Provide Bright Light and Prevent Leggy Growth
Move seedlings to a south-facing window or under a grow light within 24 hours of sprouting. Roselle seedlings need 12-14 hours of light daily to prevent them from stretching toward the light (that's when they get "leggy"). If your seedlings start looking tall and thin, your light source is too far away.
I keep the grow light 3-4 inches above the seedlings and raise it as they grow. Rotate the pots quarter-turn daily so they grow straight instead of leaning. You'll see strong, compact growth when leaves are dark green and spaced closely together.
💧 Step 4: Thin Seedlings and Harden Off
When seedlings have 2-3 true leaves (not the first tiny seed leaves), thin to the strongest plant per pot. Snip the weaker seedling at the base with clean scissors—don't pull, or you'll disturb the roots of the remaining plant. This ensures your roselle gets all the nutrients without competition.
Start hardening off by placing seedlings outside in partial shade for 1 hour daily two weeks before your last frost. Gradually increase time and sun exposure over 10 days. You'll know they're ready for the garden when they handle a full day outside without wilting—just give them a little shade at first to avoid sunburn.
✂️ Step 5: Transplant and Maintain Pest Resistance
Plant hardened-off seedlings 12-18 inches apart in well-draining soil with compost mixed in. Water deeply at the base to settle roots. Roselle thrives in full sun, so choose a spot that gets 6+ hours daily. I pinch off the first few flowers to encourage bushier growth—this gives you more harvests later.
Watch for aphids early on—they love new roselle growth. Spray leaves with neem oil solution at first sign of pests. You'll know it's working when the aphids disappear within 2-3 days. Keep soil moist but not soggy, and you'll have strong, healthy plants ready for harvest in 4-6 months.
Tips & tricks for perfect roselle hibiscus seedlings
These simple strategies will help you grow robust, pest-resistant roselle seedlings that thrive from seed to harvest.
Warmth is Key: The 70-80°F temperature range in Step 1 is crucial for germination. If your kitchen runs cooler, place the seed tray on top of your fridge or use a seedling heat mat. I've seen germination rates drop dramatically when soil stays below 70°F—patience pays off, but don't let it get too cold.
Lighting Strategy: In Step 3, when you're providing 12-14 hours of light daily, position your grow light so it's just 3-4 inches above the seedlings. I use a simple timer to automate the light cycle—this consistency prevents leggy growth. Rotate your pots daily to ensure even growth, and you'll notice the leaves develop that perfect dark green color we want.
Thinning Technique: When thinning in Step 4, use clean scissors to snip at the base rather than pulling. This prevents disturbing the roots of your remaining plant. I've found that thinning at the 2-3 true leaves stage gives your roselle the best chance to grow strong without competition for nutrients.
Harden Off Gradually: The 1-hour daily hardening off in Step 4 should increase by just 30 minutes every 2-3 days. I start with partial shade and gradually move to full sun exposure. This slow transition prevents shock and helps your seedlings develop the resilience they need for outdoor conditions.
Pro Tips for Roselle Hibiscus Seedling
- These simple strategies will help you grow robust, pest-resistant roselle seedlings that thrive from seed to harvest.
- Warmth is Key: The 70-80°F temperature range in Step 1 is crucial for germination.
- Lighting Strategy: In Step 3, when you're providing 12-14 hours of light daily, position your grow light so it's just 3-4 inches above the seedlings.
Frequently asked questions
Got questions about growing roselle hibiscus seedlings?
You’re not alone! Here are answers to the most common concerns—from pests to timing—to help you cultivate thriving plants with ease.
How do I protect roselle hibiscus seedlings from aphids?
Aphids love young seedlings, but roselle hibiscus is naturally resistant—especially if grown from seed! Start with healthy soil (rich in organic matter) to boost plant vigor. If pests appear, spray with neem oil or introduce ladybugs. Prune heavily infested leaves and isolate affected plants to prevent spread. Pro tip: Encourage beneficial insects like lacewings by planting marigolds nearby!
How long does it take for roselle hibiscus seedlings to germinate?
Germination usually takes 7–14 days in warm (70–85°F) and moist conditions. Keep soil consistently damp (not soggy) and place seeds in indirect light until sprouts appear. If germination takes longer, check soil moisture or warmth—roselle seeds need consistent conditions to break dormancy. Note: Older seeds may take up to 3 weeks.
Can I grow roselle hibiscus from cuttings instead of seeds?
Yes! Roselle hibiscus propagates well from stem cuttings. Take 4–6 inch cuttings from healthy, disease-free plants, remove lower leaves, and dip in rooting hormone. Plant in moist perlite or sand, then cover with a plastic bag to retain humidity. Roots form in 2–4 weeks—just keep the soil damp and provide bright, indirect light. Bonus: Cuttings mature faster than seedlings!
Why are my roselle hibiscus seedlings turning yellow?
Yellowing leaves (chlorosis) often signal overwatering, nutrient deficiency, or poor drainage. Check soil moisture—roselle prefers well-draining soil. Amend with compost or a balanced fertilizer (like 10-10-10) if leaves are pale. Yellowing at the bottom? It’s likely overwatering. Top leaves yellowing? Try more sunlight or iron supplements. Fix it fast: Adjust watering and repot if needed.
What’s the best climate for growing roselle hibiscus seedlings?
Roselle thrives in tropical to subtropical climates (USDA zones 9–11) but can be grown as an annual in cooler areas. Seedlings need warmth (60°F+) and humidity. Start indoors 6–8 weeks before last frost or sow directly after soil warms. If growing outdoors in cooler zones, use row covers or move pots indoors at night. Key: Avoid frost—seedlings are sensitive!
Wrapping up and next steps
Growing a roselle hibiscus seedling from seed to harvest is a rewarding journey—especially when you prioritize pest-resistant strategies like companion planting, organic sprays, and proactive care.
With the right tools, patience, and a little green thumb, you’ll enjoy a thriving plant that’s not only beautiful but also resilient against aphids and other common pests. 🌱
Ready to take the next step? Start by planting your seedling in well-prepared soil and keep an eye out for early signs of trouble. Before you know it, you’ll be harvesting vibrant roselle flowers for tea, cooking, or natural remedies—all while basking in the pride of your pest-proof garden success!