Planting
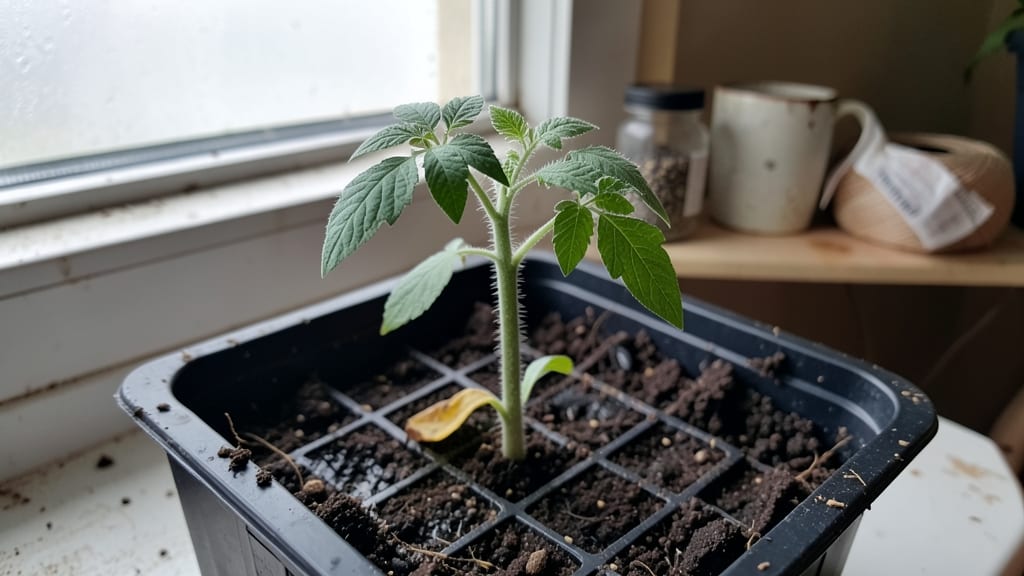
When seeds are sown at the perfect moment, you’re not just planting—you’re setting the stage for a garden that bursts with life. 🌱 I’ve watched seed packets promise "easy growing," only to see them fail when timing, soil, or light go wrong.
The difference between a thriving sprout and a sad, wilted seedling often comes down to these small details: when to start, how deep to bury, and what to do once that first green shoot appears.
Start with the right soil—light, crumbly, and moist (not soggy)—and match your seed’s needs to your climate. Most seeds need to be buried only twice their width deep, but delicate ones like snapdragons barely need covering at all.
A simple spray bottle keeps things evenly damp, and a heat mat can speed up germination for slow starters like tomatoes. The goal? Warmth, moisture, and patience—no rushing.
Outdoor sowing means waiting for the last frost date in your zone, while indoor starts need light (a sunny windowsill or grow light) to prevent leggy seedlings. Once sprouts appear, thin them properly—crowded plants compete for nutrients, leaving you with weak, spindly growth.
A pair of scissors and careful spacing (check the seed packet!) is all it takes to give each seedling room to thrive.
Even experienced gardeners forget to monitor moisture or overcrowd their starts. My first batch of basil ended up in the compost because I drowned them with enthusiasm. The key is consistency: check soil daily, avoid cold drafts, and never let the tray dry out.
With these basics, you’ll go from seed to seedling in weeks—not months—of guesswork.
📚 In This Guide
- What you need
- Instructions
- Tips and common mistakes
- Wrapping up and next steps
What you need
- ● Seeds: High-quality, fresh seeds (check the packaging for germination rates—aim for 80%+). Quantity depends on your project (e.g., 50–100 seeds for small tests, 500+ for large-scale planting).
- ● Seed Starting Mix: Lightweight, sterile potting mix (e.g., Pro-Mix or FoxFarm Seedling Mix). 1–2 gallons for small trays, 5+ gallons for larger setups.
- ● Containers: Seed trays (with drainage holes) or biodegradable pots (e.g., peat or coconut fiber).
- ○ Clear plastic domes or humidity tents (optional but highly recommended for moisture retention).
- ● Watering Can or Spray Bottle: With a fine mist nozzle to avoid disturbing seeds.
- ● Grow Lights or Sunny Windowsill: Full-spectrum LED grow lights (e.g., Spectrum 9000 Series) or a south-facing window with 6+ hours of sunlight daily.
- ● Thermometer & Hygrometer: To monitor soil temp (ideal range: 65–75°F) and humidity (50–70%).
- ● Plant Labels & Marker: Waterproof labels (e.g., plastic plant tags) and a permanent marker.
- ● Heat Mat: For seeds needing warmth (e.g., peppers, tomatoes). 70–85°F range.
- ● Seedling Heater: Portable unit to maintain consistent temps in cooler climates.
- ● Fertilizer: Balanced liquid fertilizer (5-5-5 or 10-10-10) diluted to half-strength for first feeding.
- ● Garden Journal: To track planting dates, germination times, and conditions.
- ● Tweezers or Pop Bottle Cap: For gently placing tiny seeds (e.g., carrots, lettuce).
Step-by-Step instructions for precision seed sowing
Timing matters more than you think—these steps ensure your seeds sprout strong and fast.
🌱 Step 1: Prep Your Seeds for Optimal Germination
Start by examining your seeds for any cracks or soft spots—those won’t sprout. For seeds with hard outer coats (like peas or beans), soak them in lukewarm water for 8-12 hours to soften the shell. You’ll see the water turn slightly cloudy as the seed absorbs moisture—this is your signal it’s ready.
If your seeds are tiny or delicate (like lettuce or carrots), skip soaking and move straight to planting. The key here is moisture without drowning—saturated seeds can rot. Drain any soaking water completely before handling, and pat seeds dry with a paper towel to prevent clumping.
💧 Step 2: Create the Perfect Moisture Environment
Fill your seed trays or pots with the seed-starting mix and moisten it until it feels like a wrung-out sponge—damp but not dripping. Press the soil down lightly so it’s firm but not compacted. You want roots to grip easily, not struggle through air pockets.
Use a spray bottle to mist the soil surface until it’s evenly damp. Avoid pouring water directly onto seeds—this can wash them too deep or create muddy clumps. The goal is consistent moisture without waterlogging. Cover the tray with plastic wrap or a humidity dome to lock in warmth and humidity.
☀️ Step 3: Control Temperature for Faster Sprouts
Most seeds germinate best between 65-75°F, but some (like peppers) need 80-85°F. Place your sown seeds on a seedling heat mat or in a warm spot—like on top of your fridge. Check the soil temperature with a thermometer if you’re unsure; seeds won’t sprout if it’s too cold.
Keep the humidity dome in place until you see the first signs of germination—tiny green tips breaking through the soil. This usually takes 3-10 days, depending on the seed type. Once sprouts appear, remove the dome immediately to prevent fungal growth from trapped moisture.
⏰ Step 4: Monitor Light and Airflow Daily
Move your newly sprouted seeds to a bright spot with indirect light for the first few days. Direct sunlight can scorch delicate seedlings. Watch for leggy growth—a sign they’re stretching toward light. If stems look thin and pale, raise the light source or add a grow light 2-3 inches above the plants.
Ventilate the tray daily by lifting the plastic wrap for 10-15 minutes to improve airflow. This hardens the seedlings and prevents mold. You’ll know airflow is right when the soil surface looks slightly dry but the roots stay moist below. Avoid overwatering now—damping-off fungus thrives in soggy conditions.
🌿 Step 5: Thin and Strengthen Seedlings
Once seedlings have 2-3 true leaves (not just the initial seed leaves), thin them to 1 plant per cell or 2 inches apart if sown in a flat. Use scissors to snip unwanted seedlings at soil level—this prevents disturbing roots of the remaining plants. You’ll see stronger stems and more vibrant leaves within a week of thinning.
Fertilize lightly with a half-strength balanced fertilizer to encourage root development. Avoid full-strength feeds at this stage—they can burn tender seedlings. Keep the soil consistently moist but not waterlogged, and rotate the tray weekly so all sides get even light exposure.
Tips & tricks for perfect seed germination
Precision timing is everything when it comes to getting your seeds to sprout successfully. Here are the key strategies I've learned to maximize your germination rates.
Soaking Strategy: For seeds with hard outer shells like peas or beans, that 8-12 hour soaking window is critical. Use lukewarm water—hot water can damage delicate seed membranes. I like to soak seeds in a container with a lid to contain any potential mess. After soaking, drain completely and pat dry with a paper towel—this prevents mold growth while keeping seeds hydrated for planting.
Temperature Matters: Most seeds thrive between 65-75°F, but peppers and tomatoes need that extra warmth at 80-85°F. I've found that placing seed trays on top of the fridge works surprisingly well for maintaining consistent warmth. If your home tends to be cooler, consider a seedling heat mat—it makes all the difference for heat-loving varieties.
Humidity Control: The plastic wrap or humidity dome in Step 2 creates the perfect microclimate, but timing is everything. Keep it sealed until you see those first green tips emerge—usually within 3-10 days. Once sprouts appear, remove the dome immediately to prevent fungal growth. I've seen damping-off fungus ruin entire trays when left too long under plastic.
Light Exposure: Those first few days with indirect light are crucial. I place my seed trays near an east-facing window where they get gentle morning sunlight. If your seedlings start looking leggy (long, thin stems), it's their way of telling you they need more light. A simple grow light held just 2-3 inches above the plants can work wonders for preventing this common issue.
Pro Tips for Seeds Are Sown
- Precision timing is everything when it comes to getting your seeds to sprout successfully.
- Soaking Strategy: For seeds with hard outer shells like peas or beans, that 8-12 hour soaking window is critical.
- Temperature Matters: Most seeds thrive between 65-75°F, but peppers and tomatoes need that extra warmth at 80-85°F.
Frequently asked questions
Got questions about getting the most out of your seed-sowing efforts?
Here are answers to the most common queries—from timing tricks to troubleshooting tips—to help you plant with confidence!
When is the absolute best time to sow seeds for maximum germination?
The ideal time depends on your climate and plant type! For cool-season crops (like lettuce or peas), sow 4–6 weeks before the last frost. Warm-season crops (tomatoes, peppers) thrive when soil is at least 60°F (15°C). Check seed packets for specifics—some even list "days to maturity" to guide your schedule!
What if I miss the "perfect" sowing window? Can I still get good results?
Many seeds (especially hardy varieties) can be sown early indoors under grow lights or direct-sown later with row covers for protection. For example, spinach or kale handle light frosts—just extend your season with shade cloth if temps spike. Slow growers (like broccoli) may need a longer head start, though!
Are there alternatives to traditional seed sowing (like transplants or microgreens)?
Yes! For transplants, start seeds indoors 6–8 weeks before the last frost, then harden off seedlings. Microgreens (like radish or sunflower) germinate in just 3–7 days and don’t need deep soil—just a tray and bright light! Succession planting (sowing new seeds every 2–3 weeks) also maximizes harvests for crops like bush beans or carrots.
My seeds aren’t germinating—what’s the most likely cause and fix?
Common culprits:
- Too cold/dry soil: Use a seedling heat mat (70–85°F) and keep soil moist (not soggy).
- Old or stored improperly: Test viability by soaking seeds in water—floaters are likely dead. Store new seeds in a cool, dark, dry place.
- Poor soil contact: Press seeds lightly into soil (depth = 2–3x seed size) or use a fine mist to avoid washing them away.
Pro tip: Label your seeds with dates to track freshness!
Can I sow seeds in containers, or do I need a garden bed?
Containers work great for herbs, lettuce, or dwarf tomatoes! Use pots with drainage holes and well-draining soil (like a mix of potting soil + perlite). For deep-rooted plants (e.g., carrots, parsnips), choose containers at least 12 inches deep. Just ensure they get 6+ hours of sunlight daily—windowsills or grow lights help!
Wrapping up and next steps
The journey of planting seeds is one of nature’s most rewarding cycles—and timing is the secret ingredient that turns potential into flourishing life. 🌱 By mastering the right conditions, soil prep, and moisture balance, you’ve unlocked the key to peak germination rates and stronger plants.
Now, it’s time to roll up your sleeves and watch those seeds transform under your care!
🌟 Your Next Step:
- Start small—pick one seed type and experiment with the timing tips shared here.
- Track progress in a germination journal (or even a simple spreadsheet!) to refine your technique.
- Share your green thumbs’ wins—tag us in your seedling photos! 📸
Every seed you plant today is a promise for tomorrow’s harvest. Let’s grow together! 🌱✨