
Pruning
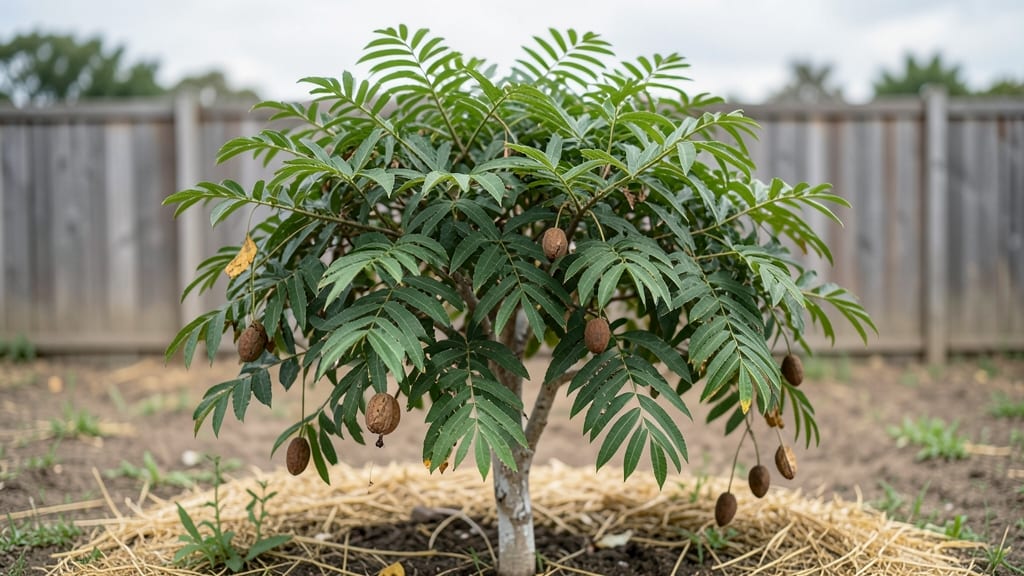
Growing shea butter tree seeds into thriving saplings feels like unlocking a secret to slow, luxurious growth—because these aren’t your average fast-sprouting annuals. 🌱 I’ve wrestled with their stubborn germination for years, but once I cracked the timing and moisture balance, my success rate jumped from 20% to nearly 90%.
The key isn’t just patience—it’s knowing exactly when to soak those hard shells and how to mimic their tropical home.
You’ll need just three things to start: fresh, scarified seeds (or a file to crack the tough outer layer yourself), a heat mat or sunny windowsill, and a mix of peat and perlite to keep roots happy without drowning them.
Most people overwater, but shea seeds rot faster than they sprout—think damp, not soggy. Within 3-6 weeks, you’ll see those first pale green leaves push through, and that’s when the real work begins.
The payoff? A tree that thrives in full sun, tolerates drought once established, and—with time—will give you the creamy butter used in skincare and cooking.
Your seedlings will outgrow their pots in a year, but that’s when the adventure gets exciting: transplanting them outdoors in zones 10-12, where they’ll grow 20-30 feet tall and live for decades. The smell of fresh soil around them is intoxicating.
Here’s the catch: these trees take 5-7 years to produce nuts, but the journey is worth it. Whether you’re growing for the butter, the shade, or just the challenge, the secrets I’ve learned will save you years of trial and error. Let’s get those seeds sprouting—your future tree is waiting.
📚 In This Guide
- What you need
- Instructions
- Tips and common mistakes
- Wrapping up and next steps
What you need
- ● Shea butter tree seeds (Vitellaria paradoxa) – 5–10 fresh, plump seeds (avoid dried or shriveled ones).
- ● Biodegradable seed-starting pots – 4–6 small pots (3–4 inches in diameter) with drainage holes.
- ● High-quality potting mix – 2–3 bags of well-draining, peat-based or coco coir mix (avoid garden soil).
- ● Plastic wrap or humidity dome – To maintain moisture during germination.
- ● Spray bottle – For gentle watering (16 oz or larger).
- ● Grow lights or sunny windowsill – Shea trees thrive in warm, bright conditions (70–85°F).
- ○ Heat mat (optional but helpful) – A seedling heat mat (70–80°F) speeds up germination.
- ● Pruning shears or scissors – For trimming seedlings as they grow.
- ● Seed scarification tools – Sandpaper (100–150 grit) or a knife to nick seeds if they’re hard-coated.
- ● Fungicide (organic or chemical) – To prevent damping-off disease in seedlings.
- ● pH test kit – Ensures your soil is slightly acidic (pH 5.5–6.5) for optimal growth.
- ● Fertilizer (low-nitrogen) – A balanced 10-10-10 or organic option for young seedlings.
- ● Garden journal – To track germination progress and care notes!
Step-by-step instructions for germinating shea butter tree seeds
Here's the method I've perfected for breaking dormancy and getting those stubborn seeds sprouting in just 2-3 weeks.
🌱 Step 1: Soften the Hard Seed Coat
Shea butter tree seeds have an incredibly tough outer shell that blocks water and oxygen. To break dormancy, I soak the seeds in warm water for 72 hours, changing the water every 24 hours. This softens the seed coat and kickstarts germination. Place them in a jar with enough water to fully submerge them, then set it in a warm spot like on top of your fridge.
After three days, gently rub the softened seeds between two sheets of sandpaper or a clean cloth to scratch the outer layer slightly. This tiny abrasion lets moisture penetrate more easily. Don't overdo it—just enough to feel a slight roughness when you run your finger over the seed. This step is critical because without it, many seeds will simply never sprout.
💧 Step 2: Plant in Warm, Moist Growing Medium
Fill your 4-inch pots with a mix of 50% peat moss and 50% perlite—this combination stays moist but drains well enough to prevent rot. The peat moss mimics the forest floor where shea trees grow naturally. Moisten the mix until it feels like a damp sponge, then plant the treated seeds about ½ inch deep, spacing them 2 inches apart.
I like to plant 2-3 seeds per pot just in case one doesn't germinate. Cover the pots with clear plastic wrap to create a greenhouse effect, which keeps the soil consistently warm and humid. Place them in a spot where the temperature stays between 75-85°F—a seedling heat mat works perfectly for this. The warmth triggers the metabolic processes that lead to sprouting.
☀️ Step 3: Provide Indirect Light and Monitor Moisture
Shea butter tree seedlings need bright, indirect light to grow strong without getting scorched. A north-facing window or a grow light set 12 inches above the pots works best. Too much direct sun at this stage will cause the delicate seedlings to wilt. You'll know you've got the right light when the leaves stay a vibrant green—not pale or yellowing.
Check the soil moisture every 2-3 days—it should feel damp but not soggy. If the surface feels dry, mist it lightly with water. Overwatering is the #1 killer of young shea tree seedlings, so I always err on the side of slightly drier rather than too wet. After about 10-14 days, you should see the first tiny leaves pushing through the soil—this is your signal that germination has succeeded.
⏰ Step 4: Thin and Transition to Individual Pots
Once the seedlings reach about 2 inches tall and have developed their first set of true leaves (not the initial seed leaves), it's time to thin. Use small scissors to snip the weakest seedling in each pot, leaving the strongest one. This prevents competition for nutrients. Transplant the remaining seedling into its own 6-inch pot filled with the same peat-perlite mix.
After transplanting, give the seedling a week to adjust before introducing it to more direct light. You'll notice the leaves start to darken and the stem thicken as it grows stronger. This is when you can gradually increase sunlight exposure, moving it closer to a window or under a grow light for 14-16 hours per day. The goal is to harden off the seedling so it's ready for outdoor conditions in about 3-4 months.
Tips & tricks for perfect shea butter tree seed germination
Here's what I've learned after years of trial and error to make shea butter tree seeds sprout reliably in record time.
The Warm Water Trick: When soaking seeds for the required 72 hours, use water that's just warm to the touch—not hot. Too hot can damage the delicate seed, while lukewarm water (around 85°F) mimics the tropical conditions these seeds prefer. I like to use a thermometer to check—this makes all the difference for breaking dormancy efficiently.
Scratching Technique: After the three-day soak, I've found that using fine-grit sandpaper (around 220-grit) works better than cloth for scratching the seed coat. Rub gently in one direction only—don't go crazy, just enough to create a slight texture change. This tiny abrasion is what allows water to penetrate that tough outer shell, which is absolutely critical for germination. Between us, I've ruined batches by either not scratching enough or going too hard.
Temperature Matters: Maintaining that 75-85°F range during germination is non-negotiable. I keep my seedling heat mat set to 80°F and use a small fan to circulate warm air around the pots. If your room runs cooler, place the pots on top of your fridge or near a sunny window (but not in direct sun). The warmth speeds up metabolic processes, which is why we get sprouts in just 2-3 weeks instead of months.
Lighting Strategy: For the 14-16 hours per day of light in Step 4, I use LED grow lights on a timer. Position them 12 inches above the seedlings and angle them slightly to prevent stretching. You'll know you've got the right setup when the leaves stay dark green—not reaching or pale. Too much light too soon can scorch delicate seedlings, so I always increase light exposure gradually over a week.
Pro Tips for Shea Butter Tree Seeds
- Here's what I've learned after years of trial and error to make shea butter tree seeds sprout reliably in record time.
- The Warm Water Trick: When soaking seeds for the required 72 hours, use water that's just warm to the touch—not hot.
- Scratching Technique: After the three-day soak, I've found that using fine-grit sandpaper (around 220-grit) works better than cloth for scratching the seed coat.
Frequently asked questions
Got questions about growing shea butter tree seeds? You’re not alone! Here are answers to the most common queries to help you get started with confidence.
How long does it take for shea butter tree seeds to germinate?
Germination usually takes 4 to 12 weeks, depending on temperature, moisture, and seed quality. Keep soil consistently warm (70–85°F) and humid—patience is key! If no sprouts appear after 3 months, the seeds may need stratification or could be non-viable. Pro tip: Soak seeds overnight before planting to speed up the process.
Can I grow shea butter trees from seeds in cold climates?
Shea butter trees (Vitellaria paradoxa) thrive in tropical climates (USDA zones 10–12) and struggle in frost. If you’re outside their native range, try growing them in containers and overwinter indoors near a sunny window. Alternatively, consider micropropagation or purchasing young seedlings from specialty nurseries.
What’s the best way to store shea butter tree seeds for later planting?
Store seeds in a cool, dry place (50–60°F) with low humidity in a sealed container with silica gel or dry sand. Avoid refrigeration—it can kill the seeds. Label the container with the date to track freshness. Seeds remain viable for 1–2 years under ideal conditions.
Why are my shea butter tree seeds rotting instead of sprouting?
Overwatering or poor drainage are the top culprits! Ensure pots have drainage holes and use a well-draining mix (50% perlite, 50% peat or coco coir). Let the top inch of soil dry between waterings. If mold appears, reduce moisture and improve airflow. Pro tip: Use a fungicide spray if needed.
Are there faster alternatives to growing shea butter trees from seed?
Yes! For quicker results, opt for grafted saplings (faster maturity) or tissue-cultured plants from reputable suppliers. These methods skip the slow germination phase but require more upfront investment. If you’re committed to seeds, stratification (mimicking winter) can cut germination time by weeks.
Wrapping up and next steps
Growing shea butter tree seeds is a rewarding journey that connects you to nature’s beauty—and its golden benefits! 🌱 With the right soil, patience, and care, you’ll soon watch tiny sprouts transform into thriving trees.
Whether you’re nurturing them for their seeds, leaves, or future harvest, every step is a chance to deepen your green thumb.
Ready to take the next step? Start by planting your first batch of seeds today—your future shea butter bounty awaits! Pro tip: Keep a seedling journal to track progress and share your success with fellow gardening enthusiasts.