
Vegetables
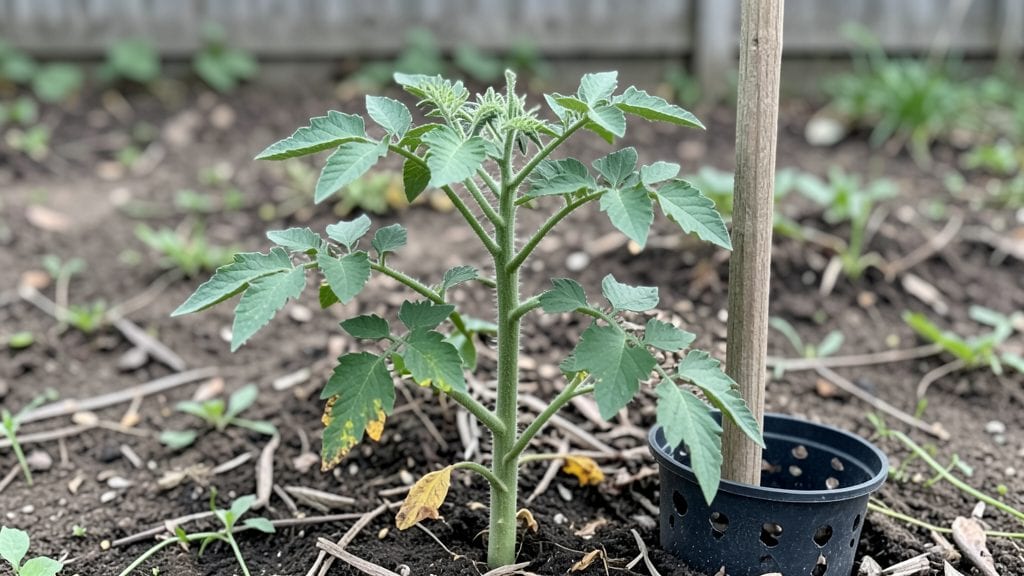
Caring for tomato seedlings transforms floppy little sprouts into sturdy, productive plants that feed you all summer. 🌱 I’ve nursed dozens of seedlings through the delicate early stages, and the difference between thriving transplants and leggy failures comes down to three key habits: consistent moisture, the right light, and avoiding overcrowding.
The biggest mistake new gardeners make is treating seedlings like full-sized plants—drowning them with water or letting them bake in harsh sunlight. Instead, keep soil lightly moist (like a damp sponge), give them 12–16 hours of bright light daily, and thin crowded trays so each seedling has room to stretch.
Within two weeks, you’ll see strong stems and vibrant green leaves that tell you they’re ready for the next phase.
When transplanting outdoors, harden off seedlings gradually to prevent shock, and bury them deeper than they grew in pots—those lower stems will root and create a stronger plant.
By midsummer, you’ll be harvesting tomatoes from plants that started as tiny seeds, and the taste of homegrown fruit makes every early effort worth it.
Whether you’re growing in a sunny windowsill or a greenhouse, these same principles apply. The payoff? Seedlings that outperform store-bought transplants and set you up for a bountiful harvest. Let’s get those plants growing strong!
📚 In This Guide
- What you need
- Instructions
- Tips and common mistakes
- Wrapping up and next steps
What you need
- ● Seedlings: 3–6 healthy tomato seedlings (choose disease-resistant varieties if possible).
- ● Containers: Individual pots (4–6 inches deep) or a seedling tray with drainage holes.
- ● Pro tip: Use biodegradable pots (like peat or coconut fiber) to avoid transplant shock later! 🌱
- ● Potting Mix: 5–10 gallons of high-quality, sterile seedling mix (avoid garden soil—it’s too dense!).
- ● Watering Can or Spray Bottle: With a fine rose nozzle for gentle watering.
- ○ Grow Lights (Optional but Recommended): LED or fluorescent grow lights (12–16 hours of light daily).
- ● Light stand or adjustable clamp for even coverage.
- ● Fertilizer: Balanced liquid fertilizer (5-5-5 or 10-10-10, diluted to half-strength).
- ● Pro tip: Start fertilizing only after the seedlings develop their first true leaves! 💡
- ○ Heat Mat (Optional for Early Stages): A seedling heat mat (70–75°F) to speed up germination if starting from seed.
- ● Pruning Shears or Scissors: For trimming leggy seedlings later.
- ● Temperature: Ideal range: 65–75°F during the day, 60–65°F at night.
- ● Humidity: High humidity (70–80%) for the first 1–2 weeks (use a humidity dome or plastic wrap if needed).
- ● Location: Bright, indirect light (south-facing window or under grow lights).
- ● Calcium supplement (like crushed eggshells or calcium nitrate) to prevent blossom-end rot.
- ● Epsom salt (magnesium sulfate) for leafy growth (1 tsp per gallon of water, used sparingly).
- ● Compost tea or mild seaweed extract for a natural boost.
- ● Label markers to track varieties and planting dates.
Step-by-step guide to nurturing healthy tomato seedlings
Here’s how to transform fragile sprouts into robust, sun-loving plants ready for transplanting.
🌱 Step 1: Provide Ideal Light for Strong Stems
Tomato seedlings crave 14-16 hours of bright light daily—a south-facing window rarely delivers enough intensity. Position a full-spectrum LED grow light just 2-4 inches above the seedlings. You’ll notice leggy, pale stems if they stretch toward the light; this means they’re starved for photons. Adjust the light height weekly as seedlings grow.
Rotate trays quarter-turn daily so plants grow straight, not lopsided. Without enough light, seedlings develop weak stems that snap easily during transplanting. If your seedlings already look stretched, move the light closer immediately—within 12 hours, you’ll see thicker stems forming.
💧 Step 2: Master Moisture Without Drowning Roots
Water seedlings only when the top inch of soil feels dry to the touch—overwatering suffocates roots and invites damping-off disease. Use a spray bottle for gentle moisture, avoiding heavy streams that dislodge tender stems. You’ll know moisture is perfect when the soil surface looks slightly damp but not glistening.
Bottom-watering (placing trays in ½-inch of water for 10 minutes) encourages deep root growth. Avoid wetting leaves, as fungal spores thrive in damp foliage. If seedlings wilt slightly in the morning, they’re thirsty—water immediately, but don’t let them sit in soggy soil.
☀️ Step 3: Harden Off Gradually for Outdoor Success
Start 2 weeks before transplanting by moving seedlings outdoors for 1-2 hours daily in a sheltered spot. Gradually increase time to full sun exposure over 10-14 days. You’ll see leaves toughen and stems darken—this means they’re adapting to wind and sun.
Skip this step, and seedlings will bolt (suddenly flower) or scorch in direct sunlight. On the final day, leave them outside overnight to test cold tolerance. If frost threatens, cover with frost cloth—tomatoes can’t handle temps below 50°F.
✂️ Step 4: Prune and Fertilize for Vigorous Growth
Once seedlings develop 2-3 sets of true leaves, pinch off the top set to encourage bushier growth. This redirects energy to root and stem development. Use balanced liquid fertilizer (10-10-10) at half-strength every 2 weeks—overfeeding burns tender roots.
Watch for lower leaves touching the soil—remove them to prevent disease. If seedlings outgrow their containers, transplant into 5-inch pots with fresh potting mix. Roots circling the bottom of the tray signal it’s time to upgrade—this prevents root-bound stress later.
⏰ Step 5: Time Transplanting for Maximum Success
Transplant after all frost risk has passed and soil warms to at least 60°F. Choose an overcast day to reduce transplant shock. Bury seedlings deeper than recommended—tomato stems grow roots along their length, creating a stronger plant.
Space seedlings 18-24 inches apart in rows 3 feet apart for airflow. Water deeply at transplanting, then mulch with 2 inches of straw to retain moisture. You’ll see new leaves emerge within 7-10 days—this confirms roots have established.
Tips & tricks for thriving tomato seedlings
These game-changing strategies will help you avoid common pitfalls and grow tomato seedlings that rival professional greenhouse results.
The Light Factor: The 14-16 hours of daily light requirement is non-negotiable for sturdy stems. I've seen seedlings stretch toward windows like sunflowers chasing the sun—this is your first warning sign. For best results, use a timer on your grow light to ensure consistent 14-16 hours daily. If you notice seedlings leaning toward the light source, adjust the tray position immediately and move the light closer within 12 hours to trigger faster stem thickening.
Moisture Mastery: The top inch dry test is your best friend, but here's what nobody tells you: morning wilting means thirst, but soggy soil means suffocation. Bottom-watering for exactly 10 minutes creates deep root systems that anchor plants better during transplanting. I've had seedlings with roots growing through drainage holes after just 10 days of this technique—proof it works!
Harden Off Like a Pro: The 2-week gradual outdoor exposure is where most gardeners fail. Start with just 1-2 hours in morning sun and sheltered spots to avoid shock. I've seen seedlings bolt overnight when moved directly to full sun—this happens when plants can't adapt quickly enough. On the final day, leave them out overnight to test cold tolerance, but be ready with frost cloth if temps drop below 50°F.
Pruning and Fertilizing: That first pinch when seedlings have 2-3 sets of true leaves might feel cruel, but it's what creates bushier plants. I use half-strength 10-10-10 fertilizer every 2 weeks because concentrated solutions burn tender roots. Watch for lower leaves touching soil—removing them prevents disease and improves airflow to the main stem.
Pro Tips for Tomato Seedling Care
- These game-changing strategies will help you avoid common pitfalls and grow tomato seedlings that rival professional greenhouse results.
- The Light Factor: The 14-16 hours of daily light requirement is non-negotiable for sturdy stems.
- Moisture Mastery: The top inch dry test is your best friend, but here's what nobody tells you: morning wilting means thirst, but soggy soil means suffocation.
Frequently asked questions
How often should I water tomato seedlings?
Keep soil consistently moist but never soggy—water when the top inch feels dry. Overwatering can drown roots, while underwatering stunts growth. Use a spray bottle or gentle stream to avoid disturbing delicate seedlings. Pro tip: Water at the base, not overhead, to prevent disease.
When is the best time to transplant seedlings outdoors?
Wait until nighttime temps stay above 50°F (10°C) and frost risk has passed. Harden off seedlings first (acclimate them to outdoor conditions over 7–10 days). Transplant in the morning on a cloudy day to reduce stress. Signs they’re ready: sturdy stems, 2–3 true leaves, and no yellowing.
What should I do if my seedlings look leggy or weak?
Leggy seedlings need more light! Move them to a sunny windowsill or under grow lights (12–16 hours/day). Bury stems deeper when transplanting (they’ll root along the buried part). Use a diluted fertilizer (like ½ tsp Epsom salt per gallon) to boost strength. Quick fix: Prune leggy growth to encourage bushier growth.
Can I save tomato seeds from store-bought tomatoes?
Yes! Scoop out seeds and ferment them in water for 2–3 days (this removes gelatinous coating). Rinse, dry on paper towels, and store in a cool, dark place. Note: Hybrid varieties may not grow true to type. For heirlooms, check seed packets for “open-pollinated” labels.
Why are my tomato seedlings turning yellow or wilting?
Yellow leaves often signal overwatering, nutrient deficiency, or disease (like damping-off). Check soil moisture and improve drainage. Wilting can also mean underwatering or root rot. Isolate affected plants and treat with neem oil if fungal issues appear. Preventative tip: Use sterile potting mix and avoid crowding seedlings.
Wrapping up and next steps
Caring for tomato seedlings is all about patience, consistency, and a little love—and now you’ve got the know-how to nurture them into thriving plants! 🌱 From selecting the right soil to mastering pruning and pest control, every step brings you closer to a bountiful harvest.
Remember, even the most seasoned gardeners started with tiny sprouts, so don’t be discouraged by setbacks.
Ready to take the next step? Plant your seedlings outdoors (or in containers) once the weather warms up, and watch them grow into robust, fruit-bearing giants. Happy gardening—your future tomatoes are waiting! 🍅✨