Lawn
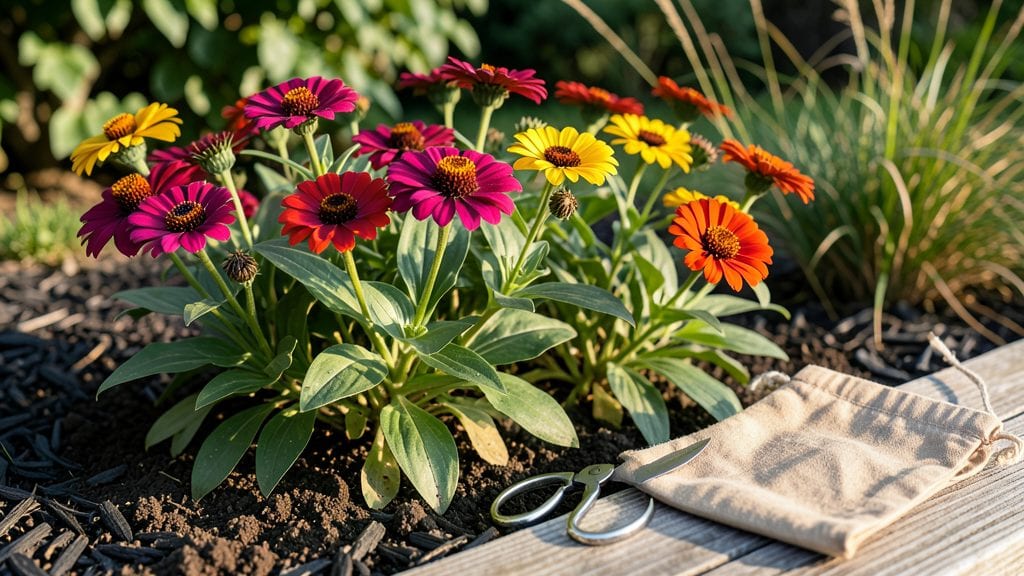
Mastering the zinnia seed collection process means you’ll never buy seeds again—and enjoy free, homegrown blooms every year. 🌻 The process is simpler than it sounds: wait for the seed heads to dry completely, then shake out the seeds into a paper bag.
I’ve collected seeds from my garden for five seasons now, and the best part? These heirloom varieties stay true from year to year.
You only need a few things: dried zinnia heads, a clean paper bag or envelope, and a dry spot to store them. Harvest when the flowers fade and the seed heads turn papery brown—usually late summer or early fall, depending on your zone.
A pair of scissors helps if you’re dealing with stubborn stems, but your hands work fine too. Once you’ve got the seeds, let them dry for another week before storing.
The payoff is huge: fresh seeds for next year’s garden, saved money, and the satisfaction of growing exactly the zinnias you love. My ‘Benary’s Giant’ mix always produces tall, vibrant blooms, and I’ve even shared extras with neighbors.
Store them in a cool, dark place, and they’ll stay viable for up to three years—though I’ve had luck with seeds even older than that.
This method works for any zinnia variety, from dwarf types to towering giants. Whether you’re growing in containers or full sun beds, saving seeds keeps your garden sustainable and full of color. Ready to turn this year’s flowers into next year’s plants?
📚 In This Guide
- What you need
- Instructions
- Tips and common mistakes
- Wrapping up and next steps
What you need
- ● Mature zinnia plants: Choose healthy, disease-free blooms (preferably Zinnia elegans varieties) with fully opened flowers.
- ● Scissors or pruning shears: Sharp, clean tools to snip seed heads (sterilize with rubbing alcohol if reusing).
- ● Paper bags or envelopes: Brown kraft paper (unbleached) or seed-saving envelopes—1 per 5–10 plants.
- ● Permanent marker: For labeling varieties and harvest dates.
- ● Drying tray or screen: A flat, well-ventilated surface (e.g., a cooling rack or mesh screen).
- ● Air-tight containers: Small glass jars or resealable plastic bags for long-term storage (e.g., quart-sized mason jars).
- ● Desiccant packets: Silica gel or rice (for ultra-dry storage).
- ● Seed catalog or notebook: To track varieties, germination rates, and growing notes.
- ● Fine mesh sieve: For cleaning seeds from chaff (if you’re feeling fancy!).
- ● Humidity indicator: A small pack to monitor storage conditions.
Step-by-Step instructions for collecting zinnia seeds
Here's how to save seeds from your zinnia blooms—simple steps that turn spent flowers into next year's vibrant garden.
🌿 Step 1: Select Healthy, Disease-Free Flowers
Wait until zinnia blooms have fully matured and the petals begin to droop naturally—this signals the seed head is ready. Choose flowers that haven't been touched by pests or disease, as contaminated seeds won't grow properly. I always pick from the center of the plant where blooms are most robust.
Look for seed heads that are turning brown and papery—this means the seeds inside are fully developed. Avoid cutting any flowers that still have vibrant color, as those seeds won't be viable. Use clean, sharp pruning shears to snip the entire flower head cleanly at the base.
⏰ Step 2: Dry the Seed Heads Properly
Lay the cut zinnia heads on a clean, dry surface in a warm, dry location with good airflow—like a mesh screen or paper towel. Keep them out of direct sunlight to prevent overheating, which can damage the seeds. I usually place mine on a windowsill where they get indirect light.
Let the seed heads dry for 2-3 weeks until they feel brittle and crumbly when squeezed. You'll know they're ready when the petals fall away easily and the center turns a deep brown. If moisture lingers, seeds may mold or rot—so check daily for any dampness.
🌱 Step 3: Extract and Clean the Seeds
Once fully dry, gently rub the seed head between your palms or use your fingers to break it apart. The seeds will pop out easily—zinnia seeds are large and flat, resembling tiny, dark brown beans. I spread them on a clean sheet of paper to catch any stray debris.
Remove any remaining chaff or flower parts by hand, then let the seeds air-dry for another 24 hours to ensure complete dryness. Store them in a paper envelope (not plastic—it traps moisture) and label with the variety and date. Seeds stay viable for 2-3 years when stored in a cool, dark place.
💧 Step 4: Test Germination Before Storing
To confirm your seeds are viable, plant a few in a small pot with seed-starting mix and keep it in a warm spot. Water lightly and place the pot in bright, indirect light. If 50% or more sprout within 7-14 days, your saved seeds are ready for long-term storage.
If germination is poor, the seeds may have dried too long or been exposed to moisture. Don’t worry—just save fresh seeds next season. I always test a small batch before storing the rest, so I know what to expect when planting time comes around.
Tips & tricks for perfect zinnia seed collection
Here's what I wish I knew when I first started saving zinnia seeds—simple tricks that'll make your seed collection process smoother and more successful.
Timing Secret: In Step 1, don't rush to cut those seed heads! The 24-hour extra drying period after extraction is crucial—it's what prevents mold and ensures your seeds stay viable for years. I've learned the hard way that skipping this step leads to damp seeds that won't germinate. Spread them on a clean paper towel in a single layer for that final 24-hour dry, and you'll thank me later.
Storage Wisdom: Those paper envelopes in Step 3 aren't just for show—they're your seeds' best defense against moisture. I keep mine in a labeled mason jar with a silica gel packet inside to absorb any lingering dampness. Store the jar in a cool, dark pantry where temperatures stay consistent. This method keeps my seeds fresh for the full 2-3 years they're viable.
Germination Test: The 7-14 day germination window in Step 4 is your quality control check. If you're impatient like me, start testing with just 5 seeds—it's less wasteful if they don't sprout. I use small plastic cups with drainage holes instead of pots to save space on my windowsill. This gives you a quick answer without committing to planting all your seeds.
Seasonal Strategy: For year-round blooms, collect seeds after each of your zinnia's three seasonal trims. After the first flush of blooms in spring, give your plants a light trim to encourage bushier growth. Collect seeds from these second and third waves too—they'll give you a longer harvest season next year. Just remember to label each batch by season for variety tracking.
Pro Tips for Zinnia Seed Collection
- Here's what I wish I knew when I first started saving zinnia seeds—simple tricks that'll make your seed collection process smoother and more successful.
- Timing Secret: In Step 1, don't rush to cut those seed heads!
- Storage Wisdom: Those paper envelopes in Step 3 aren't just for show—they're your seeds' best defense against moisture.
Frequently asked questions
Got questions about collecting zinnia seeds? You’re not alone! Here are answers to the most common ones to help you master the process and keep those vibrant blooms coming back year after year.
When is the best time to collect zinnia seeds?
Collect seeds when the flower heads turn brown and dry out—usually 4-6 weeks after blooming. For fall-blooming zinnias, aim for late September to October. For spring/summer varieties, harvest in late summer. Wait too long, and seeds may scatter or sprout prematurely!
How do I know if zinnia seeds are ready for collection?
Ready seeds look papery, tan, or light brown and rattle inside the dried flower head. Gently squeeze the head—if seeds spill out easily, they’re ready! Avoid collecting seeds from heads that are still green or moist, as they won’t store well.
Can I collect seeds from store-bought zinnias?
Yes, but check the label first! Hybrid zinnias (like ‘Benary’s Giant’ or ‘Profusion’) may not produce true-to-type seeds. For consistent blooms, save seeds from heirloom or open-pollinated varieties (e.g., ‘Crystal’ or ‘Thumbelina’). If unsure, ask your local nursery!
What should I do if my zinnia seeds won’t germinate?
Try these fixes: Soak seeds overnight in warm water, use fresh potting mix, and ensure consistent moisture (not soggy). Zinnia seeds need light to germinate—plant them shallowly (just covering with soil) or press them into the surface. Patience helps too; germination can take 7-14 days!
How should I store zinnia seeds for next year?
Store seeds in a cool, dry place (like a sealed envelope or jar with a silica packet). Keep them away from heat/humidity—zinnias stay viable for 2-3 years. Label with the variety and date! For extra protection, refrigerate in a sealed container.
Wrapping up and next steps
Collecting zinnia seeds is a rewarding way to ensure next year’s garden bursts with vibrant blooms—and you’ve got all the tools to succeed! Whether you’re trimming in summer, fall, or winter, these seasonal techniques guarantee a steady supply of seeds for year-round gardening.
Now that you’re equipped with the know-how, why not share your newfound skills? Try swapping seeds with fellow gardeners, experimenting with heirloom varieties, or even gifting them to friends to spread the joy of homegrown flowers. 🌱✨
Ready to take it further? Start a small seed-saving journal to track your progress or explore creative ways to dry and store seeds for long-term use. Happy gardening!