Featured
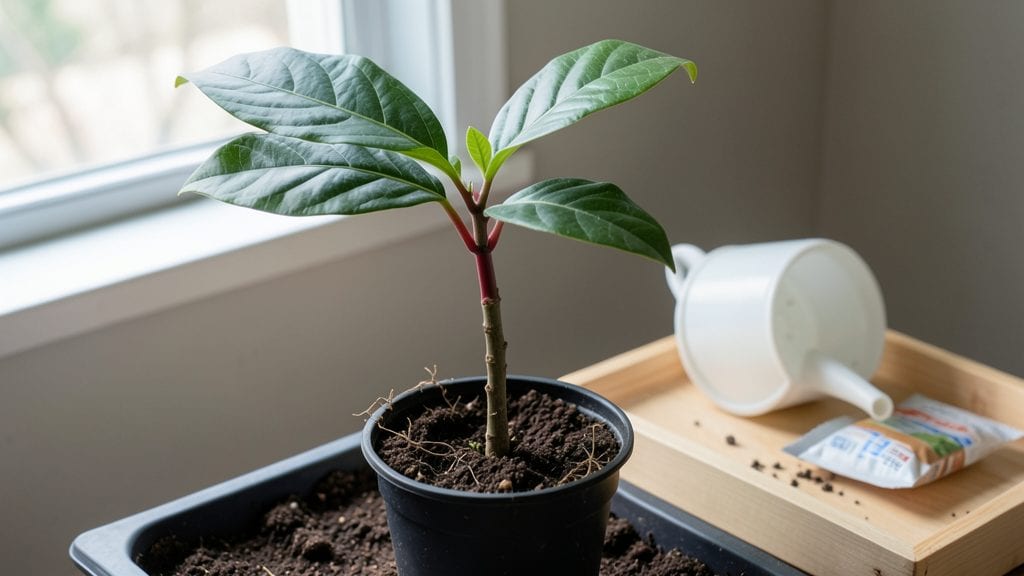
Growing a Hass avocado tree from that red seed in your kitchen is faster than you think—just 3-4 weeks to see roots if you nail the water and warmth balance.
I’ve sprouted a dozen seeds, and the key is patience paired with the right setup: a glass of water, a toothpick to keep it afloat, and a sunny windowsill.
The red skin on Hass seeds isn’t just pretty—it’s a sign of the thick, creamy fruit inside, and that same vigor shows up in your sprout.
Most people quit when the seed just sits there, but the first root appears like clockwork once you adjust the water level—keep it 1-2 inches submerged and change it every 2-3 days.
That’s when the magic happens: roots grow ½ inch per week, and within a month, you’ll have a 3-inch taproot ready for soil. The trick is avoiding mold (that’s your sign to rinse the water) and rot (drainage is everything).
By the time you transplant, you’ll have a 6-inch-tall seedling with thick, glossy leaves—proof you’re on the right track. These Hass babies grow 2-3 feet per year, and with proper care, you could see flowers (and eventually fruit) in 3-5 years.
The red skin on the seed? That’s your promise of creamy, buttery avocados down the road.
Works in any climate, though tropical zones speed things up. Let’s get that seed sprouting—no green thumb required.
Root Causes Behind Red Avocado Seeds
Understanding why your avocado seed turns red during germination can help you troubleshoot and improve your success rate. While a pinkish or reddish hue isn’t always a sign of trouble, it often indicates underlying physiological or environmental stress.
Below, we break down the most common reasons—backed by science—and how to address them.
When an avocado seed doesn’t get enough oxygen, its cells can’t perform aerobic respiration efficiently. This leads to the production of anthocyanins—the same pigments that give red apples or blueberries their color—as a stress response.
Why it happens:
- Overly moist soil or waterlogging traps air pockets, suffocating the seed’s root (radicle) as it emerges.
- Sealed containers (like plastic bags) create a anaerobic environment, slowing down germination and triggering reddening.
- Compacted or dense growing medium (like tightly packed soil) restricts oxygen flow to the seed.
Actionable fix:
- Use a well-draining medium like a mix of perlite, coconut coir, or vermiculite (avoid pure soil).
- Prop the seed at a 45° angle in a small pot to prevent water pooling around the base.
- If using water germination, keep the seed partially exposed to air—only the lower half should be submerged.
Avocado seeds rely on stored nutrients during early germination, but if the environment lacks essential minerals, the seed may signal distress through reddening. Specifically, deficiencies in phosphorus, potassium, or calcium can disrupt cellular function and trigger pigment changes.
Why it happens:
- Pure water germination (no nutrients) depletes the seed’s reserves faster, leading to stress.
- Acidic or alkaline soil (pH <5.5 or >7.5) blocks nutrient uptake, even if the medium appears fertile.
- Over-fertilization (especially with nitrogen-heavy fertilizers) can burn delicate root cells, causing red discoloration.
Actionable fix:
- For water germination, add a pinch of Epsum salt (magnesium sulfate) or liquid seaweed extract to the water to support mineral absorption.
- If repotting, use a balanced, slightly acidic growing mix (pH 6.0–6.5) with a slow-release fertilizer (like 5-5-5 NPK).
- Flush the soil with plain water every 2–3 weeks to prevent salt buildup from fertilizers.
Avocado seeds thrive in warm, stable conditions (ideal range: 70–85°F or 21–29°C). Extreme temperatures—whether too hot or too cold—disrupt enzyme activity and can cause reddening as a survival mechanism.
Why it happens:
- Cold drafts (from AC vents, refrigerators, or winter windowsills) slow metabolism, leading to chilling injury and pigment production.
- Excessive heat (above 90°F or 32°C) denatures enzymes, causing oxidative stress and reddening in the seed’s vascular tissue.
- Fluctuating temperatures (e.g., moving the seed between hot and cold spots) confuses the seed’s internal clock, delaying germination.
Actionable fix:
- Place your seed in a warm, indirect light spot (like near a sunny window but not in direct midday sun).
- Use a seedling heat mat (set to 75–80°F) if your home runs cold at night.
- Avoid glass containers (like jars) that trap heat—opt for terracotta pots for better temperature regulation.
While less common, fungal infections (like Fusarium or Pythium) can invade the seed’s outer layers, causing red or brown discoloration as the seed fights off the invasion. This often happens in humid, stagnant conditions.
Why it happens:
- Excess moisture without airflow encourages fungal spores to colonize the seed.
- Reusing contaminated growing medium (e.g., old soil from another plant) can introduce pathogens.
- Physical damage (like cracks from improper handling) creates entry points for microbes.
Actionable fix:
- Sterilize your tools (scissors, pots) with rubbing alcohol before handling seeds.
- If repotting, use pasteurized soil or a fungicide spray (like neem oil) as a preventive measure.
- Reduce humidity around the seed—aim for 40–60% humidity and avoid misting directly on the seed.
Not all avocado seeds turn red—some varieties naturally produce anthocyanins during germination, especially if the parent fruit had a high antioxidant content. If your seed is firm, healthy, and growing roots despite the red hue, it may just be a harmless genetic quirk.
Why it happens:
- Hybrid or heirloom avocados (like Hass) sometimes exhibit reddening due to breeding for disease resistance (anthocyanins act as natural sunscreen for plants).
- Older seeds (over 2 weeks since harvest) may have depleted antioxidants, leading to stress pigments.
Actionable fix:
- Monitor root growth—if the radicle (first root) is white and healthy, the red color may not be a concern.
- Avoid discarding seeds prematurely—some varieties take 4–6 weeks to sprout fully, even with reddening.
| Sign | Likely Cause | Action |
|---|---|---|
| Red tip only | Normal stress response | Continue monitoring |
| Entire seed red | Severe hypoxia or fungus | Repot in fresh, dry medium |
| Soft, mushy seed | Rot or fungal infection | Discard and sterilize tools |
| Stunted growth | Nutrient deficiency | Add fertilizer or remediate soil |
| Cracked seed coat | Physical damage or heat stress | Provide stable temperature |
Fixing Common Avocado Seed Issues
Got a stubborn avocado seed that’s refusing to cooperate? Whether your seed is turning red, rotting, or just sitting there like a stubborn rock, these solutions will help you troubleshoot and revive your sprout—without losing hope (or your patience).
Below, we’ve mapped common problems to step-by-step fixes, plus prevention tips to keep your next seed on the fast track to growth.
If your avocado seed is turning red, it’s often a sign of fungal infection, overwatering, or poor airflow. Don’t panic—this is fixable!
🔥 Step 1: Assess the Damage
- Light red spots? Likely early-stage mold or bacterial soft rot.
- Deep red or black? Advanced rot—time to act fast.
- Dry red patches? Possible over-exposure to sunlight or dehydration.
🍳 Step 2: Disinfect & Revive
- Remove the seed from water and rinse it gently with hydrogen peroxide (3%) for 5 minutes. This kills surface bacteria and fungi.
- Pat dry with a clean paper towel—moisture is the enemy now.
- Inspect for soft spots: If the seed feels mushy, trim away the rotten areas with a sterilized knife (use rubbing alcohol on the blade).
- Let it air dry for 12–24 hours in a well-ventilated spot (no direct sunlight).
👨🍳 Step 3: Reset the Germination Process
- Rehydrate properly: Place the cleaned seed in fresh, room-temperature water (change daily).
- Use a breathable container: A glass jar with toothpicks propping it open (or a mesh bag) prevents suffocation.
- Monitor closely: If redness returns, reduce water contact—soak only 1–2 inches of the seed at a time.
✨ Prevention Tips for Future Seeds
- Use filtered or distilled water (chlorine can stress seeds).
- Keep humidity in check: Aim for 60–70% humidity around your seed.
- Rotate seeds if using multiple—don’t overcrowd in one container.
A foul odor or slimy texture means your seed is drowning in bacteria. Here’s how to save it:
🔪 Step 1: Emergency Rescue
- Remove the seed from water immediately.
- Scrub gently with a soft brush and mild soap, then rinse.
- Soak in a vinegar solution (1 part white vinegar to 3 parts water) for 10 minutes to kill pathogens.
- Dry thoroughly—no shortcuts here. Use a fan or open window to speed it up.
⏰ Step 2: Adjust Your Germination Setup
- Switch to a drier method: Try the "paper towel method" (wrap the seed in a damp towel, not soaked).
- Use cinnamon or activated charcoal: Sprinkle a tiny pinch on the seed before rehydrating—natural antifungal power.
- Repot in sterile soil if roots have already sprouted (see below).
🌱 Step 3: If All Else Fails… Start Over
If the seed is too far gone, don’t waste time—grab a new seed and learn from this mistake!
💡 Prevention Tips
- Change water daily (stagnant water = bacteria buffet).
- Avoid plastic containers—glass or ceramic is easier to clean.
- Keep seeds elevated: Use a seedling tray with drainage to prevent waterlogging.
A seed that’s not sprouting after weeks might need a wake-up call. Try these tricks:
🌡️ Step 1: Warm It Up
- Place the jar near a sunny window (but not in direct light).
- Use a heat mat (set to 75–80°F) under the container for 24 hours to mimic tropical conditions.
- Warm the water slightly before soaking—cool water slows germination.
🎯 Step 2: Encourage Root Growth
- Trim the seed’s bottom (where roots should emerge) with a sterilized knife—this can trick it into sprouting faster.
- Add a rooting hormone (optional): Dip the trimmed end in powdered cinnamon or willow bark extract before replanting.
🥗 Step 3: Transplant for Success
Once roots appear (1–2 inches long), it’s time to move to soil:
- Fill a small pot with well-draining potting mix (add perlite for aeration).
- Plant the seed so half is buried, leaving the top exposed.
- Water lightly and keep soil moist but not soggy.
- Cover with a plastic bag (like a mini greenhouse) to retain humidity—remove daily for airflow.
✨ Prevention Tips
- Pick a ripe avocado—green ones won’t germinate well.
- Patent-leaf vs. Hass: Hass seeds (the common grocery variety) germinate faster than patent-leaf.
- Be patient but proactive: If no sprouts in 4–6 weeks, try a new seed.
Final Pro Tip: 🌿 Document your process! Take photos weekly—you’ll spot issues before they escalate. Happy growing! 🌱
Frequently asked questions about avocado seed germination
Why does my avocado seed turn red during germination?
Reddening often signals stress from low oxygen, overwatering, or nutrient deficiencies. Hass seeds sometimes produce anthocyanins (natural pigments) as a protective response. If roots are healthy, it may just be genetic—keep monitoring!
How long should I wait before seeing roots?
With proper care, roots typically appear in 3-4 weeks. Keep the seed in 1-2 inches of water and change it every 2-3 days. If no roots in 6 weeks, try a fresh seed—some varieties germinate slower than others.
Can I use tap water for germination?
Tap water works, but chlorine can stress seeds. For faster results, use filtered or distilled water. If you must use tap, let it sit uncovered for 24 hours to dissipate chlorine before using.
What's the best soil mix for transplanting?
Use a well-draining mix of 50% potting soil, 30% perlite, and 20% compost. Avoid heavy garden soil—it compacts and suffocates young roots. Keep the soil moist but not soggy.
Will my Hass seedling actually produce fruit?
Yes! With proper care, Hass seedlings can bear fruit in 3-5 years. They need full sun (6+ hours daily) and consistent moisture. Most homegrown avocados won't match grocery store quality, but they're delicious and rewarding!