Propagation
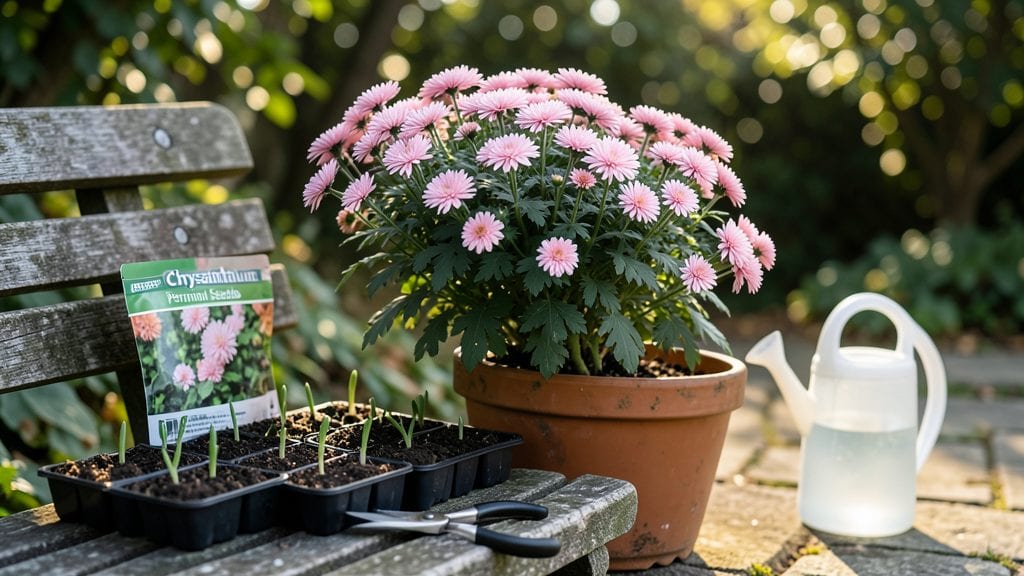
Growing chrysanthemum perennial seeds means you’ll have those bold, frost-resistant blooms returning every fall for years to come—no annual replanting needed. 🌿 I’ve grown them from seed for five seasons now, and the first year’s patience pays off with plants that multiply, spread, and outperform store-bought transplants.
The key isn’t just throwing seeds in the ground; it’s timing the sowing, prepping the soil just right, and giving them the light they crave to break through stubborn germination.
You’ll need a sunny spot with well-draining soil, seeds started indoors 8-10 weeks before your last frost, and a little extra warmth to coax those tiny sprouts along.
Most gardeners rush this step, but taking the time to harden off seedlings makes all the difference—my first batch of homegrown chrysanthemums lasted through three winters because I didn’t skimp on this prep. The payoff?
Plants that thrive in zones 5-9, handle drought once established, and reward you with 3-4 weeks of nonstop blooms when everything else is fading.
Where transplants give you one season of color, seeds give you a self-sustaining perennial that spreads over time. You’ll spot the first buds in late summer, with blooms arriving by early fall—just when you need that pop of color.
The trade-off? Slower growth in year one, but by year two, you’ll have a bushy plant ready to divide and share. This is how you build a garden that keeps giving back, with minimal effort after the initial work.
Confession: my first attempt nearly gave up after three weeks of no sprouts. Turns out, chrysanthemum seeds need consistent moisture and warmth to germinate—no cold stratification required, unlike some perennials.
Once they break through, keep them in bright indirect light until true leaves form, then gradually move them to full sun. The biggest mistake? Overwatering. These seeds rot faster than they sprout if the soil stays soggy.
Stick with me, and you’ll have a fall garden that turns heads—and lasts for years.
📚 In This Guide
- What you need
- Instructions
- Tips and common mistakes
- Wrapping up and next steps
What you need
- ● Chrysanthemum perennial seeds: Choose cold-hardy varieties (e.g., 'Hardy Bonanza' or 'Mammoth'). Buy 1–2 packets (about 50–100 seeds) for a small garden.
- ● Seed-starting mix: A lightweight, sterile peat-based or coco coir blend (1–2 cubic feet). Avoid garden soil—it may harbor pests or diseases.
- ● Seed trays or small pots: Biodegradable or plastic trays with cell inserts (72–144 cells) or 4-inch pots (1–2 per seed).
- ● Grow lights or sunny windowsill: A full-spectrum LED grow light (12–16 hours/day) or a south-facing window with 6+ hours of sunlight.
- ● Misting bottle or spray nozzle: For gentle watering to keep seeds moist without disturbing them.
- ● Plastic wrap or humidity dome: To retain moisture while seeds germinate.
- ● Small hand trowel: For transplanting seedlings.
- ● Plant labels & marker: To track varieties (e.g., wooden labels + waterproof pen).
- ○ Pruning shears: Optional, for trimming leggy seedlings later.
- ● Patience: Chrysanthemums germinate slowly—2–4 weeks at 65–75°F (18–24°C).
- ○ Cold frame or greenhouse: Optional but helpful for hardening off seedlings before outdoor planting.
- ● Well-draining soil: Amend garden beds with compost for transplanting (pH 6.0–7.0).
Step-by-step instructions for growing chrysanthemum perennials from seeds
Here’s my foolproof method for cultivating hardy chrysanthemums that return year after year.
🌱 Step 1: Choose the Right Time and Prepare Seedlings Indoors
Start seeds indoors 8-10 weeks before your last frost date—chrysanthemums need time to establish strong roots before transplanting. Use sterile seed-starting mix in small pots or seed trays, filling them to 1 inch below the rim. Press the mix down lightly so it’s firm but not compacted.
Sow seeds ¼ inch deep, spacing them ½ inch apart in rows. Cover lightly with a thin layer of additional mix, then mist gently with water until the surface looks evenly damp. Place the tray in a warm spot (70-75°F)—a seedling heat mat speeds germination significantly. Keep the soil consistently moist but never soggy; overwatering leads to damping-off, which kills seedlings overnight.
☀️ Step 2: Provide Light and Harden Off Seedlings
Once sprouts appear (7-14 days), move seedlings under grow lights or to a south-facing window where they get 12-14 hours of light daily. Without enough light, they’ll stretch and become leggy—thin stems that flop over. If you notice seedlings leaning toward the light, raise the grow light to 2-3 inches above the tallest leaves and rotate the tray daily for even growth.
Two weeks before transplanting outdoors, start hardening off seedlings. Place them outside in a sheltered spot for 1-2 hours the first day, gradually increasing time each day. Watch for wilting or yellowing leaves—this means they’re not ready yet. Once they tolerate 6+ hours outside without stress, they’re ready for the garden.
🪴 Step 3: Transplant and Establish in the Garden
Choose a location with full sun (6+ hours daily) and well-draining soil. Chrysanthemums thrive in slightly acidic to neutral soil (pH 6.0-7.0). Dig holes twice as wide as the root ball but only as deep as the container they came in. Space plants 18-24 inches apart—crowding leads to weak stems and fewer blooms.
Fill the holes with soil, water deeply, and firm gently around the base. Mulch with 2-3 inches of organic mulch (like shredded bark) to retain moisture and suppress weeds. Water 1 inch per week once established, but avoid overhead watering—wet foliage encourages fungal diseases. You’ll see new growth in 2-3 weeks, signaling they’ve taken root.
✂️ Step 4: Maintain and Encourage Year-Round Blooms
Deadhead spent blooms regularly to encourage continuous flowering through fall. Pinch back stems by ⅓ in early summer to promote bushier growth—this prevents leggy plants and ensures more flowers. Fertilize lightly every 4-6 weeks with a balanced, slow-release fertilizer (10-10-10) during the growing season. Over-fertilizing leads to lush foliage but fewer blooms.
In fall, cut back stems to 4-6 inches tall before the first hard frost. Mulch heavily (4-6 inches) to protect roots over winter. Chrysanthemums are hardy to USDA Zone 5, but in colder climates, add extra mulch or a light frost blanket for the first winter. You’ll see fresh shoots emerge in early spring—proof your perennials are thriving.
Tips & tricks for perfect chrysanthemum perennial growth
Growing chrysanthemums from seed takes patience, but these tricks will help you avoid common pitfalls and maximize your success with these cold-hardy perennials.
Timing Secret: That 8-10 week indoor start time is non-negotiable for Zone 5 hardiness. I always check my local frost date and count backward—this gives seedlings enough time to develop strong roots before facing outdoor conditions. If you're in doubt, err on the longer side (10 weeks) for first-time growers, as seedlings need time to mature.
Heat Control: Maintaining that 70-75°F warmth during germination is crucial, but don't overdo it. A seedling heat mat works wonders, but place a thermometer near the tray to monitor temperatures. If your home runs cooler, consider a small greenhouse or heated propagator. The goal is consistent warmth—not scorching heat—that helps seeds break dormancy.
Lighting Strategy: When your seedlings appear after 7-14 days, that 12-14 hours of daily light becomes your new best friend. If natural light isn't sufficient, invest in affordable grow lights—even a simple LED bulb will prevent leggy, weak seedlings. I rotate my trays daily so all plants get equal exposure, which creates uniform growth. The 2-3 inch distance from light to leaves is perfect for preventing stretching while still providing enough intensity.
Transplanting Wisdom: Those 18-24 inches of spacing might seem generous, but trust me on this—crowded chrysanthemums develop weak stems and fewer blooms. I always mark planting locations with sticks before digging to ensure proper spacing. Also, the twice-as-wide holes create room for roots to spread without competition, which means stronger plants that thrive through multiple winters.
Pro Tips for Chrysanthemum Perennial Seeds
- Growing chrysanthemums from seed takes patience, but these tricks will help you avoid common pitfalls and maximize your success with these cold-hardy perennials.
- Timing Secret: That 8-10 week indoor start time is non-negotiable for Zone 5 hardiness.
- Heat Control: Maintaining that 70-75°F warmth during germination is crucial, but don't overdo it.
Frequently asked questions
Got questions about growing chrysanthemums from perennial seeds?
You’re not alone! Here are answers to the most common ones to help you succeed with these cold-hardy beauties.
When is the best time to plant chrysanthemum perennial seeds?
For most climates, sow seeds indoors 8–10 weeks before your last frost date (typically March–April in the U.S.). If direct-sowing, wait until soil temps reach 55–65°F (13–18°C)—usually late spring or early summer. Perennials benefit from an early start to establish strong roots before winter.
Can I plant chrysanthemum seeds in fall for spring blooms?
Yes! Fall sowing works in mild-winter zones (USDA 7–10), but most perennials need a cold stratification period (4–6 weeks at 35–45°F/2–7°C). For colder regions, start seeds indoors in late summer or wait for spring. Perennials like chrysanthemums often bloom better with a full growing season to mature.
Why aren’t my chrysanthemum seeds germinating?
Common culprits: too-cold soil (keep seed trays at 65–75°F/18–24°C), poor moisture (keep soil damp but not soggy), or old seeds (viability drops after 1–2 years). Try scarifying seeds (lightly nicking the outer shell) or soaking in warm water overnight to encourage germination.
Are there easy alternatives to growing from seed?
For faster results, buy bare-root plants or cuttings from nurseries in early spring. Many garden centers sell pre-started perennial chrysanthemums that skip the seedling stage. Alternatively, divide mature chrysanthemum clumps in early spring or fall—they’re tough and often regrow vigorously!
How do I protect my chrysanthemum seedlings from pests?
Keep an eye out for aphids, slugs, and spider mites. Use neem oil or insecticidal soap for soft-bodied pests, and set up beer traps for slugs. Row covers can shield young plants from cabbage worms. Healthy seedlings with good airflow resist pests better—avoid overcrowding!
Wrapping up and next steps
Growing chrysanthemum perennial seeds is a rewarding way to add vibrant, cold-hardy blooms to your garden year after year! With the right soil, sunlight, and care, these resilient plants thrive—even in cooler climates. Whether you're a beginner or seasoned gardener, start small, experiment with varieties, and enjoy the process.
Now that you’re armed with tips and answers, take the next step: grab those seeds, prep your garden bed, and watch your chrysanthemums flourish! 🌸 Ready to dive in?