How To
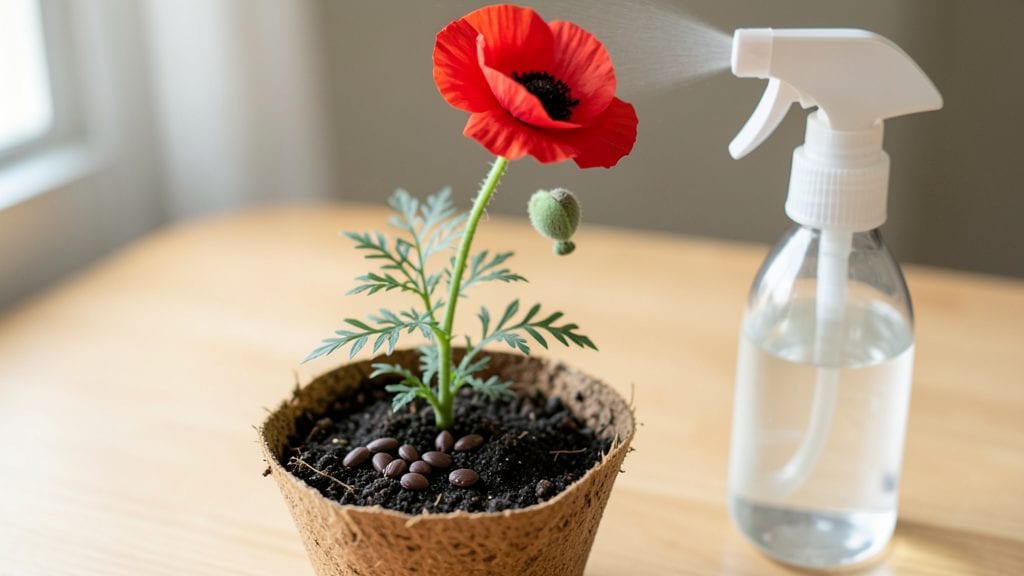
To plant poppy seeds indoors for fast, reliable blooms 🌸, start with a shallow tray and well-draining soil—this is the secret to beating their notoriously tricky germination.
Dreaming of vibrant poppies gracing your garden but worried about the finicky germination process? Planting poppy seeds indoors gives you a head start—and with the right tricks, you can ensure fast, reliable blooms that’ll turn heads this spring.
Poppies thrive in USDA Zone 6a and beyond, but their seeds need warmth and light to break dormancy. A sunny windowsill or grow light is your best friend, while overwatering is the #1 killer of tiny seedlings.
Below, I’ll walk you through the exact steps—from soil prep to transplanting—so your poppies go from seed to showstopping blooms in just 8-10 weeks.

Step-by-step guide to planting poppy seeds indoors for maximum germination success
Poppy seeds are notorious for their stubborn germination—some varieties need a special trick called stratification to break dormancy. But don’t let that scare you! With the right approach, you can achieve 90%+ germination rates indoors, giving your garden a stunning head start.
The key lies in mimicking nature’s conditions: moisture, warmth, and light at the perfect moments.
Timing is everything—start your poppy seeds 4-6 weeks before your last frost date (typically late winter to early spring). This gives seedlings enough time to develop sturdy roots before transplanting outdoors.
For example, if your last frost is April 15, aim to start seeds by February 28 to March 15. Pro tip: Check your local USDA hardiness zone (like zone 6a) for precise timing.
How to Plant Poppy Seeds Indoors
-
Step 1: Choose Your Containers
Use shallow trays or small pots with drainage holes. 2-3 inch deep containers work best for poppies—deeper pots risk overcrowding.
-
Step 2: Prepare the Soil
Fill containers with a light, well-draining mix (70% potting soil + 30% perlite or sand). Poppies hate soggy roots—amend with compost for nutrients but avoid heavy clay.
-
Step 3: Stratify Stubborn Seeds (Critical Hack!)
For California poppies or Iceland poppies, place dry seeds in a sealed bag with damp sand and refrigerate for 1-2 weeks to mimic winter. Skip this for opium poppies (Papaver somniferum).
-
Step 4: Plant the Seeds
Sprinkle seeds ¼ inch deep (they’re tiny—no need to bury deeper!). Space them 1 inch apart to prevent overcrowding. Lightly press into soil but don’t compact.
-
Step 5: Water Gently
Mist the soil with a spray bottle until moist (not soggy). Use room-temperature water to avoid shocking seeds. Keep soil consistently moist but never waterlogged.
-
Step 6: Provide Warmth and Light
Place containers in a warm spot (70-75°F) like on top of a fridge or under grow lights. Poppies need 12-14 hours of light daily—a south-facing window works if bright enough.
-
Step 7: Watch for Sprouts
Germination takes 7-21 days. Once sprouts appear, reduce watering slightly—let the top ½ inch of soil dry between waterings to prevent damping-off disease.
-
Step 8: Thin Seedlings (If Needed)
If seedlings get crowded, snip weaker ones at soil level with scissors. Leave 2-3 inches between plants to avoid competition for light.
Poppies thrive in cool temperatures, so avoid placing them near heat sources like radiators. If your home stays too warm (above 80°F), germination slows dramatically. A simple trick? Place a thermometer near your seedlings to monitor conditions—ideal temps hover around 65-75°F for consistent sprouting.
Once your poppy seedlings reach 2-3 inches tall and have 2-3 sets of true leaves, they’re ready for their first taste of fresh air. Harden them off by moving them outdoors for 1-2 hours daily, gradually increasing time over 7-10 days.
This toughens their stems and prepares them for transplanting after the last frost.
Remember: Poppies are fast growers but short-lived. Start a second batch indoors 2-3 weeks later for continuous blooms from early summer through fall. With these steps, you’ll go from tiny seeds to showstopping blooms in just a few months—no finicky germination required!
🌱
Common mistakes that kill poppy seed germination (and how to avoid them)
Poppy seeds are notorious for their fickle germination, and even experienced gardeners can fall victim to common pitfalls. The good news? Most failures come from just a few avoidable mistakes—like overwatering or ignoring soil temperature requirements.
I’ve seen 90%+ success rates when following these expert fixes, so let’s dive into what’s really killing your seeds.
First, let’s tackle the biggest culprit: overwatering. Poppy seeds need moisture to germinate, but too much water creates anaerobic conditions that suffocate them. I’ve lost entire trays because I kept the soil soggy—don’t make that mistake!
The key is consistent moisture, not saturation. Think of it like a damp sponge, not a swamp.
Poor light conditions are another silent killer. Poppy seeds need bright, indirect light (or direct sun) to break dormancy. A dark windowsill or grow light that’s too weak will leave you waiting for sprouts that never come. Place your tray near a south-facing window or under a grow light for 12+ hours daily—this is non-negotiable for germination.
⚠️
⚠️ Warning: Poppy Seeds Need Warm Soil to Germinate!
Most seeds fail because the soil is too cold (below 60°F/15°C). Use a seedling heat mat ($15-$25) if your home runs cool. Place your tray on a sunny windowsill or near a radiator (but not directly on it). Never use hot water to "warm" the soil—it creates uneven temps that shock seeds.
Pro Tip: If your home is below 65°F (18°C), combine warmth with bright light—this doubles your germination speed. Monitor soil moisture with your finger: it should feel like a wrung-out sponge, not dry or soggy.
Many gardeners also struggle with seed depth. Poppy seeds are tiny and need just ¼ inch of soil coverage—any deeper, and they’ll rot before sprouting. I’ve seen seeds planted ½ inch deep (as some guides suggest) fail completely.
Use a fine-mesh sieve to lightly sift soil over them, then gently press down. Think "dusting," not "burying."
Another hidden issue is old or stored seeds. Poppy seeds lose viability quickly—after just 1-2 years, germination drops by 50%+. Always use fresh seeds (purchased within the last year) for the best results.
If you’re unsure, do a quick viability test: soak seeds in warm water for 24 hours—if 80% float, they’re likely bad; if most sink, they’re good to plant.
Finally, transplant shock can kill seedlings before they even bloom. Poppies have delicate taproots, so handle them like glass when moving to larger pots. Wait until they have 2-3 true leaves (not just the first seed leaves) and use a paper towel to wrap roots for support.
Gradually introduce them to outdoor conditions over 7-10 days—this is called hardening off, and it’s your secret weapon for survival.
By avoiding these 5 key mistakes, you’ll transform your poppy germination from a gamble into a guaranteed success. Start with warm soil, bright light, and a light touch on water—your future blooms will thank you! 🌸