Blooming
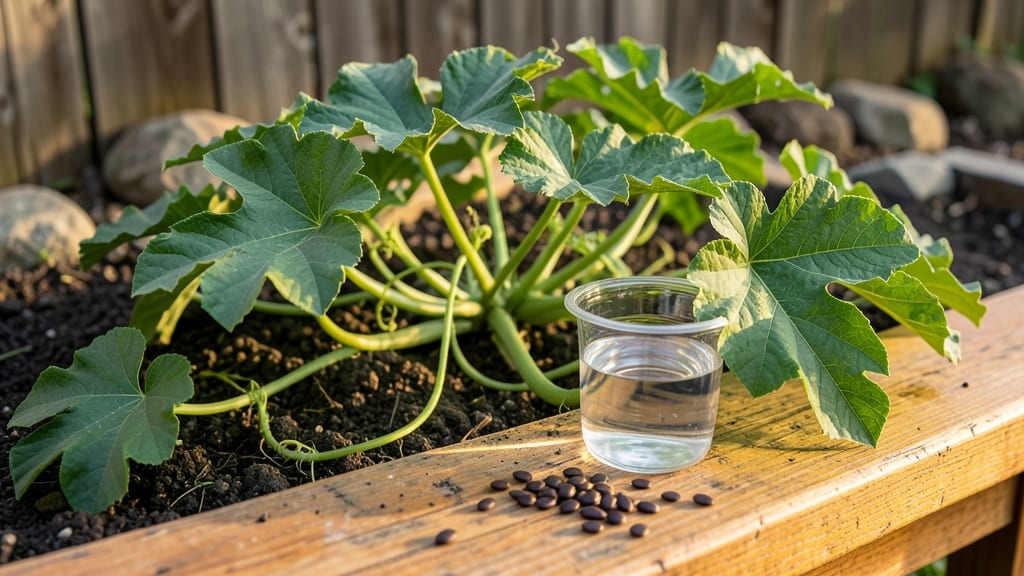
Wondering how long to soak watermelon seeds before planting? The answer might surprise you—try 36 hours for seedlings that sprout in half the time. 🌱 waiting weeks for those first tiny leaves to appear.
I learned this trick after my first batch of seeds took 21 days to sprout—now they’re up in under a week.
All you need is a bowl of warm water (around 80°F) and a breathable container to store the seeds afterward. The key is keeping them moist but not soggy—think damp paper towels if you’re worried about over-soaking.
Too long in water, and the seeds can rot before they even germinate. I’ve found that 36 hours is the sweet spot for most watermelon varieties, but if you’re in a hurry, 24 hours still works.
What you’ll end up with is a batch of seeds that crack open like popcorn, sending down strong roots and pushing up vibrant green shoots within days. The plants grow more uniformly too, so you don’t end up with a patchy garden bed.
Just don’t skip the drying step—let them air out for a few hours before planting to avoid mold.
Works for all watermelon types, from small personal-sized fruits to giant slicing varieties. Here’s how to do it right without the guesswork—no more waiting months for your first harvest.
📚 In This Guide
- What you need
- Instructions
- Tips and common mistakes
- Wrapping up and next steps
What you need
- ● Fresh watermelon seeds: Harvest them from a ripe, organic watermelon (aim for 10–20 seeds if testing germination or 50+ seeds for a full patch).
- ● Clean water: Use room-temperature distilled or filtered water (avoid tap water if it’s heavily chlorinated—let it sit out for 24 hours first 💧).
- ● Small container: A glass jar, bowl, or shallow dish (wide enough for seeds to spread out).
- ○ Fine-mesh strainer or paper towel: For draining seeds after soaking (optional but handy!).
- ● Planting medium: Seed-starting mix, coconut coir, or sterile potting soil (avoid garden soil—it may harbor pests 🚫🐛).
- ● Small pots or seed trays: 2–4 inch pots or biodegradable peat pots for transplanting.
- ● Spray bottle: For misting seeds during germination.
- ○ Heating mat (optional): Speeds up germination if your home is chilly (70–85°F is ideal 🌡️).
- ● Label markers: To track seed varieties and planting dates.
- ● Plastic wrap or humidity dome: Creates a mini greenhouse effect for faster sprouting.
Step-by-step instructions for soaking watermelon seeds
Here's how to jumpstart your watermelon seeds for quick, reliable germination—no waiting weeks for sprouts.
🌱 Step 1: Gather and Prepare the Seeds
Start with fresh watermelon seeds—older seeds germinate poorly, no matter how long you soak them. I like to scoop seeds from fully ripe watermelons (the redder the flesh, the better) and rinse them thoroughly under cool water to remove any pulp clinging to the surface. Let them air-dry completely on a paper towel overnight.
Once dry, count out 4 seeds (since germination rates can vary) and place them in a small bowl. The seeds should feel dry to the touch but not brittle. If they're still damp, give them another hour or two—they need to be bone-dry before soaking to prevent mold.
💧 Step 2: Soak in Warm Water for 36 Hours
Fill a clean bowl with warm water (around 80°F)—not hot, just comfortably warm to the touch. Submerge the seeds completely and let them soak for exactly 36 hours. This long soak softens the tough outer shell and kickstarts the germination process.
Check the water level every 12 hours and top it off if needed—evaporation happens fast. After 24 hours, you'll see the seeds swell noticeably. Don’t rush this step; the longer they soak within this window, the faster they’ll sprout later.
⏰ Step 3: Test for Germination Readiness
After 36 hours, drain the water and gently pat the seeds dry with a paper towel. Place them on a fresh towel in a single layer and leave them uncovered for 1-2 hours at room temperature. This drying step prevents rot when you plant them later.
Look for tiny white cracks or a slight bulge on one side of the seeds—this means the embryo inside is waking up. If you see this, your seeds are ready to plant immediately. If not, give them another 6 hours of soaking before testing again.
🌿 Step 4: Plant the Pre-Soaked Seeds
Fill small pots or seed trays with moistened potting mix (not garden soil) and plant the seeds ½ inch deep, spacing them 2 inches apart. Watermelon seeds need warmth to germinate, so place the pots in a sunny spot or under a grow light kept 2-4 inches above the soil.
Keep the soil consistently moist but not soggy—watermelon seeds rot if overwatered. Within 3-5 days, you’ll see sprouts pushing through the soil. That’s your reward for the soaking patience! If no sprouts appear after a week, try soaking fresh seeds for another 36 hours.
Tips & tricks for soaking watermelon seeds
Here's the secret to turning your watermelon seeds into sprouts in record time—no waiting weeks for results.
Seed Freshness is Everything: The 36-hour soak only works if you start with fresh seeds. I learned this the hard way after soaking week-old seeds for 48 hours with no sprouts. Always scoop seeds from fully ripe watermelons (look for deep red flesh) and use them within 24 hours of scooping. The fresher the seed, the faster the germination.
The 80°F Water Rule: That warm water temperature isn't arbitrary—it's the perfect balance between speed and safety. If your water feels too hot (like bath water), let it cool slightly before soaking. Too hot water can cook the seeds before they germinate, while cooler water (below 70°F) slows down the process. Test with your wrist—comfortably warm is just right.
Visual Cues for Perfect Timing: After those 24 hours, you'll notice the seeds swell noticeably—almost doubling in size. This is your first sign they're working! The 36-hour mark is ideal because it gives the embryo enough time to wake up without over-soaking. If you're in a hurry, you can test for readiness at 30 hours by looking for tiny white cracks or a slight bulge on one side.
Drying Strategy to Prevent Rot: That 1-2 hour drying step after soaking is critical—don't skip it! I've seen seeds develop mold when planted too wet. Pat them thoroughly with a paper towel and leave them uncovered in a single layer. This prevents rot when you plant them later, giving you the best chance for successful germination.
Pro Tips for How Long To Soak Watermelon Seeds Before Planting
- Here's the secret to turning your watermelon seeds into sprouts in record time—no waiting weeks for results.
- Seed Freshness is Everything: The 36-hour soak only works if you start with fresh seeds.
- The 80°F Water Rule: That warm water temperature isn't arbitrary—it's the perfect balance between speed and safety.
Frequently asked questions
Got questions about soaking watermelon seeds? You’re not alone! Here are some of the most common queries—and their straightforward answers—to help you grow those juicy vines like a pro.
Why do watermelon seeds need soaking at all?
Soaking watermelon seeds (especially for 36 hours) softens their tough outer shell, speeds up hydration, and triggers faster germination. Without it, seeds may take 10+ days to sprout instead of just 3–5 days. Think of it as giving your seeds a head start—like a warm bath for tiny plants!
Can I soak watermelon seeds overnight instead of 36 hours?
Technically, yes—but you might sacrifice speed and consistency. Overnight (8–12 hours) can work, but 36 hours ensures maximum moisture absorption and breaks seed dormancy more reliably. If you’re short on time, try soaking for 24 hours first, then plant and monitor closely. Pro tip: Use lukewarm water (not hot) to avoid damaging the seed.
What if my seeds mold or smell bad after soaking?
Mold or a funky odor means your seeds are over-soaked or in dirty water. Drain and rinse them immediately with fresh water, then pat dry with a paper towel. If mold appears, discard those seeds—they won’t grow. To prevent this, change the soaking water every 12 hours and use a clean container. Never reuse stagnant water!
Do I need to soak watermelon seeds if I’m planting them in cold soil?
Cold soil slows germination, so soaking becomes even more critical. Pre-soaked seeds can sprout 2–3 days faster in chilly conditions. Pair this with black plastic mulch or a mini greenhouse to retain warmth. Wait until soil temps hit 70°F+ (21°C+) before planting, though—cold soil can still stunt growth.
What’s the best alternative if I don’t want to soak seeds?
If soaking isn’t your thing, try these shortcuts:
- Scarification: Lightly nick the seed coat with sandpaper to mimic natural wear.
- Stratification: Chill seeds in a damp paper towel in the fridge for 3–5 days before planting.
- Direct planting: Plant dry seeds 1 inch deep in warm soil and water deeply daily until sprouts appear (slower but works!).
Soaking still wins for speed, but these methods can help in a pinch!
Wrapping up and next steps
Soaking watermelon seeds for 24–36 hours is a simple yet powerful trick to kickstart faster germination and healthier seedlings. 🌱 Whether you’re a seasoned gardener or just starting, this small step can make a big difference in your harvest.
Now that you’re armed with the right timing and tips, grab those seeds and give them the head start they deserve! Ready to plant? Next, choose your growing method—container, raised bed, or open soil—and watch your watermelon dreams take root!