
Watering
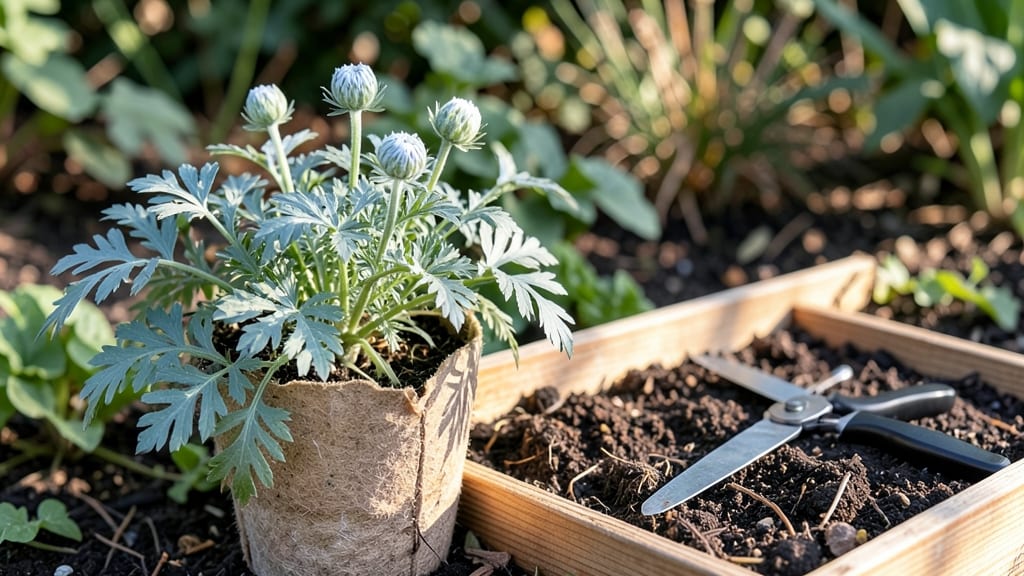
Growing Nigella damascena seedlings from seed is one of those gardening surprises that rewards patience with effortless beauty. 🌱 I’ve watched these delicate seedlings transform into lacy, fragrant plants that practically grow themselves—once you get the early stages right.
The key isn’t fussing over them but creating the perfect conditions to let nature take over.
Start with well-draining soil and a shallow tray, then scatter those tiny seeds on the surface—no need to bury them. Keep the soil consistently moist but never soggy, and place the tray in bright, indirect light until sprouts appear in about 2-3 weeks.
Overwatering is the real enemy here, as it can lead to damping-off, so a gentle misting routine works best.
Once seedlings have their first true leaves, they’ll start looking like little lace doilies. Space them 6-12 inches apart when transplanting, and they’ll reward you with feathery foliage and clusters of fragrant flowers that attract pollinators all summer.
The best part? These plants thrive in poor soil and need almost no care once established.
Common mistakes include planting too deeply or crowding seedlings, which stunts growth. If germination takes longer than expected, stay patient—Nigella seeds can be stubborn. Before you know it, your garden will be filled with these charming, low-maintenance annuals that bring both fragrance and whimsy to any cottage-style setting.
📚 In This Guide
- What you need
- Instructions
- Tips and common mistakes
- Wrapping up and next steps
What you need
- ● Nigella damascena seeds: 1–2 packets (50–100 seeds per packet). Opt for organic or heirloom varieties for best results!
- ● Seed-starting trays or small pots: 2–4 (3–4 inches deep) with drainage holes. Biodegradable pots work great too!
- ● Well-draining potting mix: 1–2 bags (lightweight, seed-starting blend preferred). Avoid heavy garden soil.
- ● Watering can or spray bottle: With a fine mist setting to keep seeds moist without overwatering.
- ● Grow lights or sunny windowsill: A spot with 6–8 hours of sunlight daily (or a grow light for indoor starters).
- ○ Clear plastic wrap or humidity dome: (Optional but helpful) To retain moisture while seeds germinate.
- ● Small hand trowel or spoon: For gently pressing seeds into soil.
- ● Plant labels: To track varieties (especially if growing multiple types).
- ○ Fertilizer (balanced, water-soluble): 1 small bottle (optional, for post-germination growth).
- ● Transplanting tray or garden bed: Once seedlings are 2–3 inches tall, for hardening off or direct planting.
Step-by-Step guide to cultivating vigorous nigella damascena seedlings
Here’s how to coax those delicate but resilient seedlings into sturdy, fragrant plants with almost no fuss.
🌱 Step 1: Prepare the Seed Starting Mix and Containers
Nigella seedlings thrive in light, well-draining soil that mimics their native Mediterranean conditions. Fill your 4-inch nursery pots with the 2 gallons of seed-starting mix, tapping gently to eliminate air pockets. The mix should feel like a damp sponge—not heavy or compacted. I like to work in a shallow tray to catch any stray seeds or soil while I fill each pot to within ½ inch of the rim. This prevents soil from spilling during watering.
Nigella seeds are tiny, so precision matters. Use a toothpick or fine tweezers to place 1-2 seeds per pot just below the soil surface—no deeper than ¼ inch. Cover them with a light dusting of mix, then mist the surface with a spray bottle until the top layer looks uniformly damp. Overwatering now will bury the seeds too deep, delaying germination.
💧 Step 2: Create Ideal Germination Conditions
Place the pots in a humidity dome or sealed plastic bag to trap warmth and moisture, which nigella seeds crave. Keep them in a spot with consistent 65-70°F temperatures—a sunny windowsill or under a grow light set to 12 hours of light daily. Germination can take 10-21 days, so patience is key. Check daily for condensation on the dome; if it fogs up, remove it for 10-15 minutes to prevent fungal issues.
Once the first cotyledons (seed leaves) appear, remove the dome entirely. These tiny, rounded leaves signal that the seedlings have broken through the soil’s surface. Water from the bottom by placing pots in ½ inch of water for 10 minutes—this ensures even moisture without disturbing delicate stems. Let excess water drain completely before returning them to their tray.
☀️ Step 3: Provide Light and Airflow for Strong Growth
Nigella seedlings crave bright, indirect light but despise direct midday sun, which can scorch their tender leaves. Position them 3-4 inches under a grow light or in a south-facing window where they receive 6-8 hours of filtered sunlight. You’ll know they’re getting enough light when the stems stay short and sturdy, not stretching toward the source. If they lean, rotate the pots ¼ turn daily to encourage even growth.
Once the first true leaves (the fern-like foliage) emerge, increase airflow by placing a small fan on low nearby. This mimics outdoor conditions and strengthens stems, preventing the leggy, weak growth that often plagues seedlings. Water when the top inch of soil feels dry, using a spray bottle to avoid disturbing the soil around the roots.
🪴 Step 4: Harden Off and Transplant Seedlings
Two weeks before your last frost date, begin hardening off by moving the pots to an outdoor shady spot for 1-2 hours the first day. Gradually increase exposure over 7-10 days, ending with full sun for the entire day. Nigella’s silvery foliage will shimmer in the light—a sure sign they’re ready for the garden. Choose a site with well-draining soil and full sun to partial shade, as they tolerate heat once established.
Transplant seedlings 3-4 inches apart in the garden or larger 6-inch pots if growing in containers. Gently loosen the roots if they’ve become root-bound, then water deeply at the base. Mulch with 1 inch of organic mulch to retain moisture and suppress weeds. Nigella’s self-seeding habit means you’ll likely have volunteers popping up next season—just thin them to maintain spacing.
Tips & tricks for perfect nigella damascena seedlings
These game-changing insights will transform your nigella seedlings from fragile sprouts into robust, fragrant plants that practically grow themselves.
Soil Texture Matters: In Step 1, when preparing your 2 gallons of seed-starting mix, resist the urge to compact it—this creates air pockets that prevent proper root development. Instead, gently fluff the mix with a fork after filling the 4-inch pots, creating a light, almost airy texture. Think "cloud-like" rather than dense. The goal is to mimic the well-draining conditions of nigella's Mediterranean homeland, where water flows through rather than pools around delicate roots.
Precision Planting Pays Off: That ¼-inch depth recommendation in Step 1 isn't arbitrary—it's the sweet spot where nigella seeds receive just enough moisture to germinate without becoming waterlogged. Use your toothpick to create tiny divots exactly this deep, then place seeds gently. For extra precision, I mark my toothpicks with a permanent marker at the ¼-inch point. This consistency is crucial because nigella seeds are so tiny that even slight variations in depth can delay germination by days.
Germination Temperature Secret: Maintaining that 65-70°F range in Step 2 is more important than you might think. Nigella seeds are particularly sensitive to temperature fluctuations—even a 5°F drop can stall germination. Place your humidity dome near a reliable heat source (like the top of a refrigerator) if your home tends to run cool. The key is consistency: check with your hand daily to ensure the soil remains warm but not hot to the touch. A simple digital thermometer placed among the pots provides peace of mind.
Light Rotation Strategy: When your seedlings develop their first true leaves in Step 3, implement this pro technique: place your pots on a lazy Susan or rotating tray under your grow light. Rotate them ¼ turn every 8 hours (morning, noon, and evening) to ensure even light exposure. This prevents the classic "leggy" growth pattern where seedlings stretch toward the light source, creating weak stems that can't support the plant's eventual height and seed pods.
Pro Tips for Nigella Damascena Seedling
- These game-changing insights will transform your nigella seedlings from fragile sprouts into robust, fragrant plants that practically grow themselves.
- Soil Texture Matters: In Step 1, when preparing your 2 gallons of seed-starting mix, resist the urge to compact it—this creates air pockets that prevent proper root development.
- Precision Planting Pays Off: That ¼-inch depth recommendation in Step 1 isn't arbitrary—it's the sweet spot where nigella seeds receive just enough moisture to germinate without becoming waterlogged.
Frequently asked questions
How long does it take for nigella damascena seedlings to germinate?
Patience is key! Nigella damascena seeds typically germinate in 10–21 days if kept in warm (70–75°F), moist soil. For faster results, soak seeds overnight before planting. If nothing sprouts after 3 weeks, try a fresh batch—they can be finicky!
Why are my nigella seedlings wilting or turning yellow?
Overwatering or poor drainage is often the culprit. These seedlings prefer dry soil—water only when the top inch feels dry. Yellowing leaves may also signal damping off (a fungal issue). Improve airflow, avoid crowding, and use a fungicide if needed.
Can I plant nigella seeds directly outside, or should I start indoors?
Both work, but direct sowing outdoors (after the last frost) is easiest. Start seeds indoors 4–6 weeks early only if your growing season is short. Nigella hates transplanting, so outdoor planting reduces stress—just scatter seeds lightly (they’re tiny!) and cover with ¼ inch of soil.
What can I do if my nigella seedlings look leggy or stretched?
Leggy seedlings crave more light! Move them to a sunnier spot (6+ hours of light daily) or use a grow light. Avoid overcrowding—thin seedlings to 6–12 inches apart. Bonus: Pinch back the tips to encourage bushier growth before flowering.
Are there alternatives to nigella damascena for fragrant annuals?
Try sweet alyssum (tiny white/purple blooms, honey-scented), Lobularia maritima, or Dianthus (clove-scented). For height, Snapdragons or Lavender add fragrance + texture. All thrive in similar low-care conditions!
Wrapping up and next steps
Growing a Nigella damascena seedling is a rewarding journey that brings beauty and fragrance to your garden with minimal effort! 🌸 With the right soil, sunlight, and watering routine, these delicate blooms will flourish into stunning annuals that attract pollinators and add charm to any space.
Whether you're a seasoned gardener or just starting out, don’t hesitate—start planting today!
Ready to see your seeds sprout? Head to your local nursery or order seeds online to begin your fragrant adventure. Happy gardening! 🌱