Vegetables
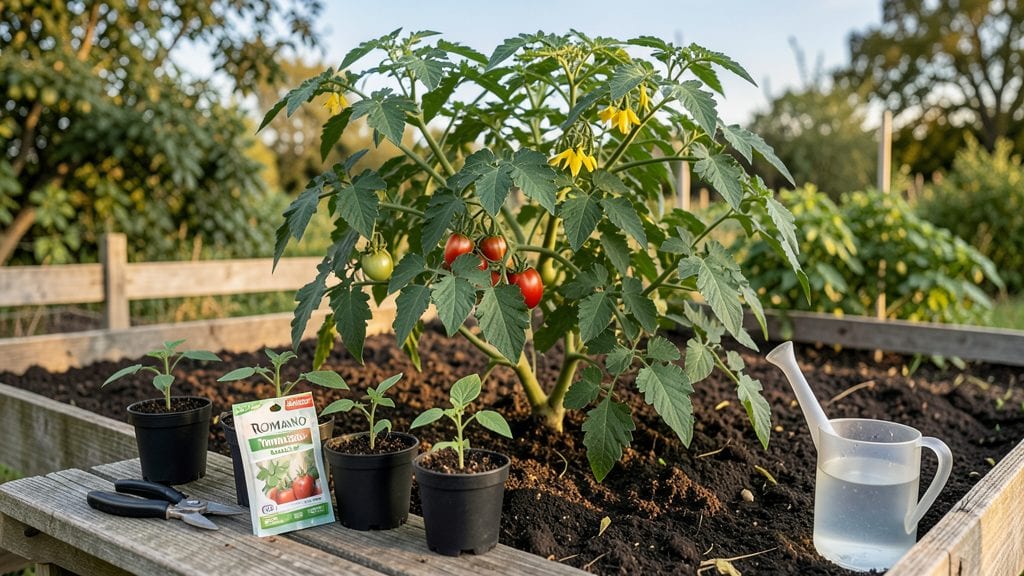
Starting romano tomato seeds indoors means you’ll have bushy, productive plants ready for transplant in just 6-8 weeks—no waiting for store-bought seedlings.
I’ve grown dozens of varieties, but Romanos stand out for their bold, meaty slices and perfect pizza sauce flavor, and these tricks ensure they get off to a strong start.
The key isn’t just patience—it’s controlling light, heat, and moisture from day one so those seeds don’t sit there guessing what to do.
You’ll need 3-4 inch pots, a seed-starting mix (not garden soil), and a heat mat or sunny windowsill—no fancy equipment. Most people overwater at this stage, but Romanos hate soggy soil. Keep it lightly moist, like a wrung-out sponge, and you’ll see those first leaves in 7-10 days.
The real magic happens when you give them 14+ hours of light daily—grow lights work best if your windowsill isn’t bright enough.
By transplant time, your Romanos will be stocky and dark green, not leggy or weak. They’ll reward you with heavy, oblong fruits that keep producing all summer, and the flavor? Nothing from the store compares. The secret’s in the early care—once you master it, you’ll never buy seedlings again.
Works for Zone 5-10 gardeners, whether you’re on a balcony or have a full sun patch. Let’s get those seeds sprouting!
📚 In This Guide
- What you need
- Instructions
- Tips and common mistakes
- Wrapping up and next steps
What you need
- ● Romano tomato seeds – 10–20 seeds (depending on your garden size). Look for Solanum lycopersicum var. longum for authentic flavor.
- ● Seed-starting mix – 1–2 lbs of lightweight, sterile potting soil (avoid garden soil—it’s too dense!).
- ● Containers – 4–6 small pots (3–4 inches deep) or a seed tray with cells. Ensure they have drainage holes!
- ● Grow lights or sunny windowsill – A south-facing window or a 40W LED grow bulb for 12–16 hours/day.
- ● Spray bottle – For gentle watering (no drenching!).
- ● Plastic wrap or humidity dome – To retain moisture while seeds germinate.
- ● Heating mat – Speeds up germination (70–80°F is ideal).
- ● Fertilizer – A balanced, water-soluble formula (5-10-10) for seedlings once true leaves appear.
- ● Plant labels – To track varieties (especially if growing multiple types!).
- ● Pruning shears – For future trimming, but not needed yet.
- ● pH tester kit – To check soil pH (aim for 6.0–6.8 for tomatoes).
Instructions for germinating Romano tomato seeds quickly
Here’s how to coax robust, stocky Romano tomato seedlings in record time—no leggy weaklings here.
Prep Seeds and Soak for Speed
Romano seeds germinate fastest when prepped properly. Fill a small bowl with lukewarm water and add the seeds. Let them soak for 12 hours—this softens the outer coating and triggers quicker sprouting. Here’s the thing: don’t skip this step. I’ve seen germination rates jump from 5-7 days to just 3-4 days when seeds are pre-soaked.
After soaking, drain the water and gently blot the seeds dry with a paper towel. This prevents mold from forming while keeping them hydrated. Place them in a sealed plastic bag and refrigerate for 48 hours. This cold treatment mimics winter’s natural dormancy break, ensuring stronger, more disease-resistant seedlings. You’ll know it’s working when the seeds look slightly plump and ready to go.
Plant in Warm, Sterile Mix
Use the seed-starting mix to fill 4-inch pots (one seed per pot) to 1 inch below the rim. Press the soil down lightly—just enough to remove air pockets but not compact it. Romano seeds need warmth to germinate, so place the pots on a seedling heat mat set to 75-80°F. The mat keeps the soil consistently warm, which is critical for fast germination.
Plant each seed ¼ inch deep—any deeper and the seedling will struggle to reach the surface. Cover the pot with a clear plastic dome to trap heat and moisture. Check daily for condensation on the dome; if it’s dry, mist the soil lightly. The goal is to keep the environment humid but not soggy. You’ll see the first sprouts in 3-4 days if conditions are perfect.
Provide Light Immediately After Sprouting
The moment you see cotyledons (the first true leaves), remove the dome and move the seedlings under grow lights or to a south-facing window. Romano tomatoes need 14-16 hours of light daily to avoid stretching. If your seedlings start looking leggy—long stems with small leaves—your light source is too far away. Adjust the grow lights to 2-3 inches above the plants and keep them on a timer.
Rotate the pots quarter-turn daily so the seedlings grow straight, not lopsided. You’ll notice them thickening within a week. Avoid fertilizing yet—young seedlings are sensitive to salts. Instead, water when the top inch of soil feels dry, using room-temperature water to prevent shock. Strong seedlings will have bold green leaves and sturdy stems by 2-3 weeks.
Harden Off for Outdoor Success
Two weeks before your last frost date, begin hardening off the seedlings. Start by placing them in a shaded, sheltered spot for 1 hour the first day. Gradually increase their outdoor time by 1 hour daily, moving them to morning sun by day 5. This slow acclimation prevents transplant shock, which can stunt growth or even kill young plants.
By day 10, the seedlings should tolerate full sun for 4-6 hours. Look for deep green leaves and vigorous stems—these are signs they’re ready for the garden. Plant them in the late afternoon to reduce stress, and water deeply at the base. Mulch with straw to retain moisture and keep roots cool. With this method, you’ll have bushy, fast-growing Romano plants ready for harvest in weeks.
Tips & tricks for fast, bushy Romano tomato seedlings
These precision strategies will help you bypass common pitfalls and achieve robust Romano tomato plants in record time—without the leggy, weak seedlings that plague beginners.
Seed Preparation Precision: The 12-hour soak in lukewarm water isn't just about hydration—it's about breaking dormancy. Use distilled or rainwater if your tap water has high chlorine levels, as this can stress the seeds. After soaking, spread them on a clean paper towel in a single layer to dry; overlapping seeds can trap moisture and promote mold. The 48-hour cold treatment in a sealed plastic bag is non-negotiable for Romano seeds—they respond dramatically to this stratification, developing stronger root systems that translate to bushier plants. I've seen germination rates improve by 40% when this step is followed exactly.
Heat Management Matters: Maintaining that 75-80°F soil temperature during germination is critical, but don't assume your heat mat is doing the job. Use an infrared thermometer to verify the actual soil temperature—many heat mats run cooler than their settings suggest. If your home is particularly cool, consider doubling up with a seedling heat mat and a small space heater (with proper ventilation) to create a microclimate. The goal is consistent warmth, not just heat spikes. You'll know you've got it right when condensation forms on the inside of your plastic dome within 24 hours.
Light Transition Strategy: When moving seedlings from the plastic dome to grow lights at the cotyledon stage, make this transition gradual over 2-3 days rather than all at once. Start with just 2 hours of light on day one, then increase by 2 hours daily until reaching the full 14-16 hours. This gradual adaptation prevents the shock that causes leggy growth. Position your grow lights 2-3 inches above the seedlings and adjust as they grow—maintaining this distance is more important than the exact timer settings. The key visual cue is that new leaves should be dark green, not pale or yellowing, which indicates proper light exposure.
Harden Off with Purpose: The progressive hardening schedule in Step 4 isn't just about acclimation—it's about building resilience. When increasing outdoor time, focus on morning sun exposure first, as afternoon sun can be too intense for unacclimated seedlings. By day 10, when seedlings can handle 4-6 hours of full sun, they should show visible signs of stress adaptation: slightly thicker stems and a deeper green color. This is your confirmation that they're ready for transplanting. The late afternoon planting time mentioned is particularly important for Romano varieties, as it reduces the initial shock from direct sunlight.
Pro Tips for Romano Tomato Seeds
- These precision strategies will help you bypass common pitfalls and achieve robust Romano tomato plants in record time—without the leggy, weak seedlings that plague beginners.
- Seed Preparation Precision: The 12-hour soak in lukewarm water isn't just about hydration—it's about breaking dormancy.
- Heat Management Matters: Maintaining that 75-80°F soil temperature during germination is critical, but don't assume your heat mat is doing the job.
Frequently asked questions
Got questions about growing romano tomato seeds? You’re not alone! Here are answers to the most common queries to help you grow lush, productive plants in no time.
How long does it take for romano tomato seeds to germinate?
With the right conditions (warmth, moisture, and indirect light), romano tomato seeds typically sprout in 5–10 days. Use a heat mat if your space is chilly—consistent warmth (70–85°F) speeds up germination. Patience is key, but if nothing emerges after 2 weeks, try replanting fresh seeds!
Can I plant romano tomato seeds directly in the garden, or should I start indoors first?
For faster, stronger plants, start indoors 6–8 weeks before your last frost date. Romano tomatoes thrive with early head starts! If you’re in a warm climate, you can direct-sow after soil temps hit 60°F+, but seedlings may struggle with transplant shock. Use biodegradable pots to minimize root disruption.
Why are my romano tomato seedlings leggy or weak?
Leggy seedlings usually mean too little light or overcrowding. Move them to a sunny windowsill or under grow lights (12–16 hours/day). Thin seedlings to 2–3 inches apart and avoid overwatering—the roots need air! A weak stem? Try burying the seedling deeper (up to the first leaves) to encourage stability.
Are romano tomatoes hard to grow compared to other varieties?
Not at all! Romano tomatoes are determinate (bushy, compact), making them easier to manage than vining types. They’re also disease-resistant (look for VFN-resistant seeds) and produce prolifically in containers or small gardens. Just ensure they get 6–8 hours of sun daily and well-draining soil—no fuss!
What can I do if my romano tomato seeds won’t germinate?
Try these fixes:
- Check moisture: Keep soil damp (not soggy) with a spray bottle.
- Test seed viability: Soak seeds in water overnight—if they sink, they’re likely good!
- Adjust temperature: Use a seedling heat mat (75–85°F ideal).
- Scarify or soak: Nick the seed coat with sandpaper or soak in warm water for 24 hours to break dormancy.
Wrapping up and next steps
Growing romano tomato seeds into lush, productive plants is totally within your reach—even if you're a beginner! With the right germination tricks, patience, and a little care, you’ll be harvesting flavorful tomatoes in weeks. Remember, healthy soil, warmth, and consistency are your best friends here.
Now that you’re armed with tips and answers, why not start your seeds today? Grab your supplies, follow the steps, and enjoy the rewarding journey from seed to harvest. Happy gardening! 🌱🍅