Watering
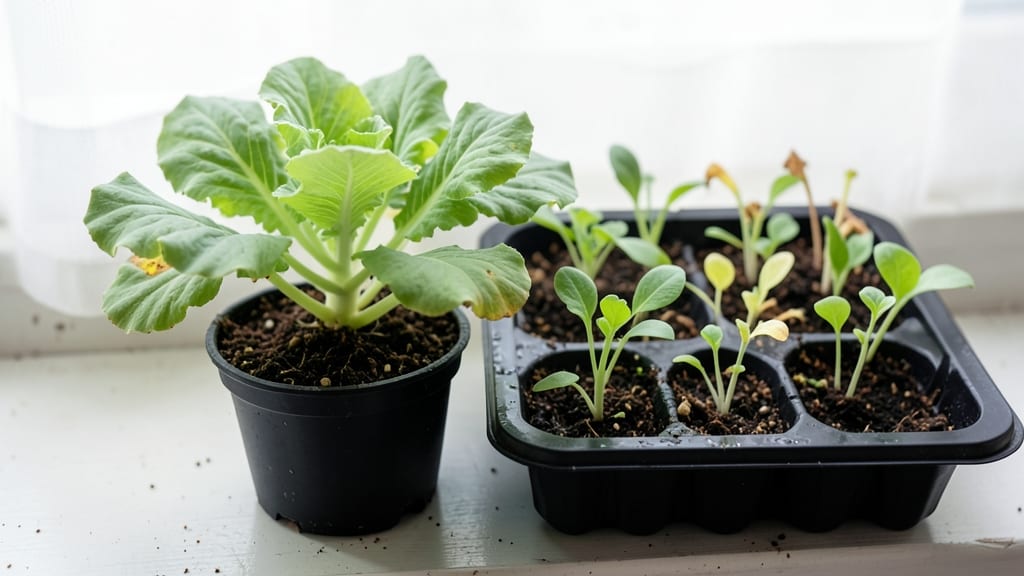
Growing strong seedlings starts with avoiding seedling growth mistakes that stifle their potential before they even sprout.
Your seedlings are the foundation of a thriving garden—but one small mistake can turn vibrant sprouts into limp, wilted failures before they even reach maturity. Whether it's drowning them in water or starving them of light, these errors happen more often than you think.
In USDA Zone 6a, where spring planting runs from April to May, the stakes are even higher. A leggy stem or yellowing leaves can mean the difference between a bountiful harvest and starting over.
The good news? Most of these problems have simple fixes—once you know what to watch for.
Here, I’ll walk you through the five most critical errors and how to correct them before your seedlings hit their growth ceiling. No more guesswork, just actionable steps to give your 🌱 plants the strong start they deserve.


Overwatering seedlings: how too much water strangles root development
When I first started growing seedlings, I assumed more water meant faster growth. Instead, my tomato and basil seedlings turned into sad, mushy messes before they even sprouted true leaves.
What I didn’t realize was that overwatering seedlings doesn’t just slow growth—it suffocates roots and invites deadly fungal diseases like damping-off. The soil might look perfect, but too much moisture cuts off oxygen, leaving your seedlings gasping for air.
Seedlings need consistent moisture, not soggy conditions. Their tiny root systems can’t handle waterlogged soil, which leads to root rot and stunted growth. Even worse, excess moisture creates the perfect breeding ground for pathogens that attack young, vulnerable plants.
The key is finding that sweet spot between hydration and aeration—where roots get enough water to thrive but don’t drown in it.
⚠️callout warning
Signs your seedlings are drowning:
- Yellowing leaves (especially at the base)
- Mushy stems that collapse when touched
- Slow or no growth despite plenty of water
- White mold or fuzzy growth at soil level (damping-off)
💡 Fix it now: Let the top 1/4 inch of soil dry out between waterings. Use pots with drainage holes and a well-draining seedling mix (50% peat moss, 30% perlite, 20% compost).
Most gardeners make the mistake of watering on a schedule rather than checking the soil. I used to water my seedlings every day, thinking they needed constant moisture. But seedlings only need water when the top 1/4 to 1/2 inch of soil feels dry to the touch.
Stick your finger in the soil—if it’s damp just below the surface, wait another day. This simple check prevents 90% of overwatering issues.
Another common trap is using containers without drainage holes. Without them, water pools at the bottom, creating a waterlogged root zone. Even if you think you’re not overwatering, excess moisture lingers in undrained pots.
Always use containers with holes or elevate pots on saucers to prevent water from sitting against the roots. For extra insurance, add a layer of perlite or coarse sand at the bottom of your pots to improve drainage.
The type of seedling mix you use makes a huge difference. Heavy garden soil compacts easily, trapping water and cutting off airflow to roots. Instead, use a lightweight seed-starting mix designed for aeration.
These mixes combine ingredients like peat moss, coconut coir, and vermiculite to hold moisture while allowing oxygen to reach the roots. If you’re mixing your own, aim for a blend that’s 40% organic matter (like compost) and 60% inorganic (perlite or sand) to balance moisture and aeration.
One of the biggest myths about seedlings is that they need constant humidity. While humidity helps prevent drying out, too much moisture in the air can actually promote fungal growth.
If you’re using a humidity dome or plastic wrap, remove it as soon as you see the first true leaves appear. At that stage, seedlings need airflow to strengthen their stems.
Instead of sealing them in, try a light misting in the morning and keep them in a bright, well-ventilated spot.
Temperature plays a sneaky role in overwatering. Cool soil holds more moisture than warm soil, so if your seedlings are in a cool environment (below 65°F), they’ll dry out more slowly. That means you might overwater without realizing it.
Keep seedlings in a warm, consistent environment (around 70-75°F) to encourage even moisture distribution. A seedling heat mat can help maintain ideal temperatures, especially in cooler climates.
If you’ve already overwatered and notice damping-off or mushy stems, don’t panic—there’s still hope. First, remove any affected seedlings immediately to prevent the disease from spreading. Then, let the soil dry out completely before watering again.
Add a fungal inhibitor like neem oil or a diluted hydrogen peroxide solution (1 part peroxide to 10 parts water) to the soil to kill existing pathogens. After that, switch to a sterilized seedling mix to avoid reintroducing the problem.
To keep track of your watering habits, I recommend using a small notebook or app to log when and how much you water. Note the soil type, pot size, and environmental conditions (like humidity and temperature).
Over time, you’ll spot patterns—like realizing your seedlings dry out faster in low-humidity conditions or that your black plastic trays retain too much moisture. Adjust your routine based on what you learn.
Remember, seedlings are resilient, but they need your attention to detail. The difference between thriving and failing seedlings often comes down to how well you balance water, air, and warmth. Start with a light touch—water only when necessary, use the right mix, and give them room to breathe.
Your future garden will thank you with strong, healthy plants ready to take on the world. 🌱
Insufficient light exposure: Why weak seedlings stretch toward failure
When your seedlings start stretching toward the light like they’re reaching for a handout, you’re witnessing etiolation—a growth disorder caused by insufficient light exposure. These leggy stems are a survival tactic, but they’re also a red flag that your plants are struggling to develop strong structures.
Without enough photosynthesis, seedlings burn through energy reserves, leaving them weak and prone to snapping or disease.
Even a south-facing window may not provide enough light for seedlings, especially during overcast days or in northern climates. Grow lights become essential tools when natural light falls short, but many gardeners underestimate how quickly seedlings outgrow their light source.
The key is understanding the light requirements for each plant type and adjusting your setup before problems arise.
- 1. Ignoring seedling growth stages: Cotyledons (first leaves) need less light, but true leaves demand 12-16 hours of daily light to prevent stretching.
- 2. Using incorrect grow light distance: Keeping lights 6-12 inches away prevents burning but may still leave seedlings light-deprived if wattage is insufficient.
- 3. Skipping light rotation: Seedlings grow toward the light source, creating uneven stems—rotate trays daily for balanced growth.
- 4. Assuming natural light suffices: A north-facing window provides only 20-30% of full sun, while south-facing may still lack intensity during winter.
- 5. Not adjusting light as seedlings mature: 4-6 true leaves signal readiness for stronger light, but many gardeners keep them under weak conditions too long.
For leafy greens like lettuce or spinach, partial shade (4-6 hours of light) may suffice, but tomatoes and peppers require full sun (8+ hours) to develop sturdy stems.
If your seedlings are already leggy, don’t panic—you can bury stems deeper when transplanting to encourage root growth along the buried section. However, prevention is easier than correction.
If you’re using LED grow lights, opt for full-spectrum bulbs (red and blue wavelengths) to mimic sunlight. Place them 2-3 inches above seedlings and adjust height as they grow.
For natural light, supplement with a reflective surface (like aluminum foil) behind trays to maximize light absorption. Even a clear plastic dome over seedlings can amplify light by 20-30%.
Monitor your seedlings for yellowing leaves or elongated stems—these are clear signs of light deprivation. If you notice weak stems or small leaves, it’s time to intervene. Start with a 14-hour light cycle (using a timer) and gradually increase to 16 hours as seedlings mature.
Remember, consistency is key—seedlings thrive on predictable light routines, just like they do in nature.
Pro tip: Place a light meter near your seedlings to track light intensity (aim for 3,000-5,000 lux). If readings are low, upgrade to a higher-wattage bulb or add a second light source.
With the right setup, your seedlings will grow stocky and strong, ready to handle transplanting without breaking. 🌱