
Lawn
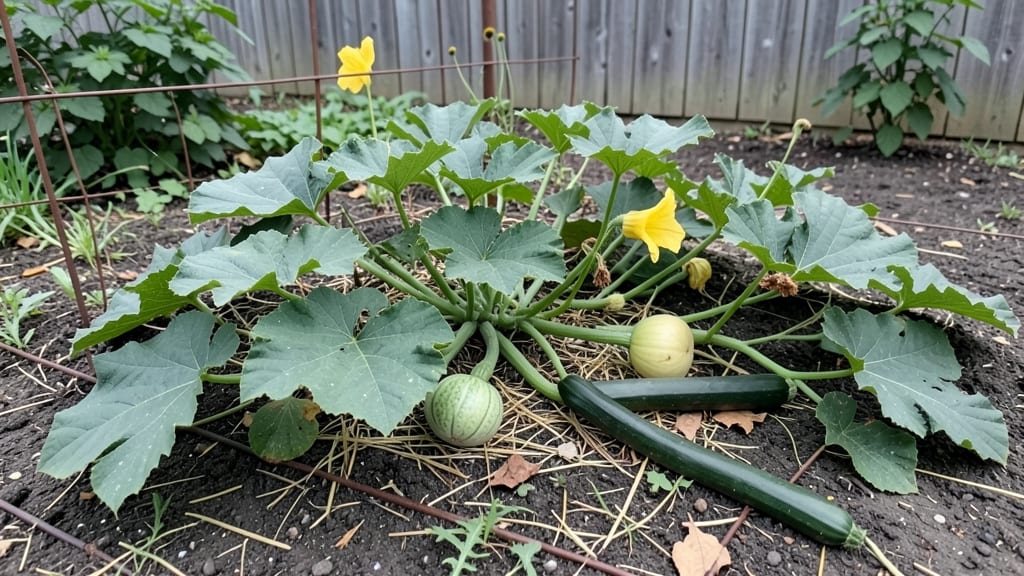
Mastering squash seed identification is your first line of defense against a garden full of surprises—like my first-year mistake growing butternut squash, only to harvest a bitter batch of tiny zucchinis instead. 🌱 The key is looking at seed shape, color, and any printed labels. because those tiny differences determine whether you'll harvest sweet, dense winter squash or tender summer varieties.
Start by sorting seeds into three basic groups: green (like zucchini or acorn), white (butternut or delicata), and black or striped (pumpkin or hubbard).
Seed packets often include tiny photos or descriptions, but even without them, size matters—pumpkin seeds are usually larger than zucchini seeds, and butternut seeds tend to be flatter. Hybrid seeds might have "F1" printed on the packet, while heirlooms often list their exact variety name.
Once you've matched seeds to plants, growth habits change dramatically. Zucchini vines sprawl aggressively, butternut squash climbs neatly on trellises, and pumpkins spread wide. Knowing this ahead of time means you'll plan spacing, trellises, and even harvest timing right from the start.
A quick visual check before planting guarantees you'll end up with the squash you actually want to eat.
For beginners, stick to labeled heirloom seeds—they're more predictable than hybrids and often come with growing tips. And if you're saving seeds from your own harvest, label everything immediately, because those tiny differences in shape and color become critical when it's time to replant next year.
Trust me, your future self will thank you.
📚 In This Guide
- What you need
- Instructions
- Tips and common mistakes
- Wrapping up and next steps
What you need
- ● Fresh or dried squash seeds: 3–5 samples of each variety (green, white, and black) for comparison. Use seeds from butternut, acorn, zucchini, or pumpkin varieties for best results.
- ○ Magnifying glass or jeweler’s loupe: 10x magnification (optional but helpful for fine details).
- ● Ruler or caliper: For measuring seed dimensions (precision: 0.01 inches).
- ● White or light-colored tray: 12" x 12" (to spread seeds for easy viewing).
- ● Soft-bristle paintbrush: Size 0 or 1 (for gentle handling).
- ● Notebook and pen: To record observations (include a sketch pad for seed drawings!).
- ● Seed identification guidebook or printed reference: Focus on Cucurbita genus (e.g., Cucurbita pepo, C. moschata).
- ● Small containers with lids: 2–3 (for sorting seeds by type).
- ● Paper towels or silica gel packets: To dry seeds if they’re damp (accelerates identification).
- ● Digital microscope with camera: For high-res photos or video documentation.
- ● UV flashlight: Reveals fluorescence patterns in some seed coats.
- ● Seed catalogs or online databases: Cross-reference with blank">Seed Savers Exchange or blank">Burpee’s seed guides.
- ● Gloves (nitrile or latex): If handling large quantities of seeds (keeps hands clean!).
- ● Labeling system: Color-coded tags or sticky notes for organizing seeds by trait (shape, color, texture).
How to identify squash seeds by color and type
Here's how to tell your green, white, and black squash seeds apart before planting.
🌱 Step 1: Examine Seed Shape and Size
Start by holding a seed between your thumb and forefinger. Squash seeds come in three basic shapes: flat and oval (like a tiny coin), slightly rounded (like a small pill), or elongated (like a tiny bean). Green varieties, such as zucchini or summer squash, tend to be the flattest and most oval-shaped. These seeds are usually about ¼ inch long and ⅛ inch wide, fitting easily on a fingernail.
White seeds, like those from butternut or acorn squash, are often slightly more rounded or pill-shaped. They're usually a bit larger, around ⅛ inch thick and ⅓ inch long. Black seeds, such as those from black beauty or black kuroda squash, are typically more elongated and slightly thicker, closer to ⅛ inch in diameter and ⅓ to ½ inch long. Run your finger along the edge—the smoother and more uniform the surface, the more likely it is to be a hybrid variety.
🌿 Step 2: Check Seed Color and Texture
Green seeds are the most common and usually have a matte, slightly rough texture. They can range from pale green to deep forest green, sometimes with faint stripes or speckles. Hold the seed up to a bright light—you might notice subtle variations in shade that hint at the squash's maturity or storage conditions. White seeds have a chalky, almost powdery texture when dry, and they often appear slightly translucent when held against light.
Black seeds are the most striking, with a deep, glossy sheen that makes them look almost wet. They're often uniformly dark but can sometimes have faint gray or brown undertones. Run your fingernail across the surface—black seeds tend to be smoother than green or white ones. If a seed feels gritty or has a rough patch, it might be a mixed variety or an older batch.
✂️ Step 3: Look for Distinctive Markings or Patterns
Some squash seeds have subtle markings that can help with identification. Green seeds from heirloom varieties might have faint stripes, speckles, or even tiny ridges running along their length. For example, seeds from a striped zucchini might show faint yellow or white lines when held at an angle. White seeds often have a faint, almost invisible network of lines or a marbled pattern when viewed closely under good light.
Black seeds are usually uniform, but some varieties have a faint gray or silver sheen that becomes visible when tilted. If you're still unsure, place a few seeds in a small bowl of water. Green seeds will sink quickly, while white and black seeds may float briefly due to their slightly lower density. This trick works best with fresh seeds—older ones may not float as predictably.
🪴 Step 4: Compare with Seed Packet or Catalog Images
If you're working with seeds from a packet, compare them directly to the image on the label. Most seed companies provide close-up photos showing the seed's shape, color, and texture. Lay the packet next to your seeds under natural light to spot any differences. Pay attention to details like the seed's edge, any visible veins, or the overall glossiness.
I always keep a small notebook nearby to jot down any discrepancies. For example, if your seeds look darker or larger than the packet image, note it—this could indicate a different variety or an older batch. If you're sourcing seeds from an unknown supplier, cross-reference with trusted seed catalogs or gardening forums. Real talk: some seeds don't match their labels, so double-checking saves headaches later.
⏰ Step 5: Test Germination for Confirmation
For a definitive answer, plant a few seeds in a small pot with 1 inch of moist potting mix. Place the pot in a warm, sunny spot and keep the soil damp but not soggy. Most squash seeds germinate within 7-14 days, depending on the variety. Green seeds from summer squash usually sprout first, often within 5-7 days, while white and black seeds may take a bit longer.
Watch for the first true leaves—green seeds often produce broad, rounded leaves first, while white and black seed varieties might show more lobed or serrated edges. If you're still unsure, take a photo of the seedling and compare it to images online. This step is the most reliable way to confirm your seed type, especially if you're planning to save seeds for next year.
Tips & tricks for perfect squash seed identification
These simple tricks will help you confidently distinguish between green, white, and black squash seeds—no gardening degree required.
Lighting is Everything: Natural daylight is your best friend when examining seeds. Place them on a white piece of paper or a light-colored surface near a window. The contrast makes subtle color differences—like faint gray undertones in black seeds—much easier to spot. I've ruined a perfectly good seed sorting session by working under dim indoor lighting, so don't make my mistake!
Texture Test: The surface texture gives major clues. Green seeds should feel slightly rough like fine sandpaper, while white seeds have that distinctive chalky, powdery feel. Black seeds are usually the smoothest—almost like polished river stones. Run your fingernail across each seed type to train your fingers for future identifications. This tactile check is especially helpful when dealing with mixed seed batches.
Seed Float Test: If you're still unsure, try the water test from Step 3—but with a twist. Use room-temperature water (not cold) and observe for exactly 30 seconds. Green seeds sink immediately, while white and black seeds might float briefly. Pro tip: Use a clear glass so you can see the seeds clearly without disturbing them. This method works best with fresh seeds, so don't rely on it for seeds older than a year.
Document Your Findings: Keep a small notebook or use your phone to photograph each seed type alongside its packet image. I've discovered that my "white" seeds were actually a rare cream-colored variety by comparing them to catalog photos. Label your images with dates and growing conditions—this creates a reference library for future seasons. Trust me on this: you'll thank yourself next planting season when you can instantly recognize your saved seeds.
Pro Tips for Squash Seed Identification
- These simple tricks will help you confidently distinguish between green, white, and black squash seeds—no gardening degree required.
- Lighting is Everything: Natural daylight is your best friend when examining seeds.
- Texture Test: The surface texture gives major clues.
Frequently asked questions
Got questions about squash seed identification? You’re not alone! Here are some of the most common queries—and their answers—to help you navigate the world of squash seeds with confidence.
How do I tell if a squash seed is viable before planting?
Fresh squash seeds should feel firm and heavy, with a smooth, unbroken outer shell. If they’re light, shriveled, or cracked, they’re likely non-viable. For extra peace of mind, soak them in warm water for 10 minutes—viable seeds will sink to the bottom.
When is the best time to harvest squash seeds from the fruit?
Harvest seeds from mature squash (when the fruit is fully ripe and the skin can’t be pierced with a fingernail). Scoop out the pulp and seeds, then ferment them in water for 3–5 days to remove the bitter coating. Rinse, dry, and store in a cool, dark place for up to 5 years!
Can I save seeds from store-bought squash, or do I need heirloom varieties?
Store-bought squash seeds (especially hybrid varieties) may not grow true to type, leading to inconsistent plants. For reliable results, opt for heirloom or open-pollinated squash. If you’re experimenting, label seeds clearly and test a few—you might discover a pleasant surprise!
How do I prevent cross-pollination between different squash varieties?
Squash plants can cross-pollinate easily, so isolate varieties by at least 100 feet or use row covers during flowering. For small gardens, plant only one type per season or choose self-pollinating varieties like Cucurbita pepo (e.g., zucchini). Save seeds only from hand-pollinated flowers for purity.
What should I do if my squash seeds sprout mold or rot?
Mold or rot usually signals excess moisture or poor storage. Discard affected seeds immediately. To prevent future issues, store seeds in a sealed container with a silica gel packet or rice (to absorb humidity) in a cool, dry place. Always dry seeds thoroughly before storing!
Wrapping up and next steps
Mastering squash seed identification is your first step toward growing vibrant, healthy plants—whether you're a seasoned gardener or just starting out! 🌱 By now, you’ve learned to distinguish between green, white, and black seeds, spotted key differences like size, shape, and texture, and even uncovered fun facts about their origins.
Your newfound knowledge isn’t just practical; it’s empowering!
Ready to put it into action? Grab those seeds, prep your garden, and plant with confidence! Whether you’re saving seeds for next year or simply admiring nature’s tiny wonders, you’re now equipped to make the most of your squash-growing journey. Happy gardening! 🌿