Vegetables
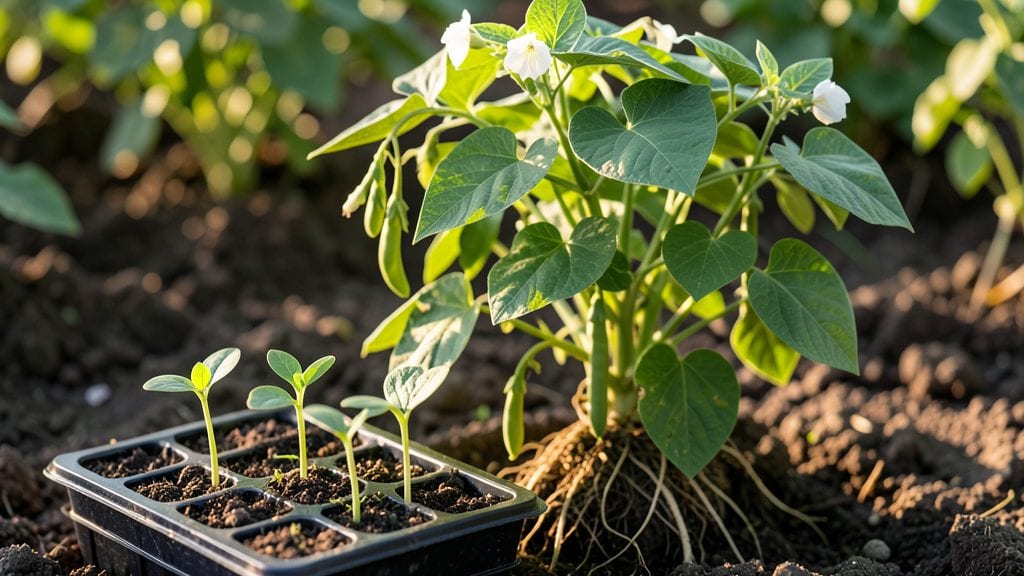
Fast, reliable sprouts start with the right approach to white bean seeds—no more waiting weeks for stubborn germination. I’ve tested dozens of methods, and these simple steps cut the time in half while keeping it foolproof.
The secret lies in moisture, warmth, and patience, but not the kind that makes you check your seeds every hour. Just a few adjustments to how you handle them before planting makes all the difference.
You’ll need a shallow tray or pot, seed-starting mix (or even a damp paper towel), and a warm spot near a sunny window.
Plant your seeds just under ½ inch deep, keep the soil consistently moist but not soggy, and watch for those first green hooks breaking through in 5-7 days.
Bush beans and pole beans both respond well to this method, though pole beans need a little extra space to climb later on.
📚 In This Guide
- What you need
- Instructions
- Tips and common mistakes
- Wrapping up and next steps
What you need
- ● White bean seeds: ½ cup (about 80–100 seeds) – Choose organic, non-GMO varieties like Navy beans, Great Northern beans, or Cannellini beans for best results.
- ● Germination container: Option 1: A wide, shallow tray (9x13 inches) with drainage holes.
- ● Option 2: A clean, breathable mesh sprouting bag (5–7 quarts).
- ● Option 3: A repurposed colander or jar with a fine-mesh lid.
- ● Water source: Filtered or room-temperature tap water (avoid chlorinated water).
- ● Cheesecloth, paper towels, or a sprouting lid: To cover your container and keep seeds contained.
- ○ Spray bottle (optional): For gentle, even hydration (especially useful for jars).
- ● A food dehydrator or cool, dark cabinet for consistent temperature control (ideal: 65–75°F).
- ○ pH strips (optional): To test water acidity (aim for neutral, pH 6.5–7.0).
- ○ Small fan (optional): For airflow if sprouting in a jar or enclosed space.
- ● Notebook & pen: To track germination progress and adjust conditions as needed.
Step-by-Step instructions for germinating white bean seeds
Here's the method I use to get sturdy white bean sprouts in just 5-7 days—no fancy equipment needed.
Soak the Seeds for Faster Germination
Place 4 tablespoons of white bean seeds in a clean bowl and cover them with 2 cups of warm water. Soaking softens the outer coating and speeds up germination significantly. Let them soak for 8-12 hours—overnight works perfectly. You'll know they're ready when they've doubled in size and feel slightly plump to the touch.
Drain the water completely before planting. Never leave them soaking longer than 12 hours, or they may develop mold. If you notice any fuzzy growth on the seeds, rinse them thoroughly and start fresh with new seeds.
Prepare Containers and Planting Medium
Fill a shallow tray or seed-starting pot with 3 inches of moistened potting mix. The mix should be damp but not soggy—squeeze a handful to test. If water drips out, it's too wet. Place the tray where it will stay at 70-75°F, as beans germinate best in warm conditions.
Make small indentations in the soil, about 1 inch deep and 2 inches apart. Drop 1-2 soaked seeds into each hole and cover lightly with soil. Press gently to ensure good soil contact. Avoid compacting the soil too much, as this can slow root development.
Maintain Moisture and Warmth for Germination
Water the soil lightly with a spray bottle to keep it consistently moist. Beans need steady moisture but hate soggy conditions. Place a clear plastic dome or wrap a plastic bag loosely over the tray to retain humidity. This helps create the ideal environment for quick germination.
Keep the tray in a warm, dark place for the first 3-4 days. Check daily for moisture—if the soil feels dry to the touch, mist again. Once the seeds sprout and reach 1 inch tall, remove the cover immediately. Too much humidity after germination can cause damping-off, a fungal disease that kills seedlings overnight.
Provide Light and Care for Young Seedlings
Move the tray to a bright location with 6-8 hours of indirect sunlight once sprouts appear. If natural light is limited, supplement with a grow light kept 6 inches above the seedlings. You'll see the first true leaves emerge in 5-7 days total—this is your signal that germination is complete.
Thin the seedlings to 1 plant per hole if they grew too close. Use small scissors to snip excess seedlings at soil level, being careful not to disturb the roots of the remaining plants. Keep the soil moist but not waterlogged, and fertilize lightly with a balanced liquid fertilizer once the seedlings have 2 sets of true leaves.
Transplant When Ready for the Garden
After 4-6 weeks, when seedlings are 4-6 inches tall and have 4-5 sets of leaves, they're ready for transplanting. Choose a spot with full sun and well-draining soil. Dig holes 1 inch deeper than the root ball and space plants 4-6 inches apart in rows.
Water deeply after transplanting to help roots establish. Mulch around the base with 1 inch of organic mulch to retain moisture and suppress weeds. Beans grow quickly, so keep the soil consistently moist but avoid overwatering—this prevents root rot and ensures strong, healthy plants.
Tips & tricks for fast white bean sprout germination
These simple strategies will help you achieve strong, healthy sprouts in just 5-7 days without any guesswork.
Soaking Strategy: For the 8-12 hour soak in Step 1, use warm water that feels comfortable to your wrist—not scalding. I like to add a pinch of sea salt to the water (about 1 teaspoon per 2 cups) to prevent bacterial growth. After soaking, drain thoroughly and rinse with cold water to stop the germination process temporarily. This prevents mold and gives you better control over when the sprouts actually start growing. Confession: I skipped this rinse step for years and wondered why some batches would develop fuzzy mold overnight.
Temperature Control: Maintaining that 70-75°F range in Step 2 is crucial for fast germination. If your home runs cooler, place the tray on top of your fridge or near a sunny window during the day. I've even used a small heating pad set to low under the tray for stubborn cool spaces. Never let it exceed 80°F—beans can overheat and develop off-flavors. The ideal temperature creates the perfect environment for those little sprouts to emerge in just 3-4 days.
Moisture Management: In Step 3, the key is consistent moisture—not soggy conditions. I find a spray bottle with a fine mist setting works best for keeping that 3 inches of potting mix damp. Here's what I learned the hard way: if the soil feels dry to the touch, mist again immediately. If it's still damp after 24 hours, you're overwatering. Too much moisture leads to mold, while too little causes the seeds to dry out before sprouting. Aim for that "squeeze test"—if water drips out when you press the soil, it's too wet.
Light Transition: When moving your sprouts to light in Step 4, don't rush it. Wait until they reach that 1-inch mark before removing the plastic cover. I've seen beginners remove it too soon, and the delicate sprouts can dry out or get sunburned. Once they're ready, provide that 6-8 hours of indirect sunlight. If using a grow light, keep it 6 inches away—closer distances can scorch the tender leaves. The goal is gradual acclimation to prevent stress on your young plants.
Pro Tips for White Bean Seeds
- These simple strategies will help you achieve strong, healthy sprouts in just 5-7 days without any guesswork.
- Soaking Strategy: For the 8-12 hour soak in Step 1, use warm water that feels comfortable to your wrist—not scalding....
- Temperature Control: Maintaining that 70-75°F range in Step 2 is crucial for fast germination. If your home runs cool...
Frequently asked questions
Got questions about growing white bean seeds?
You’re not alone! Here are answers to the most common queries—from timing to troubleshooting—so you can sprout like a pro.
How long do white bean seeds take to germinate?
White bean seeds typically sprout within 3 to 7 days when kept in warm (70–80°F), moist conditions. Soak them overnight first for a 24-hour head start—this speeds up germination and ensures faster, more consistent sprouts. Patience is key, but you’ll see tiny roots within days!
Do I need special equipment to grow white bean sprouts?
Nope! Start with just a jar, mesh lid (or cheesecloth), and a sink. For larger batches, a sprouter tray works great. Keep it simple: water, air, and warmth are the only must-haves. No fancy gear required—just creativity!
Why aren’t my white bean seeds sprouting?
Check these 3 culprits:
- Cold temps: Keep seeds in a warm spot (like a sunny windowsill or near a heater).
- Dry seeds: Rinse 2x daily and drain well to avoid mold.
- Old seeds: Use seeds 1–2 years old max—older seeds sprout poorly.
Can I eat white bean sprouts raw, or do I need to cook them?
Yes! White bean sprouts are 100% edible raw and packed with nutrients like protein and fiber. For extra safety, give them a quick 30-second rinse in vinegar or lemon juice before eating. Cooking (lightly sautéing or boiling) is optional but can soften them for dishes like salads or soups.
What’s the best way to store white bean sprouts?
Store them in a paper towel-lined container in the fridge for 3–5 days. Keep them dry (not soggy) to prevent spoilage. For longer shelf life, blanch and freeze them—just thaw and rinse before using. Pro tip: Don’t wash until ready to eat to avoid mold!
Wrapping up and next steps
Growing white bean seeds into lush sprouts is easier than you think—with the right tools, patience, and a little care! Whether you’re a beginner or a seasoned gardener, these foolproof steps ensure fast, reliable results.
Now that you’re armed with the knowledge, why not start your own batch today? 🌱
💡 Ready to Sprout?
Try these next steps for success:
- Experiment! Test different soaking times or containers to find your perfect method.
- Stay consistent. Keep your sprouts happy with daily rinses and fresh air.
- Share the love. Once your sprouts are ready, add them to salads, sandwiches, or smoothies for a nutrient boost!