Lawn
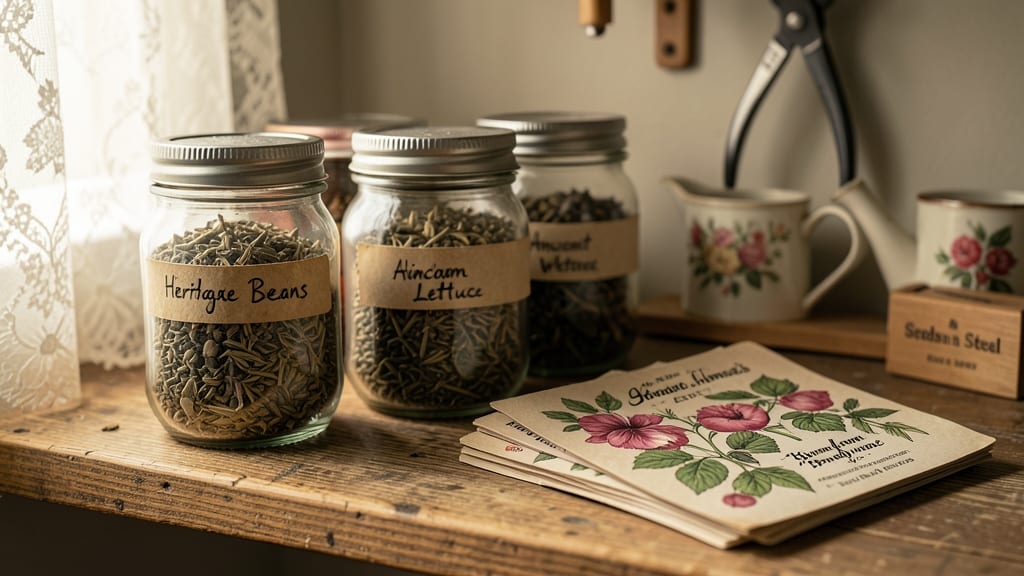
Preserving seeds in the garden seed banks means never paying for them again—and keeping heirloom varieties alive for generations. 🌱 I learned the hard way that store-bought seeds can’t match the flavor or resilience of what I grew myself, so I started... collecting seeds from my best tomatoes, beans, and flowers.
The process is simpler than it sounds, and the payoff is a garden that evolves exactly how you want it.
You’ll need just a few supplies: clean paper envelopes, a dry place to store them, and a notebook to track what you’ve saved. The key is drying seeds completely before storing them in cool, dark spots—your pantry works perfectly.
Most seeds stay viable for years, letting you replant favorites without ever buying new ones. It’s like having a time capsule of your garden’s best moments.
Once you’ve collected and stored your seeds, you’ll be ready to test their viability with a simple water float test. Healthy seeds sink, while hollow ones stay afloat—no fancy equipment needed. This way, you’ll know exactly which seeds to plant for the most reliable results next spring.
The best part? You’re not just saving seeds; you’re preserving a piece of your garden’s story.
This method works for almost any vegetable or flower, though some hybrids won’t produce true-to-type seeds. Legal considerations vary by state, so check local regulations before sharing saved seeds.
With a little practice, you’ll have a seed bank that supports biodiversity, cuts costs, and keeps your garden thriving year after year.
📚 In This Guide
- What you need
- Instructions
- Tips and common mistakes
- Wrapping up and next steps
What you need
- ● Air-tight containers: Glass jars (mason jars work great!), plastic bags with zip locks, or vacuum-sealed bags. Quantity: 1–2 per seed type (or more if storing large batches).
- ○ Silica gel packets: 1–2 packets per container to absorb moisture and prevent mold. Optional: Use uncooked rice or cat litter as a budget-friendly alternative.
- ● Paper envelopes or seed packets: Acid-free, breathable material to store seeds before sealing. Quantity: Enough for each seed variety.
- ● Permanent markers or labels: Waterproof, to mark seed types, varieties, and harvest dates.
- ● Desiccant: A moisture absorber like calcium chloride (available at hardware stores) for long-term storage.
- ● Scissors or pruning shears: For harvesting seed pods cleanly.
- ● Fine-mesh sieve or colander: To separate seeds from chaff or debris.
- ○ Oven or dehydrator: To dry seeds thoroughly (optional but recommended for faster drying).
- ● Small fan or paper towels: For air-drying seeds naturally.
- ● Freezer or cool, dark storage space: Ideal for long-term seed preservation (below 40°F/4°C).
- ● Mature, healthy plants: Harvest seeds only from disease-free, well-developed plants for the best viability.
- ● Knowledge of seed-saving basics: Research which plants are easy to save (e.g., tomatoes, beans, herbs) vs. those requiring special techniques (e.g., squash, peppers).
- ● Patience: Proper seed drying takes at least 1–2 weeks—rushing can ruin your stash!
Step-by-step instructions for creating your own garden seed bank
Here's how to save seeds from your garden and store them properly for next year's planting.
🌱 Step 1: Select and Harvest Mature Seeds
Choose healthy plants that have fully matured—look for seeds that are dry, hard, and have lost their vibrant color. For example, tomato seeds should come from ripe, fully colored fruit, while beans should be completely dry and crisp in their pods. Harvest seeds on a dry day to prevent moisture buildup, which can lead to mold.
Gently remove seeds from their pods or fruits. For tomatoes, slice open the fruit and scoop out the gel and seeds, then rinse them in water to remove the sticky coating. For beans, simply open the pods and let the seeds dry naturally. Place seeds on a clean, dry paper towel in a single layer to avoid clumping.
💧 Step 2: Dry and Clean the Seeds
Spread the seeds out in a warm, dry place with good airflow—like a sunny windowsill or a well-ventilated room. They need to dry completely, which can take anywhere from 3-14 days, depending on the seed type. You’ll know they’re ready when they’re brittle and break easily between your fingers.
Once dry, remove any debris, chaff, or unwanted plant material by gently sifting the seeds through a fine mesh screen or picking through them by hand. Store only the cleanest, most uniform seeds to ensure the best germination rates next season.
⏰ Step 3: Store Seeds in Airtight Containers
Use small, airtight containers like glass jars, plastic bags with zip locks, or seed envelopes to keep seeds protected from moisture and pests. Label each container with the seed type, variety, and the year harvested—this prevents mix-ups and helps track seed viability over time.
Place the sealed containers in a cool, dark, and dry location, such as a refrigerator or a basement. Ideal storage temperatures are between 35-45°F to slow down seed aging. Avoid storing seeds in the freezer unless you’re preserving them long-term for decades.
🌿 Step 4: Test Seed Viability Annually
Every year, test a few seeds from each variety to check if they’re still viable. Place 10-20 seeds between damp paper towels in a sealed plastic bag, then keep them in a warm spot (70-75°F) for 7-14 days. If most seeds sprout, they’re still good to plant. If fewer than half sprout, consider saving fresh seeds or sourcing new ones.
If seeds fail the viability test, don’t toss them out—some seeds, like beans or peas, can still be used for compost or mulch. This ensures nothing goes to waste and your garden remains sustainable.
Tips & tricks for perfect garden seed banks
Here's what nobody tells you about creating a seed bank that'll keep your favorite varieties thriving for years to come.
Seed Selection Wisdom: Pay close attention to the plant's natural indicators of maturity—like fully colored tomato fruit or crisp bean pods. I learned this the hard way after trying to save seeds from underripe tomatoes, which resulted in weak, non-viable seeds. For tomatoes specifically, let them stay on the vine until they're completely soft and starting to wrinkle—this ensures maximum seed development.
Drying Strategy: The 3-14 day drying period can feel like forever, but patience pays off! Place your seeds in a warm, dry spot with good airflow—like a sunny windowsill—but avoid direct sunlight that can overheat them. I use a small fan on low setting to create gentle airflow, which helps speed up the process while preventing mold. Remember, seeds are ready when they're brittle enough to crush between your fingers.
Storage Temperature: Keeping your seeds between 35-45°F is crucial for long-term viability. I store mine in the back of my refrigerator where it stays consistently cool and dark. If you don't have refrigerator space, a basement or root cellar works perfectly. The key is maintaining that stable cool temperature—fluctuations can significantly reduce seed lifespan.
Viability Testing: That annual germination test with 10-20 seeds is your best quality control! I've found that some seed varieties (like beans) often still sprout even after several years, while others (like lettuce) may only last 1-2 years. When testing, use the warmest spot in your home (around 70-75°F) for consistent results. This simple test can save you from planting non-viable seeds next season.
Pro Tips for Garden Seed Banks
- Here's what nobody tells you about creating a seed bank that'll keep your favorite varieties thriving for years to come.
- Seed Selection Wisdom: Pay close attention to the plant's natural indicators of maturity—like fully colored tomato fruit or crisp bean pods.
- Drying Strategy: The 3-14 day drying period can feel like forever, but patience pays off!
Frequently asked questions
Got questions about garden seed banks? You’re not alone!
Here are answers to the most common concerns—from timing to troubleshooting—to help you preserve your harvest like a pro.
What’s the best time to harvest seeds for a seed bank?
Harvest seeds when they’re fully mature but before they fall naturally. For most veggies (like tomatoes or beans), wait until the pods dry slightly on the plant. Herbs and flowers (e.g., basil or marigolds) should be harvested when the seed heads turn brown. Pro tip: Morning harvests yield the driest seeds!
How long can I store seeds in a seed bank?
With proper storage (cool, dry, dark, and sealed), most seeds last 1–5 years. Vegetables like beans and peas often keep 3–5 years, while lettuce or onions may only last 1–2 years. Label everything! Date your seed packets to track viability.
Are homemade seed banks cheaper than buying new seeds?
Saving seeds from heirloom varieties can save 80–90% per year compared to buying fresh packets. Plus, you avoid GMOs and support biodiversity. Downside: Hybrid seeds (like many store-bought tomatoes) won’t grow true to type—stick to open-pollinated varieties for best results.
What do I do if my stored seeds get moldy or damp?
Discard any seeds with mold or musty smells—they’re unsafe. To prevent this, store seeds in airtight containers with silica gel packets or rice (for natural moisture absorption). If humidity’s an issue, try a dehumidifier or switch to vacuum-sealed bags.
Can I save seeds from store-bought vegetables?
Maybe! If the label says “heirloom” or “open-pollinated”, you’re golden. But most hybrid seeds (common in grocery-store produce) won’t reproduce reliably. Skip: F1 hybrids (e.g., many cherry tomatoes). Try instead: Seed packets labeled “save your seeds” or organic heirlooms.
Wrapping up and next steps
Garden seed banks are a simple yet powerful way to preserve your hard-earned harvest and ensure a fresh start for next season. By saving seeds, you not only save money but also contribute to biodiversity and self-sufficiency.
Whether you're a seasoned gardener or just starting out, every seed saved is a step toward a greener, more sustainable future!
Ready to take the next step? Start small—pick one or two of your favorite plants to save seeds from this year. Before you know it, you’ll be well on your way to a thriving garden seed bank that keeps giving back!