Lawn
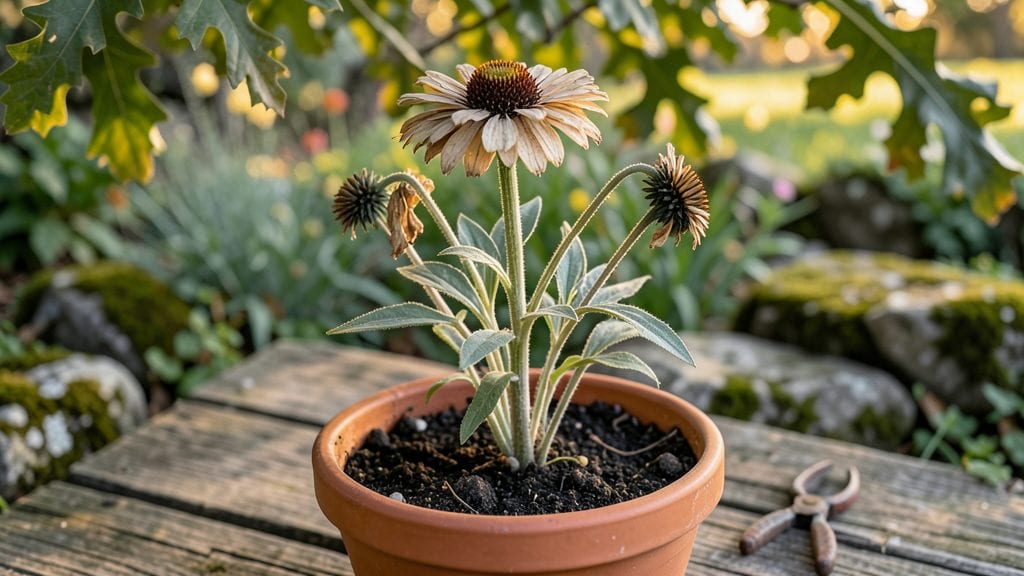
Your zinnia seed heads are the unsung heroes of late-summer gardens—packed with crafting potential and next year’s seeds. ✨ I’ve turned mine into dried bouquets, birdseed treats, and even homemade potpourri, all while keeping my garden looking tidy.
The key is knowing exactly when to harvest, how to dry them properly, and which ones to save for planting.
You’ll need just a few simple tools: sharp scissors, paper bags for drying, and a dark, dry storage spot. Harvest seed heads when they turn brown and papery, usually 6–8 weeks after blooming.
Leave some on the stems for birds, but save the rest for crafting or replanting—every seed head has 100+ tiny treasures inside.
Once dried, you’ll have vibrant, long-lasting flowers for arrangements that stay fresh for months. The dried seed heads also make stunning winter decor or can be crushed into natural birdseed blends. Best of all, saving your own seeds means free, heirloom-quality zinnias next spring.
This works for all zinnia varieties, from tiny 'Thumbelina' to towering 'Benary’s Giant.' Whether you’re a crafter, a seed saver, or just love a tidy garden, these seed heads are your golden ticket. Let’s put them to work!
📚 In This Guide
- What you need
- Instructions
- Tips and common mistakes
- Wrapping up and next steps
What you need
- ● Fresh or dried zinnia seed heads: 10–20 heads (depending on project size; harvest when fully mature and dry).
- ● Scissors or pruning shears: Sharp, clean pair for trimming stems and seed heads.
- ● Cardstock or thick paper: 8.5" x 11" sheets (for templates or backing; 65–80 lb weight recommended).
- ● Glue (white or craft glue): PVA or Mod Podge (for secure adhesion; non-toxic preferred).
- ○ Hot glue gun & glue sticks: (Optional but helpful for heavy or 3D projects).
- ● Wire or floral wire: 20–24 gauge (for structural supports in wreaths or sculptures).
- ○ Embellishments (optional): Ribbon (satin or grosgrain, ½"–1" wide).
- ● Beads, buttons, or small charms.
- ● Acrylic paint & brushes (for coloring seed heads).
- ● Foam core or wire frame: For 3D wreaths or wall hangings.
- ● Spray sealant (matte or glossy): To preserve crafts (e.g., Mod Podge spray).
- ● Drying rack or paper towels: For air-drying seed heads if not fully mature.
- ● Child-safe materials: If crafting with kids (e.g., washable glue, larger seed heads).
How to harvest and preserve zinnia seed heads for crafting
Turn your garden's natural beauty into lasting decor with these simple steps.
🌱 Step 1: Select and Harvest Mature Seed Heads
Wait until zinnias produce brown, papery seed heads—this happens naturally after the flowers fade. The best time to harvest is on a dry, sunny morning when dew has evaporated but humidity is still low. This prevents mold from forming on the delicate seed pods.
Use clean, sharp scissors or pruners to cut the stems 2-3 inches below the seed head. Avoid pulling or twisting, which can damage the stems and leave plants vulnerable to disease. I like to harvest in small batches—4-6 seed heads at a time—so I can process them fresh without delay.
💧 Step 2: Dry the Seed Heads Properly
Remove any remaining petals or debris from the seed heads, but leave the stems attached. Arrange them in a single layer on a clean, breathable surface like a mesh screen or paper towels. Place them in a warm, dry, well-ventilated area away from direct sunlight—too much heat can cause the seed heads to dry too quickly and crack.
Check daily for 2-3 weeks until the seed heads feel lightweight and brittle when gently squeezed. You’ll know they’re fully dry when the seed pods rattle slightly when shaken. If moisture lingers, the seed heads may develop mold, ruining your crafting materials.
☀️ Step 3: Store Seed Heads for Long-Term Use
Once completely dry, store the seed heads in paper bags or breathable fabric pouches to prevent moisture buildup. Keep them in a cool, dark place like a closet or pantry. Avoid plastic containers—they trap humidity and encourage mold growth. Label each bag with the date to track freshness.
Properly stored, zinnia seed heads can last up to a year while retaining their shape and color. If you notice any signs of dampness or musty smells, discard those seed heads immediately and dry a fresh batch.
✂️ Step 4: Prepare Seed Heads for Crafting
Before using the seed heads in projects, gently remove any remaining stems or debris. You can leave them whole or break them into smaller clusters for different effects. For wreaths or garlands, I like to tie 3-4 seed heads together with twine for a cohesive look.
If you’re making potpourri or sachets, crush the seed heads lightly with your hands to release their natural oils and fragrance. Avoid over-crushing, as this can turn them into dust. Store finished crafts in airtight containers to preserve their beauty and scent.
Tips & tricks for perfect zinnia seed head preservation
Here's how to turn your garden's seasonal bounty into year-round crafting treasures without the common pitfalls.
Harvesting Strategy: I learned this the hard way—harvesting too many seed heads at once can lead to uneven drying. Stick to the 4-6 seed heads at a time recommendation from Step 1, especially if your climate is humid. This ensures each seed head gets proper airflow and prevents mold from developing between batches. On particularly damp mornings, wait until late morning when dew has completely evaporated.
Drying Environment: The 2-3 week drying time mentioned in Step 2 can feel long, but it's crucial for preventing cracking. I've found that placing a small fan nearby creates gentle airflow without direct drafts that could cause seed heads to dry too quickly. Avoid basements or enclosed spaces—even slight humidity will extend drying time and risk mold. A kitchen cabinet with the door slightly open works perfectly.
Storage Wisdom: That up to a year storage claim in Step 3 is true, but only if you follow the paper bag method precisely. I add a silica gel packet to each bag for extra moisture control, especially in humid climates. For visual tracking, I use masking tape and a marker to label bags with both the date and the zinnia variety—this helps me remember which seed heads work best for specific projects.
Crafting Prep: When preparing seed heads for wreaths or garlands in Step 4, I tie them with hemp twine instead of regular twine—it's stronger and adds a natural, rustic look. For potpourri, I crush the seed heads between two sheets of parchment paper to avoid making a mess. This also helps control the crushing process so you don't accidentally turn them into dust.
Pro Tips for Zinnia Seed Heads
- Here's how to turn your garden's seasonal bounty into year-round crafting treasures without the common pitfalls.
- Harvesting Strategy: I learned this the hard way—harvesting too many seed heads at once can lead to uneven drying.
- Drying Environment: The 2-3 week drying time mentioned in Step 2 can feel long, but it's crucial for preventing cracking.
Frequently asked questions
Got questions about harvesting and crafting with zinnia seed heads?
You’re not alone! Here are some of the most common queries—and their easy answers—to help you make the most of your garden’s natural treasures.
When is the best time to harvest zinnia seed heads?
Harvest seed heads once the petals have fully fallen or turned brown, usually late summer to early fall. Wait until the seed pods are dry and papery to the touch—this ensures easy removal and better seed viability. If left too long, they may scatter seeds on their own!
Can I save zinnia seeds for next year’s garden?
Once harvested, let the seed heads dry completely (1–2 weeks in a dry, dark place), then gently rub or shake out the seeds. Store them in a paper envelope in a cool, dry spot for up to 2 years. Pro tip: Label them to track varieties!
What are some creative ways to use zinnia seed heads beyond crafts?
Zinnia seed heads shine in wreaths, potpourri, or even dried floral arrangements. For a rustic touch, glue them to wood slices or twine for ornaments. Bonus: Their papery texture adds texture to holiday centerpieces or pressed art projects!
Why are my zinnia seed heads attracting pests?
Seed heads can draw spiders, aphids, or even birds seeking shelter or seeds. To deter pests, harvest early or shake out seeds before storing. If birds are a problem, cover seed heads with fine mesh until ready for crafting.
Do I need to clean zinnia seed heads before crafting?
Not always! For most projects (like wreaths or garlands), a quick brush-off of debris is enough. For pressed flowers or detailed crafts, gently wipe with a damp cloth and let dry. Avoid soaking—it can cause mold or weaken the structure.
Wrapping up and next steps
Zinnia seed heads are a versatile, free, and eco-friendly crafting treasure waiting to be discovered in your garden! Whether you’re creating winter wreaths, pressed art, or rustic decor, these little powerhouses turn seasonal cleanup into creative magic. 🌸✨
Ready to dive deeper? Start small—gather a handful of seed heads this weekend and experiment with a simple project. Before you know it, you’ll be transforming your garden’s "leftovers" into handmade masterpieces that bring joy year-round!