Picking
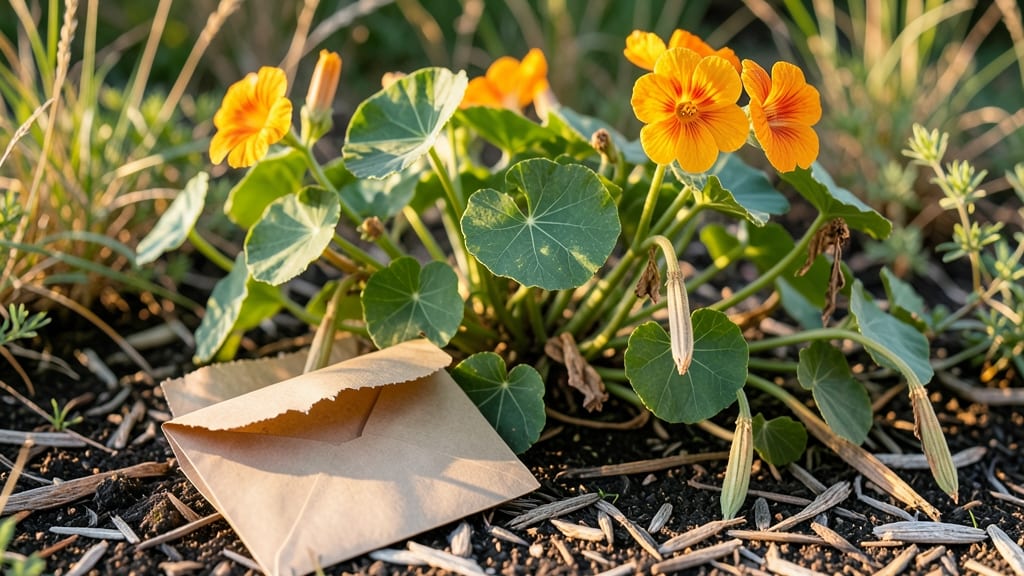
Harvesting nasturtium seeds from your garden is like capturing sunshine in a pod—once you know how, you’ll never buy them again. 🌻 These bright orange and yellow flowers don’t just add color; they produce seeds that store easily and sprout reliably for years.
The key is timing: those papery seed pods turn from green to brown between late summer and early fall, signaling it’s time to act.
You’ll need just a few simple tools: sharp scissors or fingers for harvesting, a tray or paper towels for drying, and an envelope or jar for storage. The process takes less than an hour, but skipping it means missing out on free, heirloom-quality seeds tailored to your climate.
I’ve saved seeds from my nasturtiums for three seasons now, and the plants always come back stronger.
Once dried, the seeds stay viable for up to five years if stored in a cool, dark place. Imagine next spring’s garden bursting with those same vibrant blooms—just from seeds you collected yourself.
The best part? You’ll have more plants than you know what to do with, ready to share or tuck into new garden spots.
Here’s the catch: harvest too early, and the seeds won’t mature properly. Too late, and they’ll scatter on their own. But get it right, and you’ll have a stash of seeds that’s cheaper than store-bought and packed with flavor and beauty. Let’s get those pods ready for next year’s garden!
📚 In This Guide
- What you need
- Instructions
- Tips and common mistakes
- Wrapping up and next steps
What you need
- ● Mature nasturtium plants: Choose healthy plants with fully developed seed pods (usually bright green or brownish when ripe). Aim for at least 3-5 plants to ensure a good seed yield.
- ● Sharp scissors or pruning shears: A pair with clean, sterilized blades to avoid damaging the pods or spreading disease. Small gardening shears work best.
- ● Paper bags or breathable seed-saving envelopes: Use brown kraft paper bags or unbleached paper envelopes (avoid plastic—it traps moisture!). Size: 8x10 inches or larger to hold multiple pods.
- ● Permanent marker: For labeling bags with the variety name and harvest date.
- ● Drying tray or screen: A wire mesh screen or clean baking sheet to lay pods out for drying. Avoid direct sunlight.
- ● Small bowl or container: For gently removing seeds from dried pods (e.g., a ceramic bowl or glass jar).
- ○ Fine-mesh sieve or strainer: Optional but helpful for separating seeds from chaff. A small kitchen strainer (1mm mesh) works well.
- ● Desiccant packets: Place a few in your storage container to absorb excess moisture and extend seed viability.
- ● Seed catalog or notebook: To track varieties, germination rates, and notes on next year’s planting.
- ● Glove or soft cloth: Protects hands from the mildly irritating nasturtium sap while handling pods.
- ● Humidity pack: A small silica gel packet for long-term storage (if storing in airtight containers).
Step-by-Step instructions for harvesting nasturtium seeds
Here’s how to save seeds from your nasturtiums—simple, satisfying, and ready for next spring.
🌱 Step 1: Identify and Select Healthy Seed Pods
Wait until the pods on your nasturtium plants turn from green to papery brown—this means they’re fully mature and ready for harvest. I like to pick them in the morning when the air is cool and dampness has evaporated, so the pods stay intact. Gently twist or pinch the pod between your fingers until it releases the seeds inside.
Skip any pods that look shriveled, moldy, or have holes—those won’t produce viable seeds. A good pod should feel dry and slightly crisp to the touch. If you’re unsure, open it carefully and check for plump, dark seeds inside. Store these separately from the healthy ones.
💧 Step 2: Dry the Seeds Completely
Spread the harvested pods and seeds on a clean, dry paper towel or a piece of breathable fabric in a warm, dry spot (like a sunny windowsill or a well-ventilated room). Avoid direct sunlight—it can overheat and damage the seeds. Let them dry for 7-10 days, stirring them gently every few days to ensure even drying.
You’ll know they’re fully dry when the seeds rattle inside the pod and feel light to the touch. If you press a seed between your fingers and it crumbles, it’s still too moist. Once dry, remove the seeds from the pods by rubbing them between your palms or tapping the pod lightly over a bowl.
⏰ Step 3: Store Seeds Properly for Long-Term Viability
Transfer the dried seeds into a small envelope or airtight container—I use a folded paper envelope labeled with the variety and harvest date. Store them in a cool, dark place, like the back of a pantry or a sealed container in the fridge. Nasturtium seeds stay viable for 3-5 years if kept dry and cool.
Don’t skip labeling! Even if you think you’ll remember, seeds can look identical from different varieties. Write the name and harvest year on the envelope—this saves headaches next planting season. Check the seeds once a year to ensure they’re still dry; if you notice any moisture, transfer them to a fresh container.
☀️ Step 4: Test a Few Seeds Before Next Year’s Planting
Before you plant all your saved seeds, do a quick viability test. Place 10 seeds between two damp paper towels in a sealed plastic bag. Keep them in a warm spot (around 70°F) and check daily. If half or more sprout within 7-10 days, your seeds are good to go. If fewer than half sprout, you might want to supplement with fresh seeds.
This test gives you confidence that your saved seeds will perform well. If they pass, you’re ready to plant them in well-draining soil and enjoy another season of vibrant nasturtiums. If they fail, don’t worry—just try again next year with fresh pods!
Tips & tricks for perfectly harvested nasturtium seeds
A few simple tricks will help you save the best-quality nasturtium seeds from your garden—and avoid common pitfalls that waste your effort.
Pod Selection Matters: In Step 1, when choosing pods, look for that perfect papery brown color and crisp texture. I've learned the hard way that green pods release seeds too early, and they won't store well. The morning harvest time is key—cool air helps prevent the pods from cracking open prematurely. If you're unsure about a pod's readiness, try the "twist test": a mature pod should release seeds with just a gentle twist, not requiring force.
Drying Strategy: For Step 2, I recommend spreading your pods on a breathable fabric rather than paper towels. Fabric allows better airflow and prevents condensation buildup, which can happen with paper towels. During the 7-10 day drying period, place a small fan nearby to gently circulate air—this speeds up drying without risking overheating. I check them daily by gently squeezing a pod; if it feels hollow and light, it's ready.
Labeling System: This is where most gardeners make mistakes in Step 3. Don't just write the variety name—include the harvest year and any notable characteristics (like flower color or disease resistance). I use small masking tape flags on my envelopes with both the variety and year, so I can sort them quickly next planting season. Trust me, you'll thank yourself when you're sorting through a collection of identical-looking seed packets.
Viability Test Insight: In Step 4, when testing your seeds at 70°F, pay attention to the timing. Some varieties may sprout faster or slower than others. If your seeds take longer than 10 days but still reach 50% germination, they're still good—just give them more time. I've had seeds that took up to 14 days to sprout but still produced healthy plants. The key is consistency in your testing conditions.
Pro Tips for Harvesting Nasturtium Seeds
- A few simple tricks will help you save the best-quality nasturtium seeds from your garden—and avoid common pitfalls that waste your effort.
- Pod Selection Matters: In Step 1, when choosing pods, look for that perfect papery brown color and crisp texture.
- Drying Strategy: For Step 2, I recommend spreading your pods on a breathable fabric rather than paper towels.
Frequently asked questions
Got questions about harvesting nasturtium seeds? You’re not alone!
Here are some of the most common concerns—and their simple solutions—to help you save seeds like a pro.
When is the best time to harvest nasturtium seeds?
Harvest seeds when the seed pods start turning brown and dry but before they split open (usually late summer to early fall). If left too long, the pods will crack, and seeds will scatter—bye-bye, future plants!
How long does it take for nasturtium seeds to dry indoors?
Seeds need 1–2 weeks to fully dry indoors in a cool, dry, well-ventilated spot (like a paper bag or mesh bag). Avoid heat or humidity—this speeds up mold risk. Patience pays off for viable seeds!
Can I harvest seeds from store-bought nasturtiums?
Yes, but check for heirloom/open-pollinated varieties first. Hybrid nasturtiums (like ‘Jewel Mix’) may not produce true-to-type seeds. If unsure, ask the nursery or opt for seeds from a trusted source.
Why are my nasturtium seed pods cracking open too soon?
Overripe pods or humid weather cause premature splitting. Harvest pods earlier (when slightly greenish-brown) and dry them indoors immediately. If already cracked, scoop out seeds quickly—they’ll still germinate!
How do I know if stored nasturtium seeds are still good?
Test viability by placing a few seeds on damp paper towels for 5–7 days. If they sprout, they’re fresh! Store seeds in a cool, dark place (like a sealed jar) for up to 3–5 years. No sprouts? Try again—sometimes seeds need a little coaxing!
Wrapping up and next steps
Harvesting nasturtium seeds is a rewarding way to save money, extend your garden’s beauty, and share nature’s bounty with others!
With just a little patience and the right timing, you can turn last year’s blooms into next year’s vibrant flowers. Now’s the perfect time to put your new skills to use—grab those dried seed pods, store them properly, and get ready to grow a stunning nasturtium patch in no time!
🌱 Next step: Start small—plant a few saved seeds this spring and watch your garden thrive with homegrown nasturtiums!