Pruning
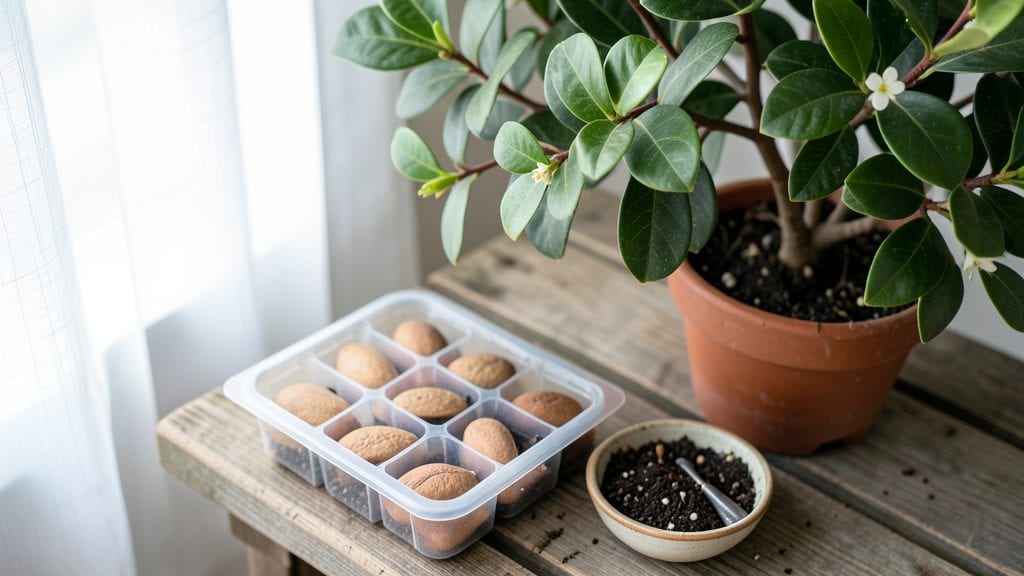
Growing a kumquat tree from seeds is one of those gardening surprises that rewards patience with something truly special. 🌱 I’ve learned that the key to bushy growth starts with understanding how these tiny seeds need a little extra encouragement to break dormancy—something most guides skip over.
The process isn’t complicated once you know the tricks: soaking seeds overnight, using a warm, well-draining mix, and keeping humidity high during those first critical weeks.
Most people give up too soon because germination can take 4-6 weeks, but with the right setup, you’ll see those first green shoots before you know it.
By the time you’re pinching back new growth, you’ll have a sturdy young tree with thick, glossy leaves—exactly what you want before transplanting. The best part? These trees thrive in containers, so even small spaces can grow their own citrus harvest in just a few years.
Fair warning: kumquats grow slower than citrus trees from grafts, but the payoff of watching every leaf and branch develop from seed makes it worth it. Here’s how to turn those seeds into a thriving little tree without losing your patience along the way.
📚 In This Guide
- What you need
- Instructions
- Tips and common mistakes
- Wrapping up and next steps
What you need
- ● Kumquat seeds (3–5 fresh, plump seeds per attempt—the more, the merrier!)
- ● Small pots or seed trays (3–4 inches deep, with drainage holes—plastic or biodegradable works!)
- ● Well-draining potting mix (50% peat moss or coconut coir + 50% perlite or sand—kumquats hate soggy roots!)
- ● Spray bottle (for gentle watering—no drowning seeds here!)
- ● Plastic wrap or humidity dome (to create a mini greenhouse effect)
- ● Grow lights or sunny windowsill (6+ hours of bright, indirect light daily)
- ○ Heat mat (optional but helpful) (70–80°F range to speed up germination)
- ● Fertilizer (balanced 10-10-10 or seaweed extract—wait until sprouts appear!)
- ● Humidity tray (pebbles + water to boost moisture without overwatering)
- ● Pruning shears (for future shaping—think tiny bonsai!)
- ● Label markers (to track seedling progress—avoid mix-ups!)
Step-by-Step instructions for germinating kumquat tree seeds
Here's my foolproof method to coax kumquat seeds into life—fast and with the best chance for sturdy, bushy growth.
🌱 Step 1: Extract and Clean the Seeds
Start by removing the seeds from a fresh, organic kumquat fruit. Cut the fruit in half and scoop out the seeds with a spoon—avoid crushing them. Rinse the seeds under cool water to remove any pulp, then let them air-dry on a paper towel for 24 hours. This prevents rot later.
I like to soak the seeds in lukewarm water for 12 hours before planting. This softens the outer coating and speeds up germination. Place them in a small bowl of water, then let them sit while you prepare the pots. The seeds are ready when they feel slightly softer to the touch.
💧 Step 2: Prepare Pots and Planting Mix
Use 4-inch diameter pots for each seed—kumquat roots need room to spread early. Fill each pot halfway with a mix of 50% potting soil and 50% perlite (this ensures drainage and prevents soggy soil). Moisten the mix lightly with water until it feels damp but not wet.
Press the soil down gently to create a firm base, then make a small hole—about ½ inch deep—with your finger. This depth keeps seeds from drying out while still allowing easy sprouting. I label each pot with the date to track germination progress.
🌿 Step 3: Plant and Provide Warmth
Place 1-2 seeds per pot into the hole, covering them with soil just enough to hide them. Pat the soil lightly to secure the seeds, then mist the surface with water until the top layer feels evenly damp. Don’t oversaturate—excess water drowns seeds.
Kumquat seeds need warmth to germinate, so place the pots in a warm, dark spot (like a seedling heat mat set to 75-80°F). Keep the soil consistently moist but never soggy. Germination can take 2-4 weeks, so patience is key—check daily for tiny green sprouts.
☀️ Step 4: Introduce Light and Monitor Growth
Once sprouts emerge, move the pots to a bright, indirect light spot (like a south-facing window). Avoid direct sun at first—young seedlings can scorch. If growth looks leggy (stretched and pale), the light isn’t strong enough. Adjust by moving the pot closer to the window.
Water when the top inch of soil feels dry, using a spray bottle to avoid disturbing the seedlings. After 4-6 weeks, when seedlings reach 2-3 inches tall, transplant them into larger pots (6 inches) with fresh potting mix. This step encourages stronger root development.
⏰ Step 5: Harden Off and Prepare for Outdoors
Before moving seedlings outside, harden them off over 1-2 weeks. Start by placing them in a shaded outdoor spot for 1 hour daily, gradually increasing time. Watch for wilting—if it happens, bring them back inside and extend the process.
Once hardened, kumquat seedlings can tolerate mild outdoor conditions (down to 40°F). Choose a sunny spot with well-draining soil, and plant them in spring or early fall for best results. With care, your bushy kumquat tree will thrive in just a few months!
Tips & tricks for germinating kumquat tree seeds
Confession: I struggled with kumquat seed germination for years before realizing these simple tricks make all the difference. Here's what nobody tells you about growing bushy, healthy kumquat trees from seeds.
Soaking Strategy: The 12-hour lukewarm water soak in Step 1 is your secret weapon. I've found that using distilled water instead of tap water prevents chlorine from inhibiting germination. After soaking, gently rub the seeds between your fingers to remove any remaining outer coating—this helps break dormancy and speeds up sprouting. The seeds should feel noticeably softer when ready to plant.
Heat Hack: Maintaining that 75-80°F warmth in Step 3 is absolutely critical. I use a seedling heat mat set to 78°F for consistent results, but you can also place pots on top of your refrigerator (not inside) for gentle warmth. If your home stays cooler than 70°F, consider using a small greenhouse or clear plastic wrap over the pots to trap heat. Remember, warmth accelerates germination but never sacrifice consistent moisture for heat.
Light Transition: When moving seedlings to light in Step 4, I recommend rotating pots 180 degrees daily during their first week of growth. This prevents them from leaning toward one light source and creates more balanced, bushier plants. Watch for that leggy growth—it's your signal to move the pot closer to the light or add a grow light if natural light isn't sufficient.
Transplant Timing: The 4-6 week transplant window in Step 4 is perfect for encouraging strong root development. Before transplanting to 6-inch pots, gently squeeze the current pot—if you feel resistance from roots, it's ready. I always add a handful of worm castings to the new soil mix for extra nutrients. This step is where many seedlings fail—don't rush it, even if your plants look small.
Pro Tips for Kumquat Tree Seeds
- Confession: I struggled with kumquat seed germination for years before realizing these simple tricks make all the difference.
- Soaking Strategy: The 12-hour lukewarm water soak in Step 1 is your secret weapon.
- Heat Hack: Maintaining that 75-80°F warmth in Step 3 is absolutely critical.
Frequently asked questions
Got questions about growing kumquat trees from seeds? You’re not alone! Here are answers to the most common queries to help you nurture your citrusy green thumb successfully.
How long does it take for kumquat seeds to germinate?
With the right warmth (70–80°F) and moisture, kumquat seeds typically sprout in 10–21 days. Patience is key—some may take up to a month, especially if stored seeds are used. Keep the soil consistently damp (not soggy) and place the pot in bright, indirect light to speed things up.
Can I grow a kumquat tree from a grocery store kumquat?
Store-bought kumquats often contain viable seeds. Just rinse and dry them thoroughly before planting to prevent mold. Pro tip: Soak seeds in warm water for 24 hours to soften the outer shell and improve germination rates.
Do kumquat seedlings need winter protection?
Young kumquat trees are tender and can’t handle frost. If you’re in a cold climate, grow them in pots and move them indoors (near a sunny window) when temps drop below 40°F. Alternatively, mulch heavily outdoors and cover with burlap if short-term chills are expected.
Why aren’t my kumquat seeds sprouting?
If your seeds refuse to germinate, check these common culprits:
- Old seeds: Kumquat seeds lose viability after 6–12 months. Test freshness by floating them in water—sinkers are more likely to sprout.
- Poor soil drainage: Overwatering suffocates seeds. Use a mix of 50% perlite and 50% potting soil.
- Lack of warmth: Place seeds on a seedling mat or near a heat source (like a refrigerator’s top).
How fast will my kumquat tree grow, and when can I expect fruit?
Seedlings grow slowly at first—expect 6–12 inches in their first year. With proper care (full sun, well-draining soil, and occasional fertilizer), your tree may produce tiny, tart kumquats in 3–5 years. Note: Fruit from seed-grown trees may not match parent varieties in size or flavor.
Wrapping up and next steps
Growing a kumquat tree from seed is a rewarding journey that blends patience with the joy of nurturing life!
With the right germination tricks—like proper soil moisture, warmth, and a little creativity with citrus seed hacks—you’ll soon be on your way to a bushy, thriving tree in just weeks. 🌱✨
Now that you’re armed with the know-how, it’s time to roll up your sleeves and get planting! Start small, stay consistent, and don’t forget to celebrate those first sprouts. Ready to grow your own citrus treasure? Grab those seeds and let the adventure begin!