
Propagation
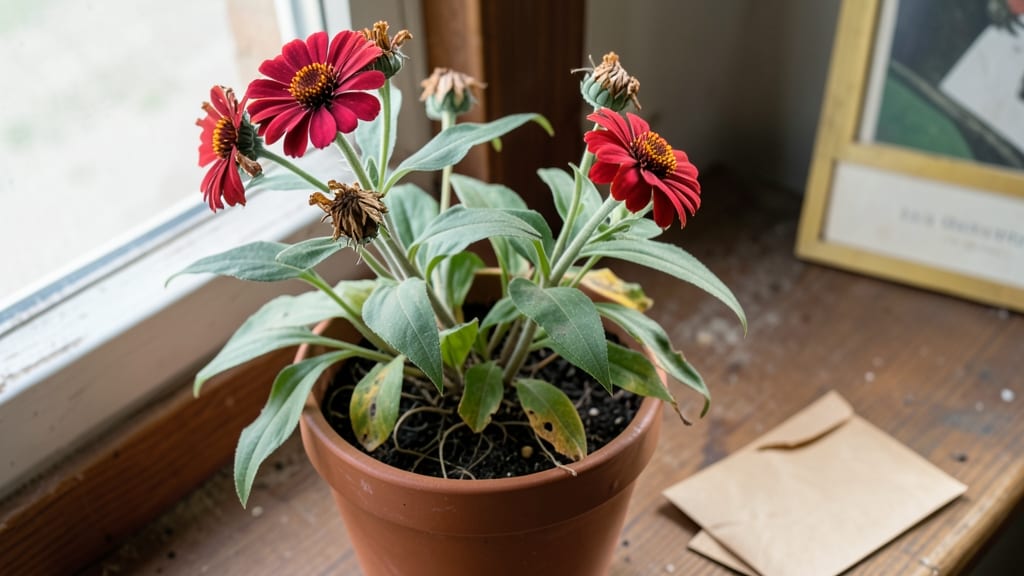
Storing zinnia seeds properly means next year’s garden will burst with the same bold, jewel-toned blooms you love. 🌻 I’ve saved seeds from my brightest zinnias for three seasons now, and the key is drying them just right before storing—no fancy equipment needed.
The difference between viable seeds and dust is all in the timing and conditions.
You’ll need only a few simple supplies: clean paper bags or envelopes, a dry spot away from direct sun, and a cool, dark place for long-term storage. The process takes about two weeks from harvest to storage, and the best part?
Your seeds stay fresh for up to three years if kept properly. That means fewer trips to the nursery and more of the zinnias you already know will thrive in your garden.
Once dried, your seeds will look like tiny, papery packets ready for next spring’s planting. The right storage keeps them from absorbing moisture or losing viability, so you’ll see strong germination rates when you’re ready to sow.
This method works for any zinnia variety—from dwarf types to towering giants—so you can preserve your favorites year after year.
For gardeners in humid climates, a small packet of silica gel in the storage container adds an extra layer of protection. And if you’re saving seeds from heirloom or special varieties, labeling each packet with the name and year makes replanting a breeze.
Now let’s get those seeds ready for next season’s showstopper blooms.
📚 In This Guide
- What you need
- Instructions
- Tips and common mistakes
- Wrapping up and next steps
What you need
- ● Mature zinnia seed heads: Harvest fully dried, brown seed pods (after frost or when petals fall naturally). Aim for at least 10-20 pods per variety for a good yield.
- ● Paper envelopes or seed packets: Use breathable, acid-free paper (e.g., kraft paper or seed-saving envelopes). Size: 4x6 inches or larger to accommodate seeds.
- ● Small paper bags or mesh bags: For larger seed heads (e.g., 1-2 gallon-sized bags to shake out debris before storage).
- ● Permanent marker: To label envelopes/bags with variety name, date, and location (e.g., "Benary’s Giant Zinnia – 2024 – Sunny Patio").
- ○ Dessicant packets (silica gel): 1-2 packets per storage container to absorb moisture (optional but highly recommended for humid climates).
- ● Air-tight containers: Choose glass jars with tight lids (e.g., mason jars) or plastic containers with rubber seals. Size: quart or pint jars for small batches.
- ● Fine-mesh sieve or colander: To separate seeds from chaff (e.g., 1/4-inch mesh for delicate zinnia seeds).
- ● Vacuum sealer: Extends seed viability by removing all air/moisture (great for long-term storage).
- ● Refrigerator or freezer: For extra-long storage (up to 5+ years) if seeds won’t be planted soon.
- ● Humidity indicator cards: To monitor moisture levels inside containers.
- ● Seed catalog or notebook: To track germination rates year over year.
Step-by-Step instructions for storing zinnia seeds
Here’s how to preserve your zinnia seeds so they stay fresh and ready for next season’s bold, cheerful blooms.
🌱 Step 1: Harvest Mature Seed Heads
Wait until the zinnia blooms fade and the seed heads turn brown and papery—this signals maturity. I like to harvest on a dry day when the air feels crisp, as moisture can encourage mold. Use clean scissors or fingers to snip the entire seed head from the stem, leaving about 1 inch of stem attached.
Place the harvested heads in a single layer on a clean, dry paper towel. Let them dry completely in a warm, dry spot away from direct sunlight. This usually takes 7-10 days. You’ll know they’re ready when the seed heads crumble easily at the touch and the seeds rattle inside.
🪴 Step 2: Extract and Clean the Seeds
Once the seed heads are fully dry, gently rub them between your fingers or use a clean, dry brush to release the seeds. I find a shallow tray or sheet of paper works best for catching the seeds as they fall. Avoid shaking the heads too hard—this can damage the delicate seeds.
Remove any debris like chaff or small stems by sifting the seeds through a fine mesh strainer or by hand. Store only the clean, plump seeds—discard any that look shriveled or discolored. This ensures you’re saving only the healthiest seeds for next year.
💧 Step 3: Dry the Seeds Further
Spread the cleaned seeds in a single layer on a clean, dry paper towel or in a thin tray. Place them in a warm, dry spot with good airflow, like a sunny windowsill or a ventilated cabinet. Let them dry for another 3-5 days to ensure all moisture is gone.
Check daily for any signs of dampness or mold. If you notice even a hint of moisture, spread them out again and let them dry longer. Properly dried seeds will feel light and crisp to the touch, almost like fine sandpaper.
⏰ Step 4: Store Seeds in Airtight Containers
Transfer the fully dried seeds into small, airtight containers like glass jars, plastic bags with zip locks, or even small envelopes. Label each container with the zinnia variety and the harvest date—this helps track seed age and viability. I like to include a tiny note about the color or height of the blooms for easy reference.
Store the containers in a cool, dark place like a pantry or refrigerator. Zinnia seeds can remain viable for 2-3 years under these conditions, though germination rates drop slightly after the first year. Keep them away from heat, light, or humidity to prevent spoilage.
☀️ Step 5: Test Viability Before Planting Next Year
Before you plant your stored seeds, do a quick viability test. Place 10 seeds between two damp paper towels in a sealed plastic bag. Keep them in a warm spot, like on top of the fridge, and check daily. You should see sprouts within 7-14 days.
If at least half the seeds sprout, they’re still good to plant. If fewer than half sprout, consider mixing them with fresh seeds or using them for a smaller batch. This simple test saves you from planting dozens of seeds only to find they won’t grow.
Tips & tricks for perfectly storing zinnia seeds
Saving zinnia seeds for next season is easier than you think—these simple tricks will ensure your seeds stay viable and ready to grow vibrant blooms.
Timing is Everything: The 7-10 day drying period in Step 1 is crucial for preventing mold and ensuring seed viability. If you're in a humid climate, consider using a small fan on low to circulate air around your drying seed heads. This can cut drying time by 2-3 days while keeping moisture at bay.
Gentle Extraction: When you're ready to extract seeds in Step 2, avoid using a blender or food processor—these can crush the delicate seeds. Instead, gently rub the dried seed heads between your fingers or use a soft brush. Think of it like brushing your hair: slow, controlled motions work best. The goal is to release the seeds without damaging them.
Storage Wisdom: For long-term storage beyond the recommended 2-3 years, consider adding a small packet of silica gel to your airtight container. This helps absorb any lingering moisture and can extend viability by another year or two. Just make sure the seeds aren't in direct contact with the silica gel—place it in a small mesh bag inside the container.
Labeling System: Don't just label with the variety—include the harvest year and any distinctive features like flower color or height. I like to use small masking tape labels on my jars so I can write directly on them. This system has saved me from planting mystery seeds that might not perform as expected. Trust me on this!
Pro Tips for Storing Zinnia Seeds
- Saving zinnia seeds for next season is easier than you think—these simple tricks will ensure your seeds stay viable and ready to grow vibrant blooms.
- Timing is Everything: The 7-10 day drying period in Step 1 is crucial for preventing mold and ensuring seed viability.
- Gentle Extraction: When you're ready to extract seeds in Step 2, avoid using a blender or food processor—these can crush the delicate seeds.
Frequently asked questions
Got questions about keeping your zinnia seeds fresh and ready for planting? Here are some of the most common concerns—and their answers—to help you master seed storage like a pro!
How long can I store zinnia seeds before they lose viability?
With proper storage, zinnia seeds typically remain viable for 2–3 years. After that, germination rates may drop, though some seeds can still sprout after 4+ years. Test a few seeds annually to check viability—plant a small batch and see how many bloom!
What’s the best time to harvest zinnia seeds for storage?
Harvest seeds when the flower heads turn brown and dry, usually 4–6 weeks after blooming. Wait until the petals fall off naturally and the seed pods split open slightly. Avoid harvesting in damp weather to prevent mold—aim for a sunny, dry day!
Do I need special paper envelopes, or will a ziplock bag work?
While seed-saving envelopes (like those from seed banks) are ideal, a paper bag or ziplock with a silica packet works too. Avoid plastic alone—it traps moisture and speeds up decay. Label everything with the date and variety!
Why did my stored zinnia seeds sprout mold? How do I prevent it?
Mold thrives in humidity, so store seeds in a cool (32–41°F), dry place (like a fridge) with a desiccant packet. If mold appears, discard the batch—it’s a sign of poor storage conditions. Always let seeds dry completely before storing!
Can I store zinnia seeds in the freezer for extra-long life?
Yes! Freezing seeds (0°F or below) can extend viability to 5+ years for zinnias. Place seeds in a sealed, airtight container with a moisture absorber, then freeze. Thaw seeds overnight before planting—no need to rush!
What if my seeds won’t germinate after storage?
Try these fixes: soak seeds overnight in warm water, test viability with a damp paper towel, or scarify them lightly with sandpaper. If all else fails, order fresh seeds—sometimes genetics just need a fresh start!
Wrapping up and next steps
Storing zinnia seeds is your ticket to next year’s stunning blooms—with the right care, you’ll enjoy vibrant flowers season after season! 🌸 By keeping them dry, cool, and protected from moisture, you’ll preserve their viability effortlessly.
Whether you’re a seasoned gardener or just starting, this simple process ensures you’re always ready to bring color back to your garden.
Now that you’re equipped with the know-how, grab those seeds and get storing! Ready for planting? Try experimenting with different varieties or even sharing seeds with fellow gardeners—your green thumb is about to shine even brighter. 🌱